32 - FORM NO. 56043088 / Advenger
™
/ BR 600S, 650S, 700S, 800S
SCRUB BRUSH SYSTEM
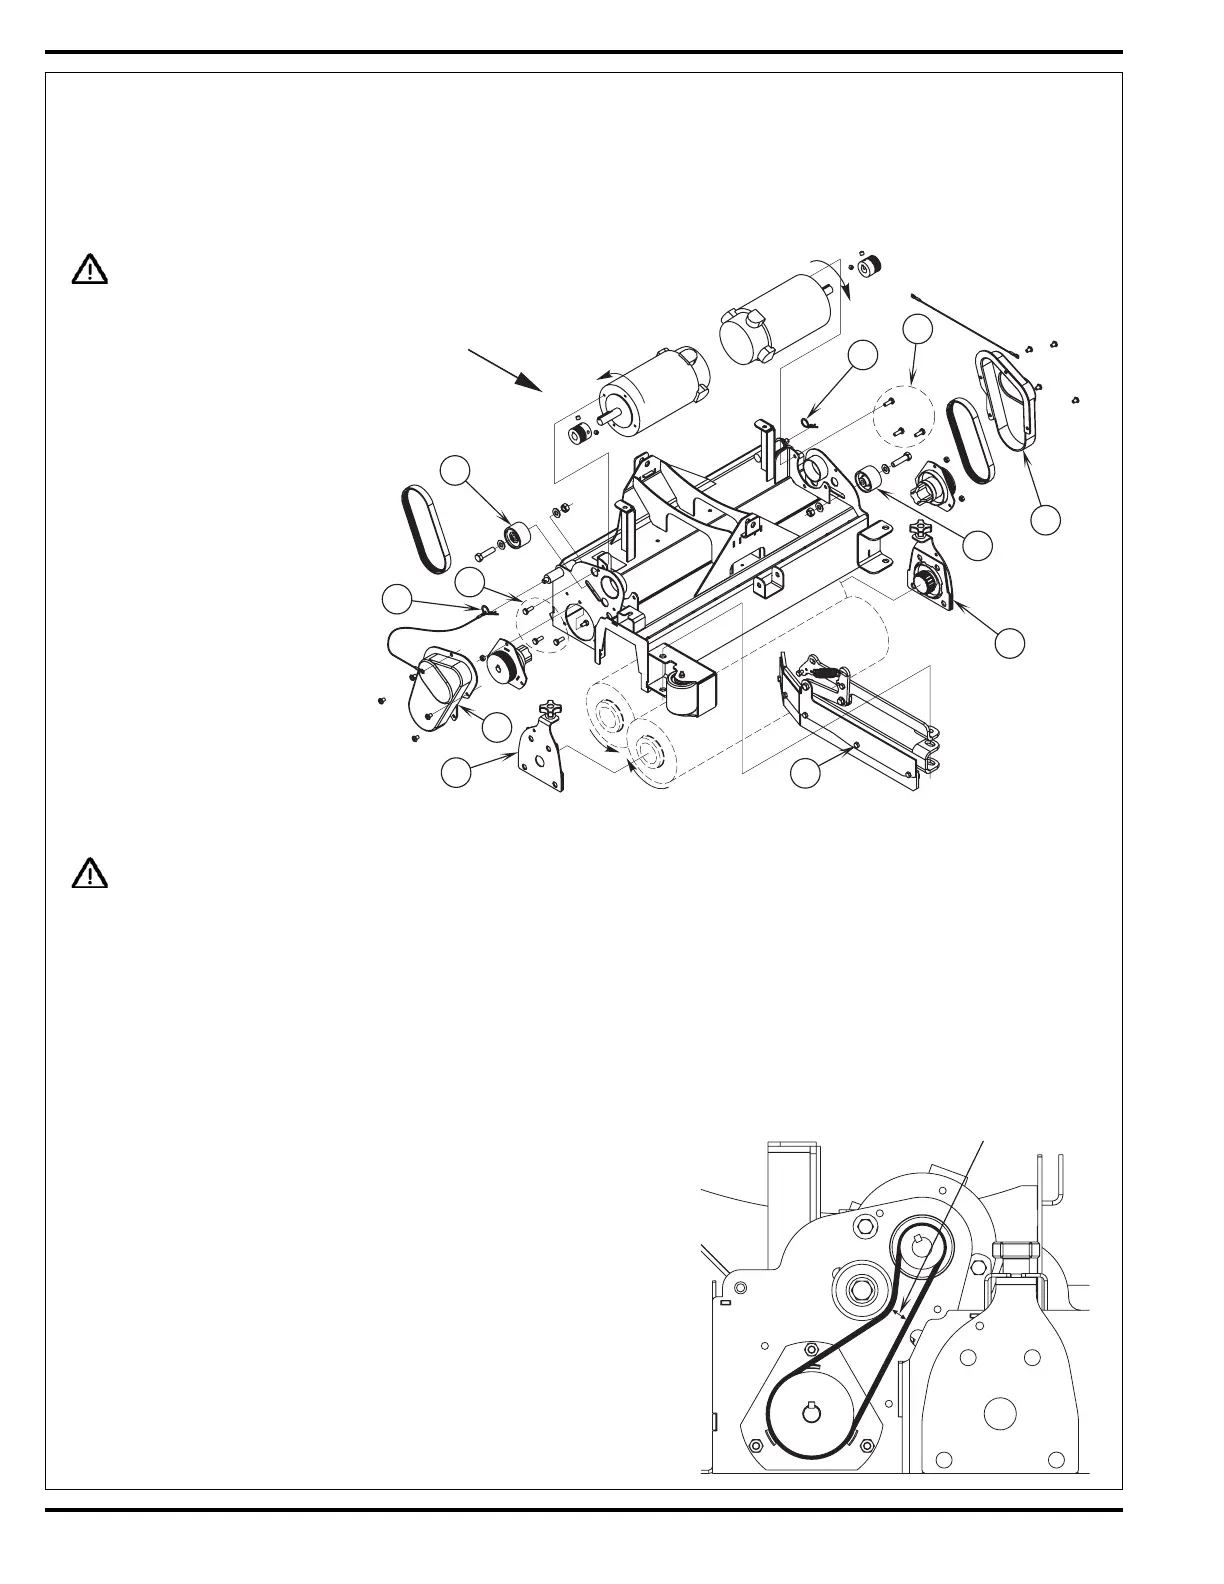
SCRUB BRUSH MOTOR(S) REMOVAL (CYLINDRICAL)
1 See Figure 6. Remove the Hairpin (AM) from both the scrub deck skirt assemblies and swing them open.
2 Next remove the Belt Guards (AN) (4 screws per side). With an operator in the driver’s seat with the key switch ON and the increase scrub
function selected press the drive pedal to start the scrub brushes and observe which brush motor needs to be removed.
WARNING!
FIGURE 6
Disconnect the battery pack by activating
the emergency stop switch/battery
disconnect lever (13) before servicing.
3 Next loosen the scrub brush belt
tension Hex screw in the center
of the Belt Idler (AO) (using a 5/8”
wrench).
4 See Figure 8. Remove the wiring at
both the Pos. & Neg. brush motor
terminal studs and note the correct
wiring connections (for reinstallation).
Then remove the (3) Screws (AP)
and lift the motor out from the scrub
deck.
5 Reassemble in reverse order and
adjust the belt tension to 1/2-9/16
inches (13-14 mm) as shown in
Figure 7. Note: Install motors with
wires pointing to the rear towards the
plastic motor wiring standoffs.
SCRUB BRUSH BELT REPLACEMENT (CYLINDRICAL)
WARNING!
Disconnect the battery pack by activating the emergency stop switch/battery disconnect lever (13) before servicing.
1 See Figure 6. Remove Hairpin (AM) and swing open the scrub deck skirt assembly (right or left side) and remove the belt guard(s) (AN) (4
screws each).
2 Important Service Tip: The left and right side drive belts are not the same lengths they must be ordered individually (P.N. 56407465, left side &
P.N. 56407466, right side).
3 Loosen the scrub brush belt tension hardware on the Belt Idler Pulley (AO) (using a 5/8” wrench). Pull the idler wheel away from the backside
of the belt and roll the belt off both the motor and brush pulleys. Then inspect for wear and replace as needed.
4 Re-install the drive belt and tension the belt as shown in Figure 7. Then install the belt guard, reconnect the battery pack and test the scrub
system for proper operation.
SCRUB BRUSH SYSTEM MAINTENANCE
The scrubbing system must be serviced at regular intervals to maintain good scrubbing
performance. Follow the maintenance steps listed below.
1 Rinse clean, built up debris from the debris hopper drain holes (daily).
2 Clean drain holes in the solution delivery trough on top of the scrub deck
(weekly).
3 Clean built up dirt from the inside of the scrub brush housing (weekly).
4 Remove any string wrapped around the scrub brush, drive hub and idler hub
(weekly).
5 Remove both the scrub brushes and rotate, turn end for end (weekly). See Scrub
Brush Removal and Installation (Cyl)
section.
6 Inspect the scrub brush bristles for wear, the brushes should be replaced when
the bristle length is 1 inch (26 mm) or less (monthly).
* Rotation from shaft end.
FIGURE 7
AR
FRONT
AQ
AN
AM
AO
AP
AQ
AN
AO
AP
AM
CCW*
CCW*
1/2" to 9/16" (12-14mm)
 Loading...