Other CRUs
Removal and Replacement 3-19
Repeat the parking procedure if necessary to make sure the robot is secured in the
proper position.
5. Set the robot lock to the locked position.
If the robot lock is the type with a knob, grasp the knob and turn it
counter-clockwise until the point is past the red, locked padlock icon.
If the robot lock is the type with a screw, loosen the thumbscrew, remove the
mechanism, rotate the mechanism 180 degrees, insert the mechanism, and tighten
the thumbscrew.
Note: Make sure the locked padlock icon is indicated.
6. Replace the top drive or drive filler in the base module.
Task 2 Robot Removal
Note: The robot CRU weighs approximately 5 kg (11 pounds).
1. Make sure to identify each Ethernet port on the robot and its attached cable (label
the cable if necessary).
Note: The Ethernet ports might be connected to different
networks.
2. Disconnect all cables, Ethernet cable and expansion cable, attached to the robot
CRU.
Note: Set the expansion cable(s) aside if the expansion modules
have been removed in preparation for base module replacement.
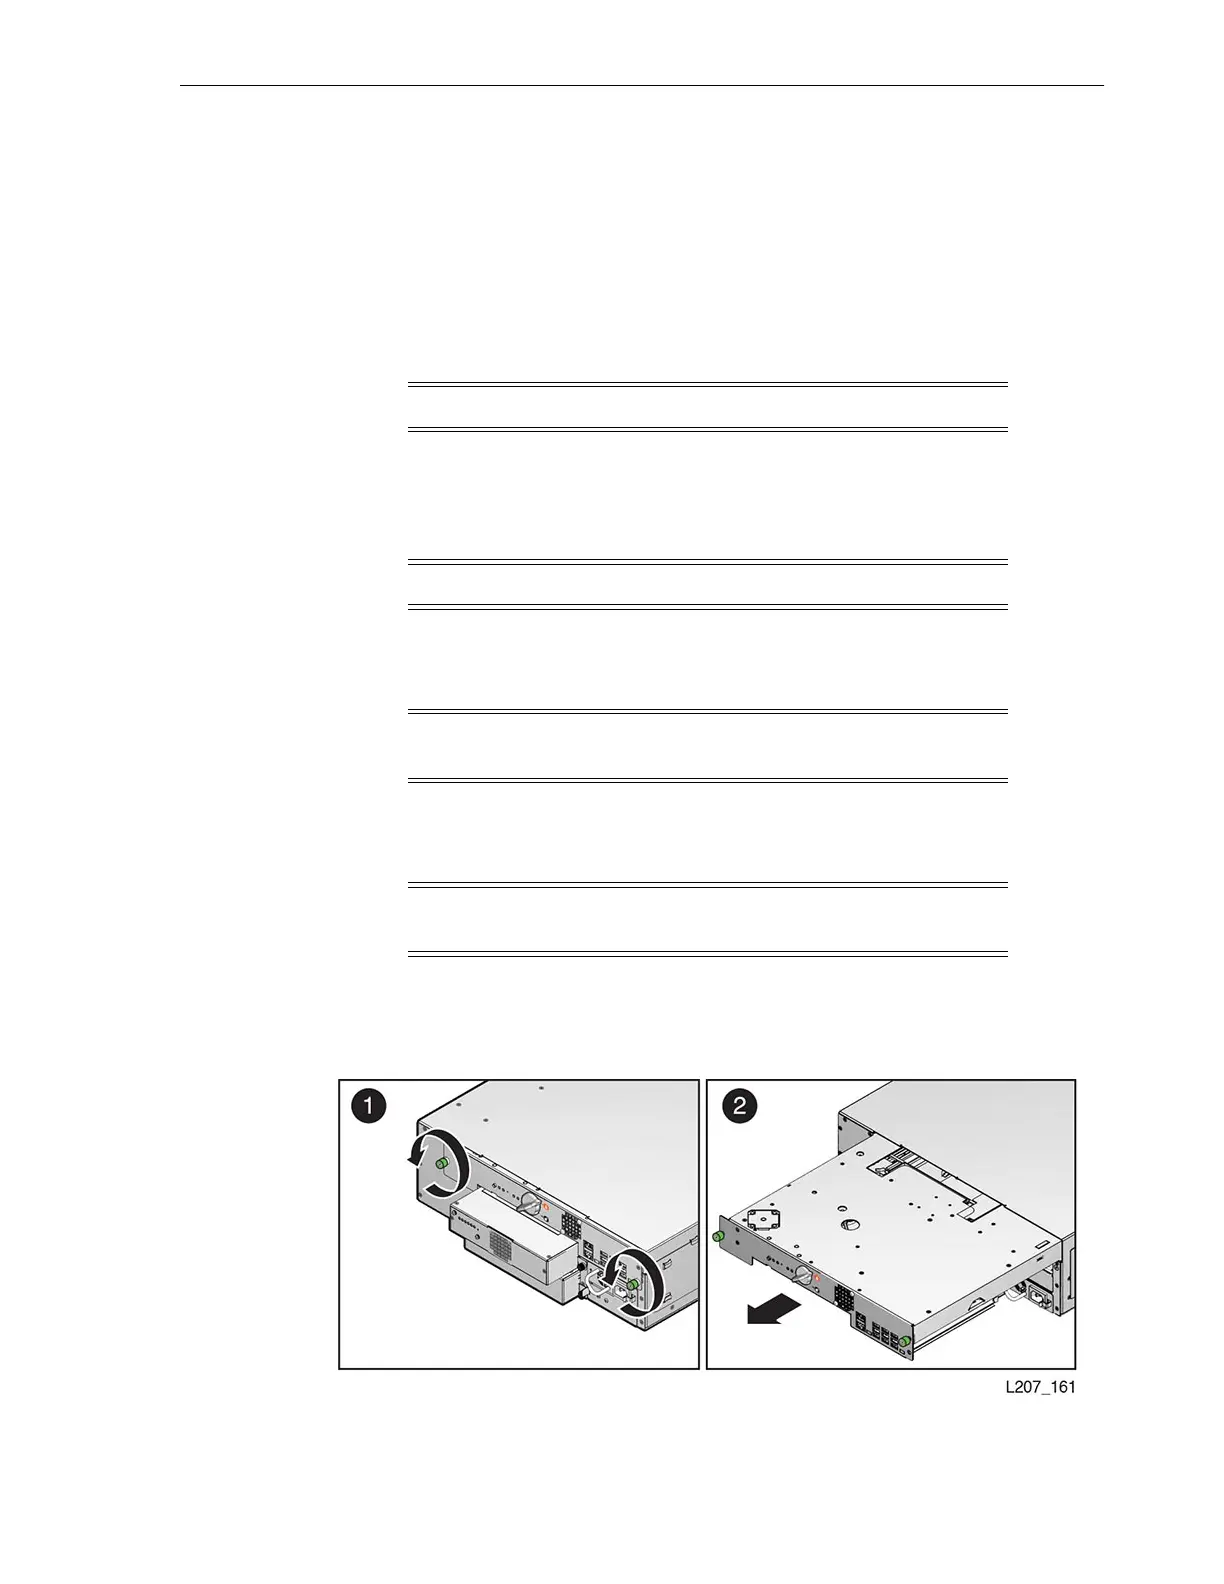
3. Loosen the robot module thumbscrews (see Figure 3–19).
Figure 3–19 Robot Removal and Replacement
 Loading...


