Other CRUs
3-22 StorageTek SL150 Modular Tape Library Customer Replaceable Unit Guide
2. Replace all cartridge magazines and tape drives removed during this procedure.
3. Continue with "To Replace the Robot".
To Replace the Robot
Task 1 Preparation
1. Remove the replacement robot from its shipping carton, and set it on the anti-static
mat. Save the packaging materials for the return of the failed CRU.
Task 2 Replacement
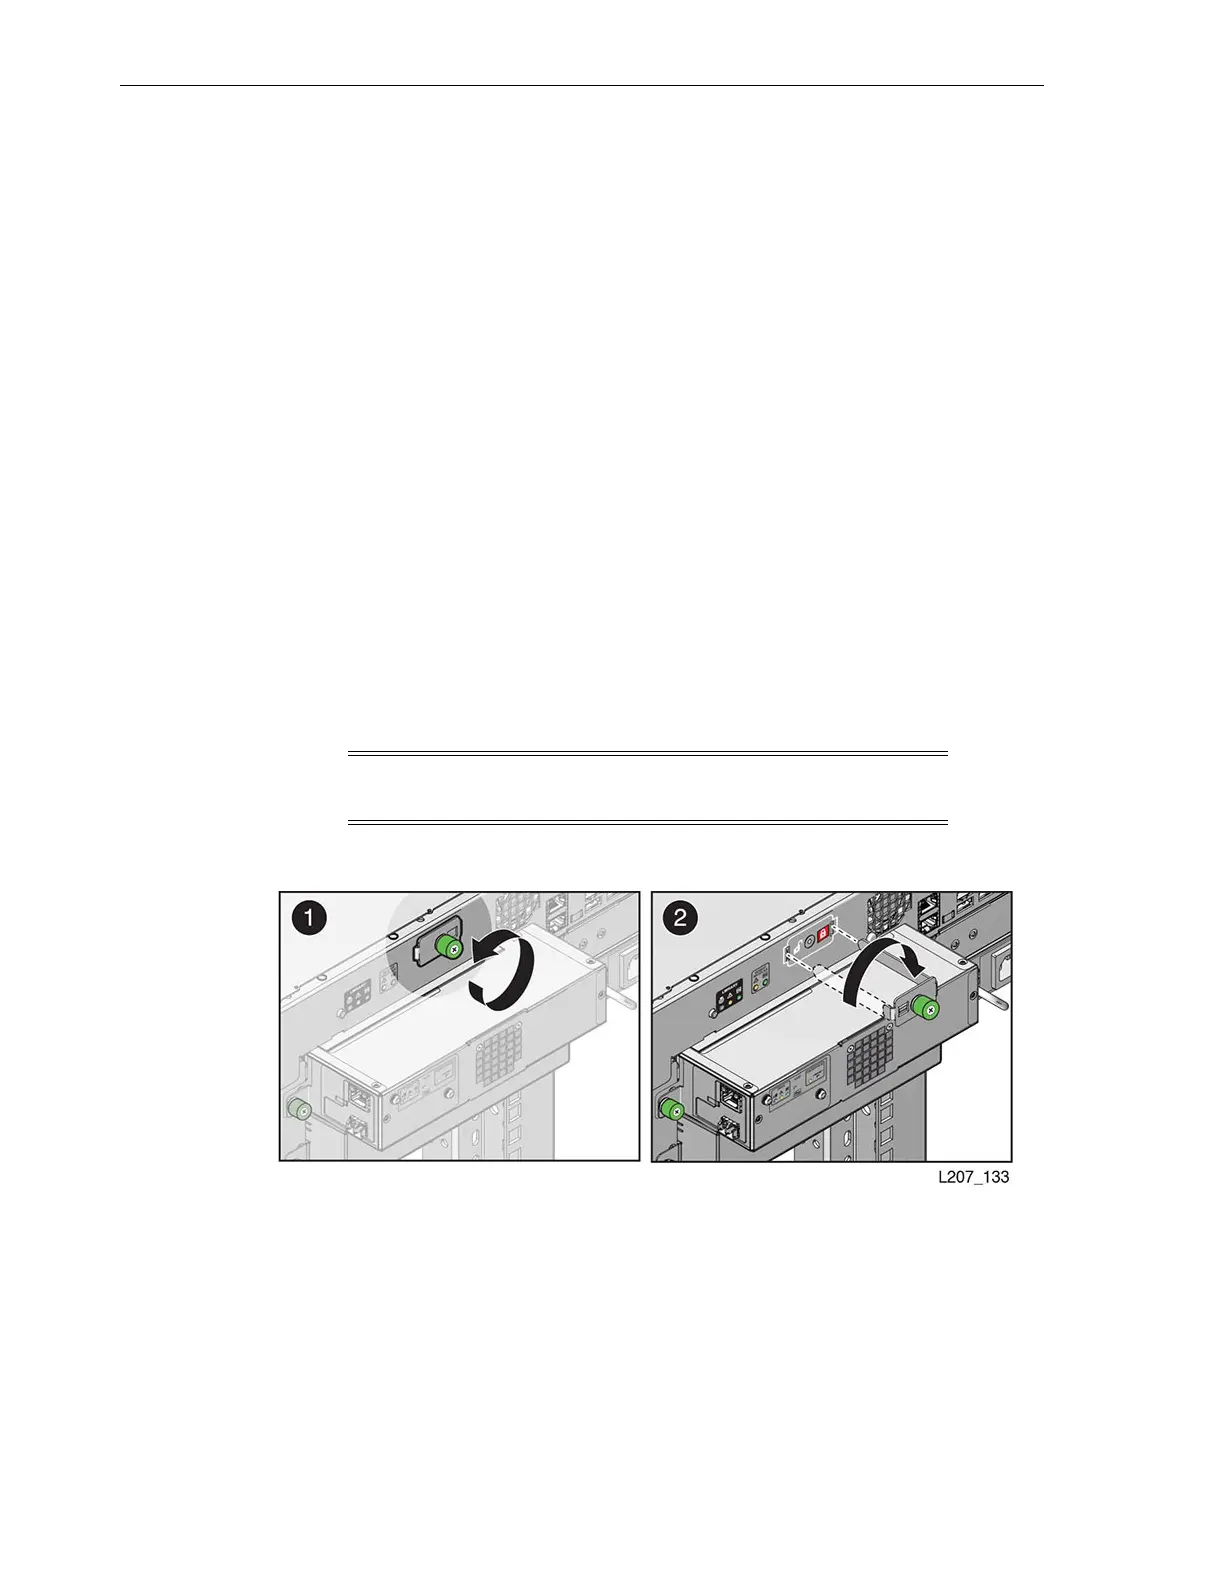
1. Grasp the robot near the center with the thumbscrews facing you.
2. Insert the robot into the base module (see Figure 3–19).
3. Push the robot fully into the module.
4. Tighten the thumbscrews on each side of the robot CRU.
5. Set the robot lock to the unlocked position.
If the robot lock is the type with a knob, grasp the knob and turn it clockwise until
the point is past the black, unlocked padlock icon.
If the robot lock is the type with a screw, loosen the thumbscrew, remove the
mechanism, rotate the mechanism 180 degrees, insert the mechanism, and tighten
the thumbscrew.
Note: Make sure the unlocked padlock icon is indicated (see
Figure 3–20).
Figure 3–21 Robot Lock (Unlocked)
Task 3 Cabling
1. Plug the expansion cable for each module into a base module connector (it is
permissible to connect a cable to any available connector).
2. Plug the Ethernet cables into the appropriate Net Mgt ports.
3. Continue with "Power System Behavior" on page 3-35.
 Loading...


