Other CRUs
3-30 StorageTek SL150 Modular Tape Library Customer Replaceable Unit Guide
3 - Flange (Long Section)
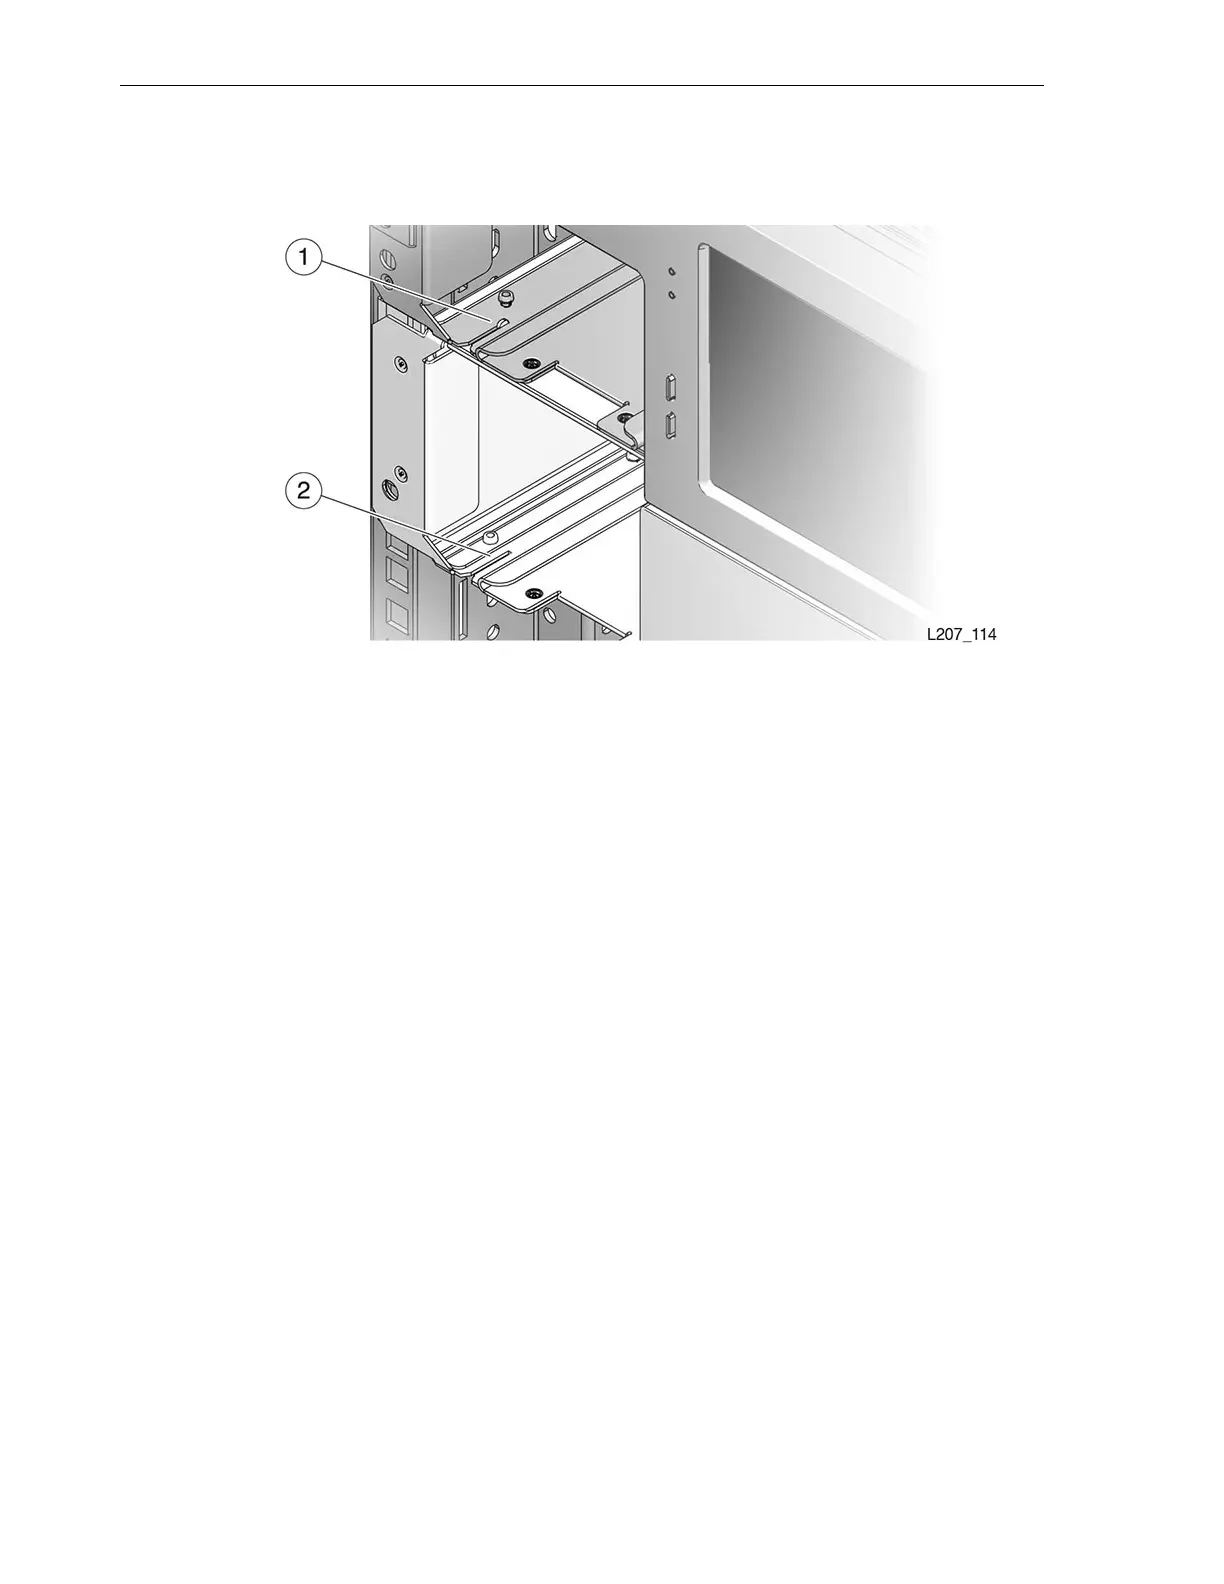
Figure 3–30 Module Alignment
Illustration Legend:
1 - Alignment Tab
2-Slot
Task 2 Secure the Module
1. Insert the rear rails for each module, and secure them with Phillips screws.
2. Secure the module to the front of the rack with two Phillips screws.
Task 3 Install the CRUs, Fillers, and Magazines in the Replaced Module
Cables and cords are connected as part of CRU installation.
1. Install the module controller (see "To Replace the Module Controller" on
page 3-18).
2. Install the tape drive assembly (see "To Replace the Drive Tray" on page 3-9).
3. Install the tape drive filler (see "To Install the Drive Filler" on page 3-31).
4. Install the power supply (see "To Replace the Power Supply" on page 3-10).
5. Install the power supply filler (see "To Install the Power Supply Filler" on
page 3-31).
6. Insert the cartridge magazines.
Task 4 Install the Remaining Expansion Modules
1. Locate the next expansion module for installation (refer to the module number
label on the back of the module).
2. Install the floor if this is the bottom library module (see "To Install the Floor" on
page 3-27).
 Loading...


