Other CRUs
3-34 StorageTek SL150 Modular Tape Library Customer Replaceable Unit Guide
6. Secure the base module to the rack with screws (put one in a few turns then the
other screw and tighten both).
Task 2 Install the Base Module CRUs
Cables and cords are installed as part of the CRU replacement procedures.
1. Install the robot (see "To Replace the Robot" on page 3-22).
2. Install the tape drive trays (see "To Replace the Drive Tray" on page 3-9).
3. Install the tape drive filler (see "To Install the Drive Filler" on page 3-31).
4. Install the power supplies (see "To Replace the Power Supply" on page 3-10).
However, do not connect the power supply cable now.
5. Install the power supply filler (see "To Install the Power Supply Filler" on
page 3-31).
6. Install the Front control panel (see "To Replace the Front Control Panel" on
page 3-16).
Task 3 Install the Expansion Modules
1. Locate Module 2.
2. Determine if this is the bottom library module. Install the library floor in the
bottom module (see "To Install the Floor" on page 3-27).
3. Install the module (see "To Replace the Expansion CRU Chassis" on page 3-29).
Note: CRUs, drive cables, and module interconnect cables are
installed during replacement of the expansion module.
4. Locate the next module and repeat step 2 and step 3 as necessary until all modules
are in place.
5. Install cartridge magazines (see "To Replace a Tape Cartridge Magazine" on
page 3-6) in all modules.
Task 4 Finishing Touches
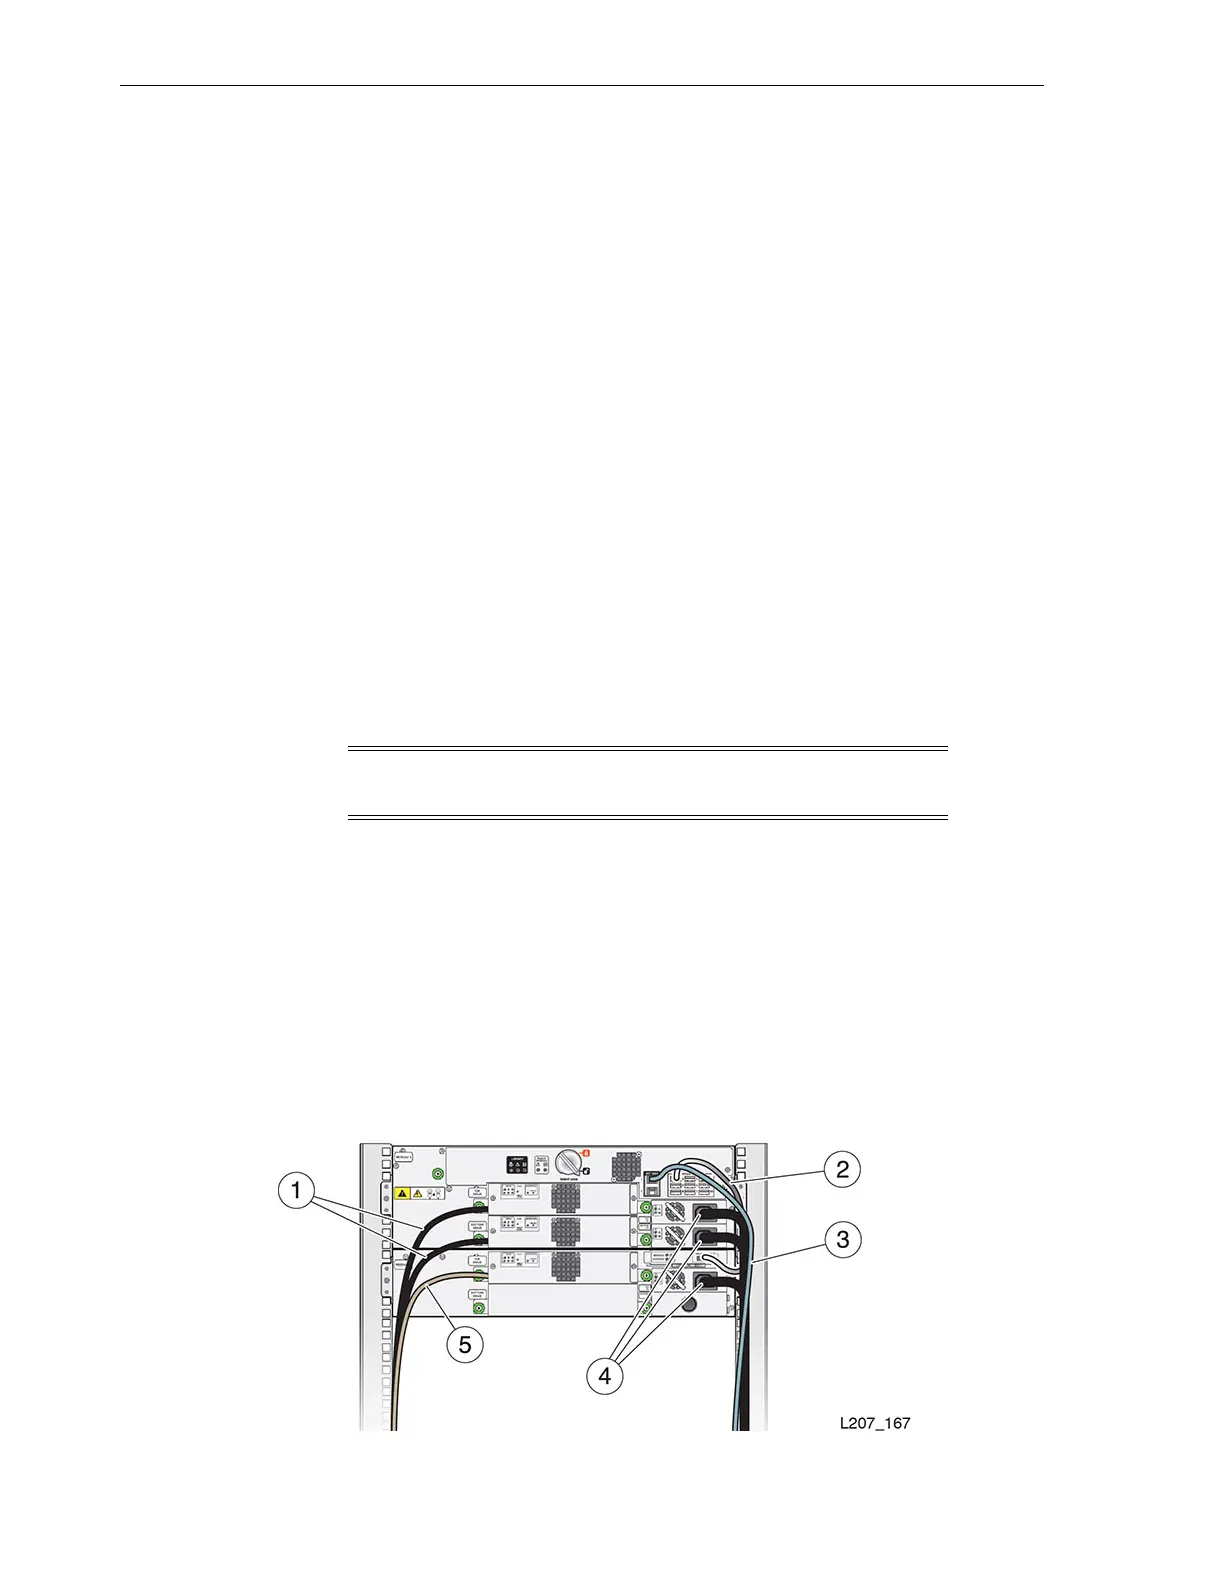
1. Align and dress the cables. Secure the cables in the hook and loop straps, if
applicable.
Figure 3–33 Cable Attachment
 Loading...


