Other CRUs
Removal and Replacement 3-29
To Replace the Expansion CRU Chassis
Task 1 Installation
1. Lift the expansion module by the sides.
2. Align the flanges at the rear of the expansion module with the grooves in the
lower front edges of the library module.
3. Push the expansion module a few inches into the library.
Note: There is a gap in the module flange.
4. Lower the top front edge of the expansion module while slowly pushing it toward
the library.
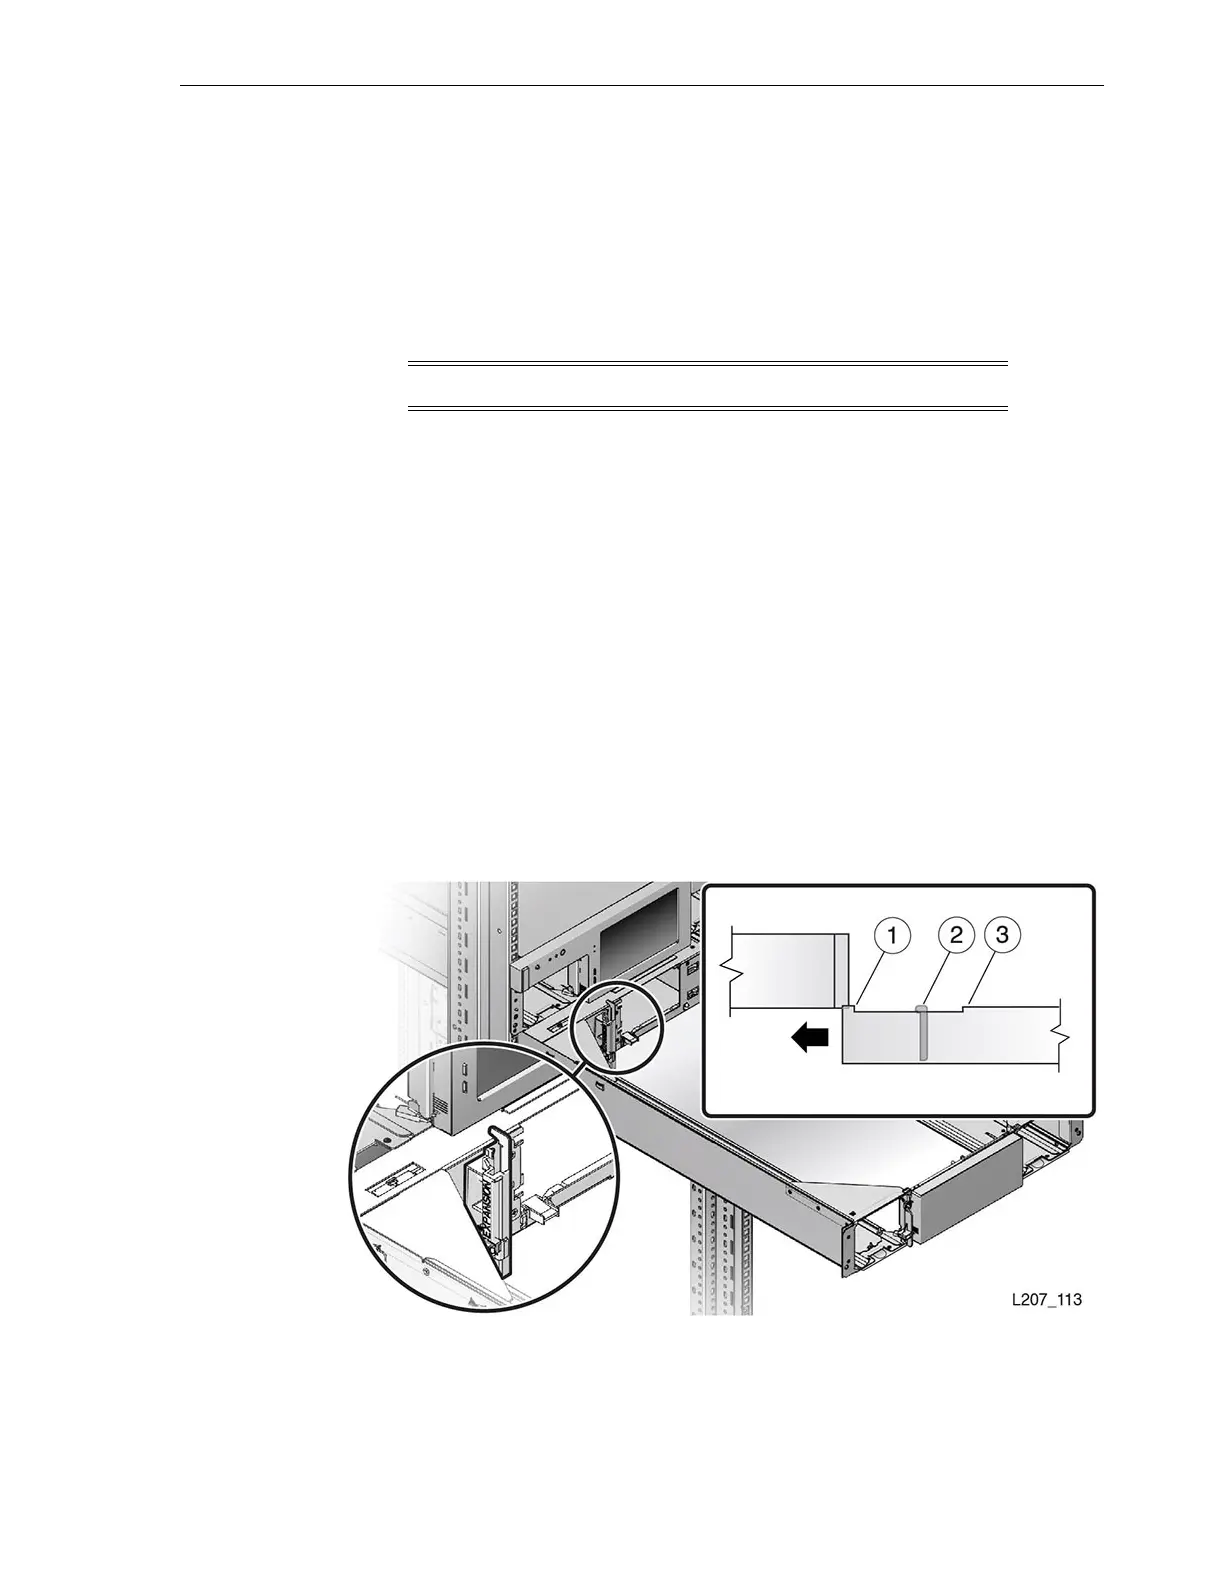
5. Take care to avoid any contact between the expansion module internal vertical
flange and the plastic bezel of the library module (see Figure 3–29).
6. Lift the front edge of the module to level after the internal vertical flange is behind
the face of the installed module. Continue to push the module in until it is about
51 mm (2 inches) from the rack front stiles.
7. Locate the expansion module alignment tab and the slot in the library module left
magazine slot (see Figure 3–30).
8. Push the expansion module in and seat the alignment tab fully in the left
magazine slot.
9. Attach the expansion module CRU label (upper-left, rear corner inside the scribe
marks) if applicable.
Figure 3–29 Avoid Contact with the Operator Panel
Illustration Legend:
1 - Flange (Short Section)
2 - Internal Vertical Flange
 Loading...


