-
-
-
-
-
-
-
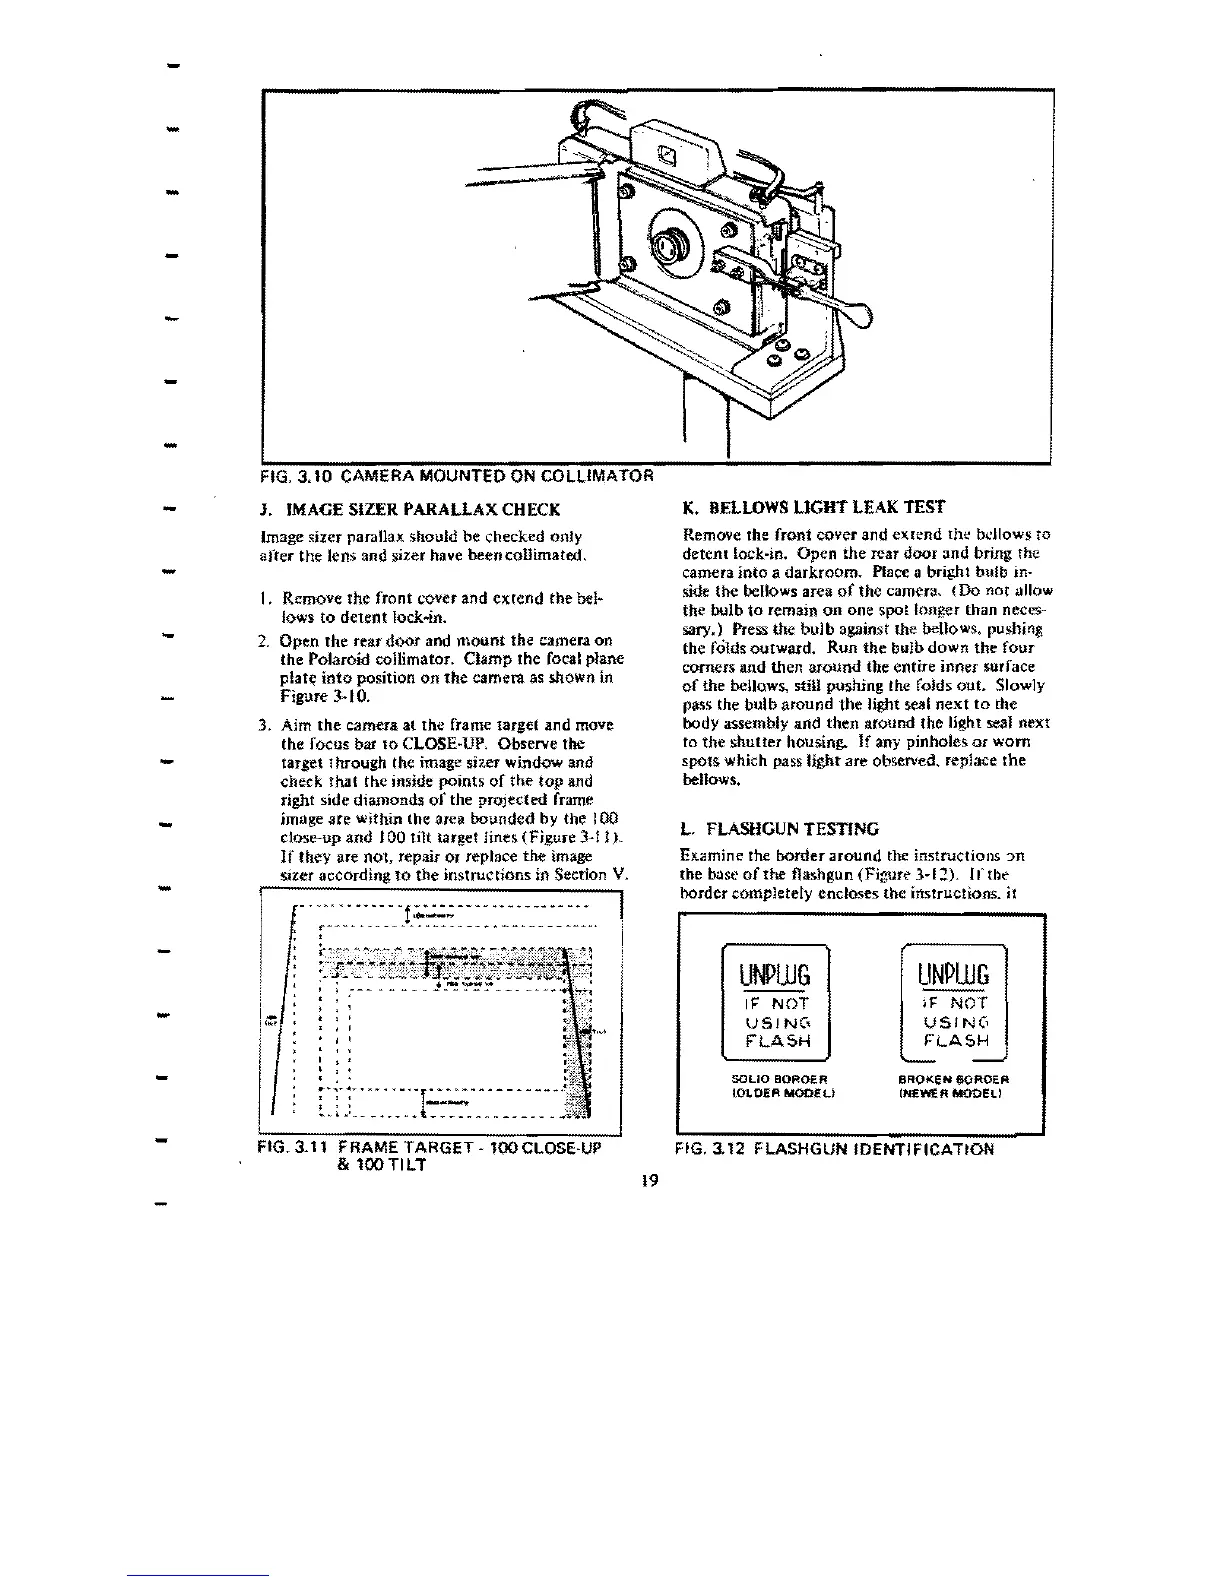
FIG,3,
-
j,
IMAGE
SIZER
PARALLAX
CHECK
Image
siler
parallax should
be
checked only
after
the
len$ and sizer have been<:ollimated,
-
1,
Remove
the
front ,,'()\'er
and
extend
the
bel~
lows
to
detent
lock-4n.
2.
Open the rear
door
and
mount
the camera on
-
the Polaroid cQllimator.
Clamp
the
focal plane
platti
into
position
on
the
camera as shown in
Figure 3·10,
3. Aim
the
camera
at
the
frame target and move
the
focus
bar
to
CLOSEMUP,
Observe
the
target
through
the image sizer window and
-
check
that
the
inside
points
of
the
top
and
right side diamonds
of
the
projected frame
image
are
within the area
bounded
by
the
100
-
close-up
and
100
tilt target lines.
(Fjgure
3-11).
If
they are nOl, repair
Or
replace the image
-
sizer according
to
the
instructions
in Section
V.
, .•• -
-1;;.,-..;.:,:;----
_W
__
_.w
~~~-
--~.-
,..
__
w
••
______
•
W~
___
__
~.
__
W
_______
.0
,
-
i_
,
,,,.
-
-
FIG.3.11
, ,
,
,
, ,
, '
, ,
:.;.:
.....
----1-·-'----
----
--_.
,
,)
----.
~.I.·_._
..
~.~
_~_
.....
_.
___
_
FRAME
TARGET·
100
CLOSE·
UP
& 100
TILT
19
K.
BELLOWS
LIGHT
LEAK
TEST
Remove the front
COYer
and
exrend
the
bcJlows
to
detent
lock-ln.
Open
the
rear
door
and
bring
the
camera
into
a
darkroom.
Place a bright bulb
in·
side
the
bellows area
of
the
camera.
(Do
not Jllow
the
bulb
to
remain
on
one spo{ longer than neces-
sary.) Press the
bulb
against
the
bellows, pushing
the
folds
outward.
Run
the
bulb
down
the
four
comers and then
around
tbe
entire inner surface
of
the
bellows., still pushing the folds
out.
Slowly
pass the bulb
around
the
light seal
next
to
the
body
assembly
and
then
around the
light
seal
next
to
the
shutter
housing.
If
any pinholes
or
worn
spots
which pass light
are
observed, replace
the
benows.
L,
FLASHGUN TESTING
Examine the
border
around
the instructions
:m
the
tmse
oftlle
flashgun (Figure 3·1;2).
If
the
border completely encloses the instructions.
it
UNPWG
UNPWG
If:
NOT
If
NOT
US!
N(,
USI
N(,
,LA5"
FLA5H
~
-
SOLiO BOROER
BROKEN 8OI'WER
lOLOER MODEL)
(NEWER MOOEL!
FIG, 3.12 FLASHGUN IDENTIFICATION

 Loading...