-
Models
100.240.
2S0, 3S0 & 360:
Replace the four beUows scn:ws.
-
All
O.her Models:
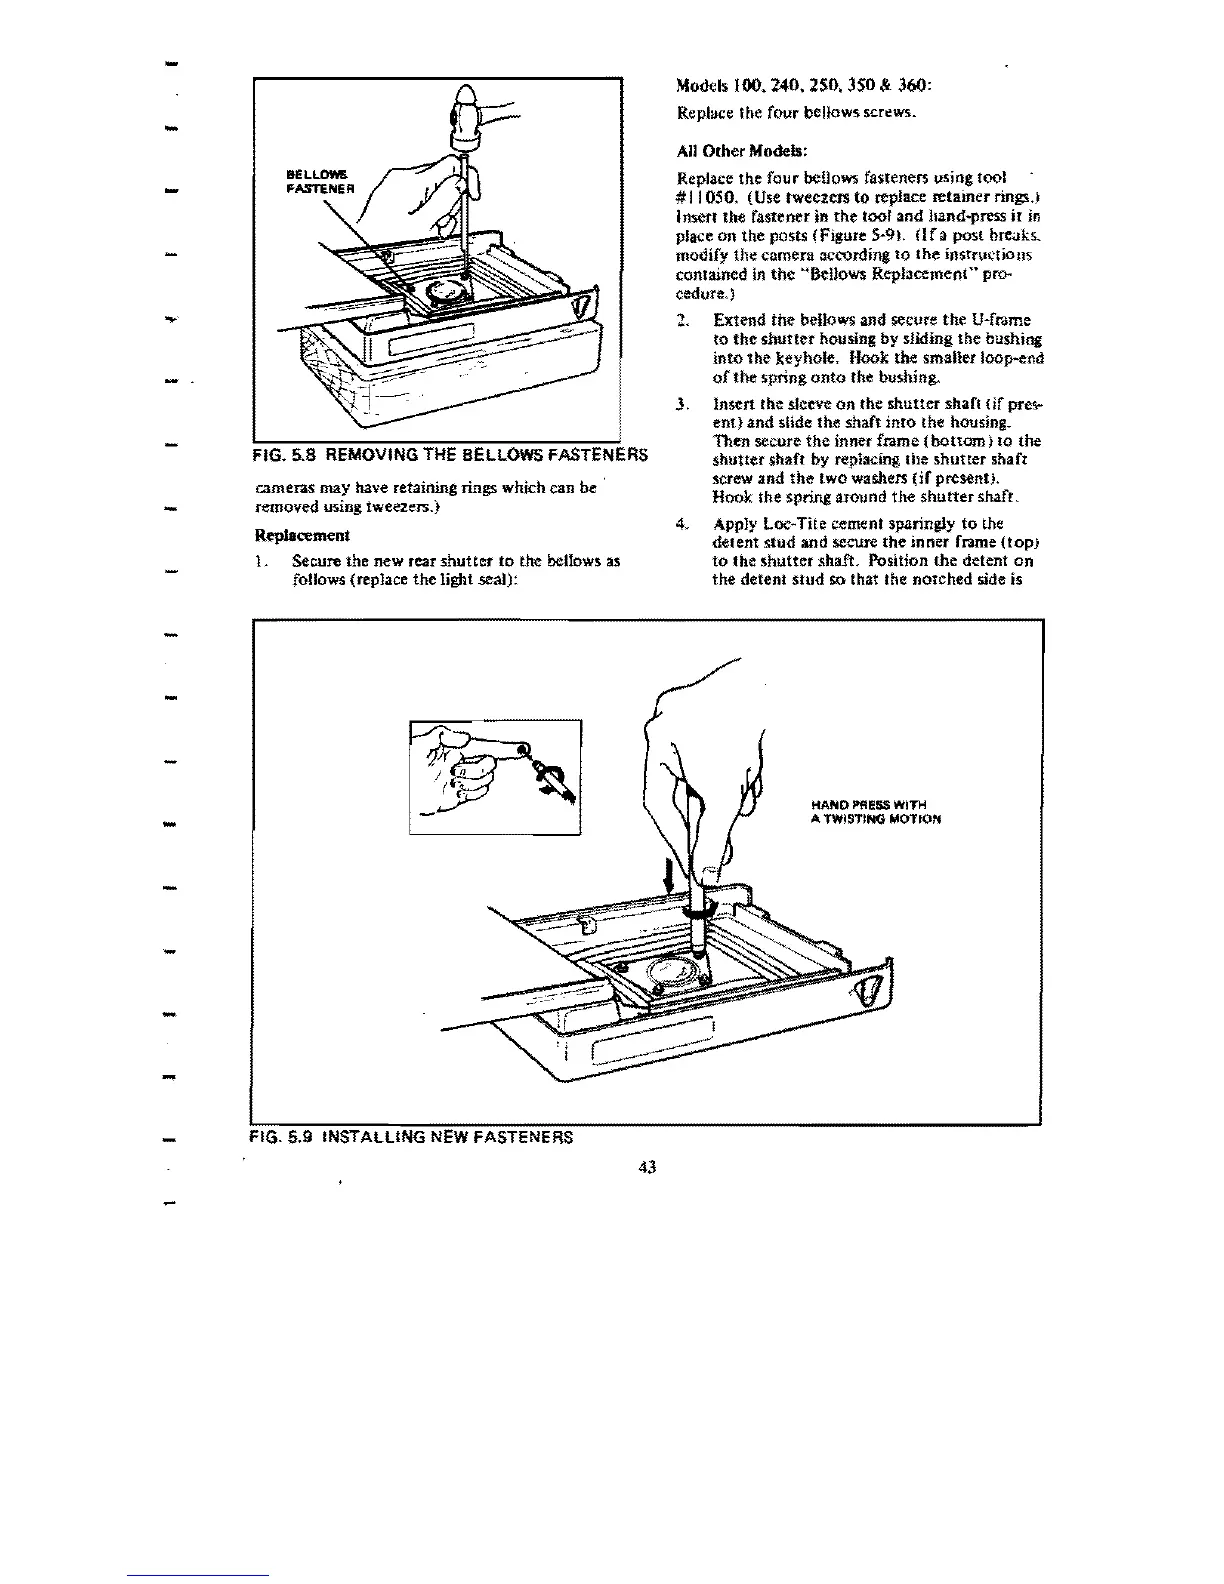
Replace the
four
bellows fasteners using
tool
- # II 050. (Use tweezers
to
replace retainer rings.)
Insert the fastener in
the
toof and hand..pres5
it
in
place
on
the posts (Figure 5·9).
(If
a post breaks.
modify
th~
camera according
to
the
insrructions
contained
in
the
'"'Bellows Replacement n
pnr
cedure.)
., Extend the bellows and secure
the
U-frame
to
tbe
shutter
housing by sliding the bushing
into
the
keyhole, Hook the smaller loop--end
of
the
spring
onto
the bushing.
J, Insert the sleeve
on
the
shutter
shaft
(if
pres--
ent)
and slide the shaft
into
the housing.
Then secure
the
inner frame
(bottom)
to
the
shutter
shaft by repiadng
the
shutter
shaft
screw and
the
two washers
(if
preseno,
Hook ihe spring around the
shutter
shaft.
-
4.
App1y
toc-
Tite cement sparingly
to
the
detent stud and secure the inner frame
(t0Pi
to
the
shutter
shaft. Position the detent on
the detent
stud
so that the notched side is
FIG.
5.B
REMOVING THE BELLOWS FASTENERS
cameras may have retaining rings which can be '
removed using tweezers.)
Replacement
1. Secure the new rear
shutter
to
the
beUows
as
fonows (replace the light .seal):
-
HAIliD
PflESS
WITH
A
TWISTING
MOTION
-
-
-
-
-
FIG. 5.9 INSTALLING NEW FASTENERS
43

 Loading...