-
tnldes
l/4~'
from the bottom
of
!.he
jig
#169441 fFigun:
5-121.
RctUlIl the light
(Figure 5-10).
SCJI
if
it is in good
condition.
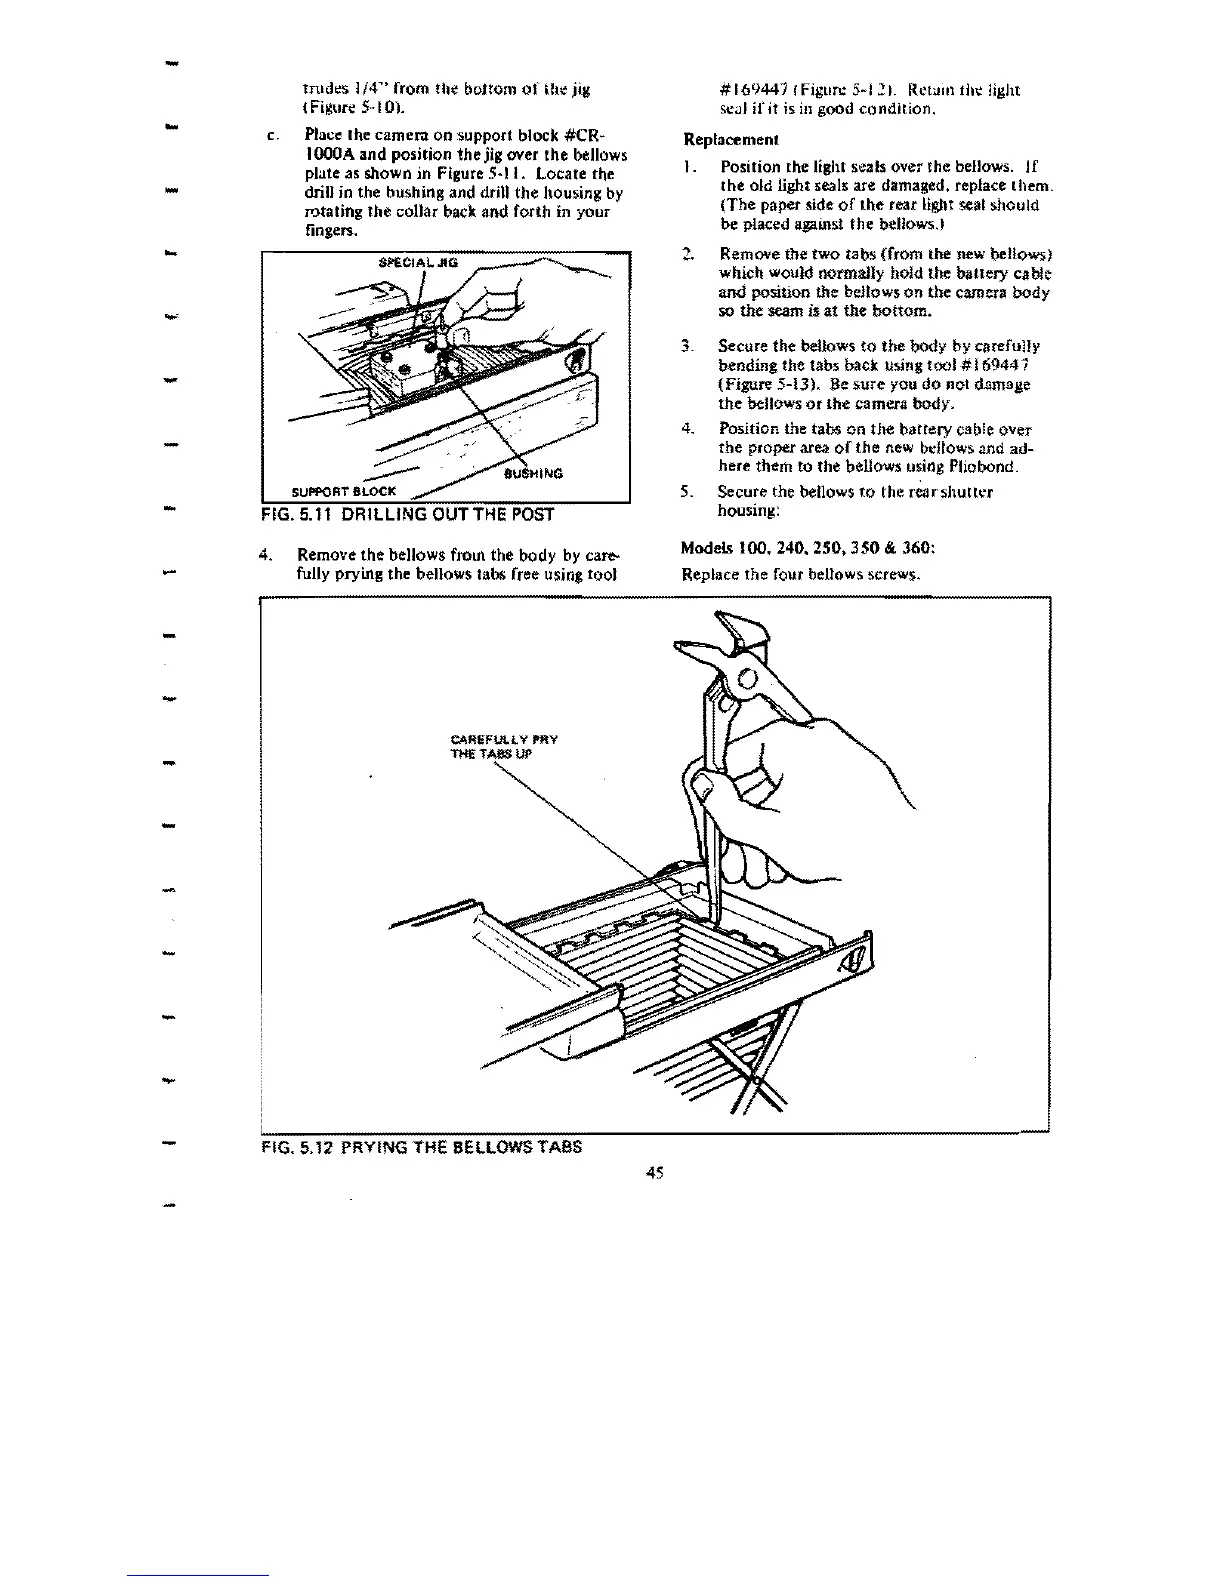
c. Place Ihe camer.t
on
support block
#CR~
IOCOA
and
position
the
jig over
the
bellows
plate
as
shown in Figure
5~ll.
Locate the
drill in the bushing
and
drill
the
housing by
-
rotating the coBar back and forth in your
fingers.
-
-
-
4. Remove
the
bellows
froUl.
the
body
by
care-
fully prying
the
bellows tabs free using tool
SUPPORT
BLOCK
FIG.5.11
DRILLING
Replacement
I.
Position the light seals over
the
bellows.
If
[he
old light seals are damaged. replace
lhem.
(The paper side
of
the
rear
Ught
seal should
be
placed against
the
bellows')
2.
Remove the
two
labs
(from the new bellows)
which would normally
hold
the
bauery
ca ble
and
position
the
beHows
on
the
camera
body
so
the
seam is
at
the
bottom.
3.
Secure the bellows
to
the
body
by carefuUY
bending the tabs back using tool
# 169447
(Figure 5-13).
Be
sure
you do not damage
the
bellOWS
or
the
camera body.
4. Position the tabs
on
the
battery cable over
the
proper area
of
the
new bellows and
ad-
here them to the bellows using Pliobond.
5. Secure the bellows
to
the
reu
shutler
housing:
Models
100.
240.250.350'"
360:
Replace
the
four bellows screws.
-
-
-
-
-
-
-
-
CAREFut.t. Y PRY
UI'
FIG. 5.12 PRYING THE BELLOWS TABS
45

 Loading...