Matrix 424, 832, 832+ Installation Manual
RINS918-6 Page 17
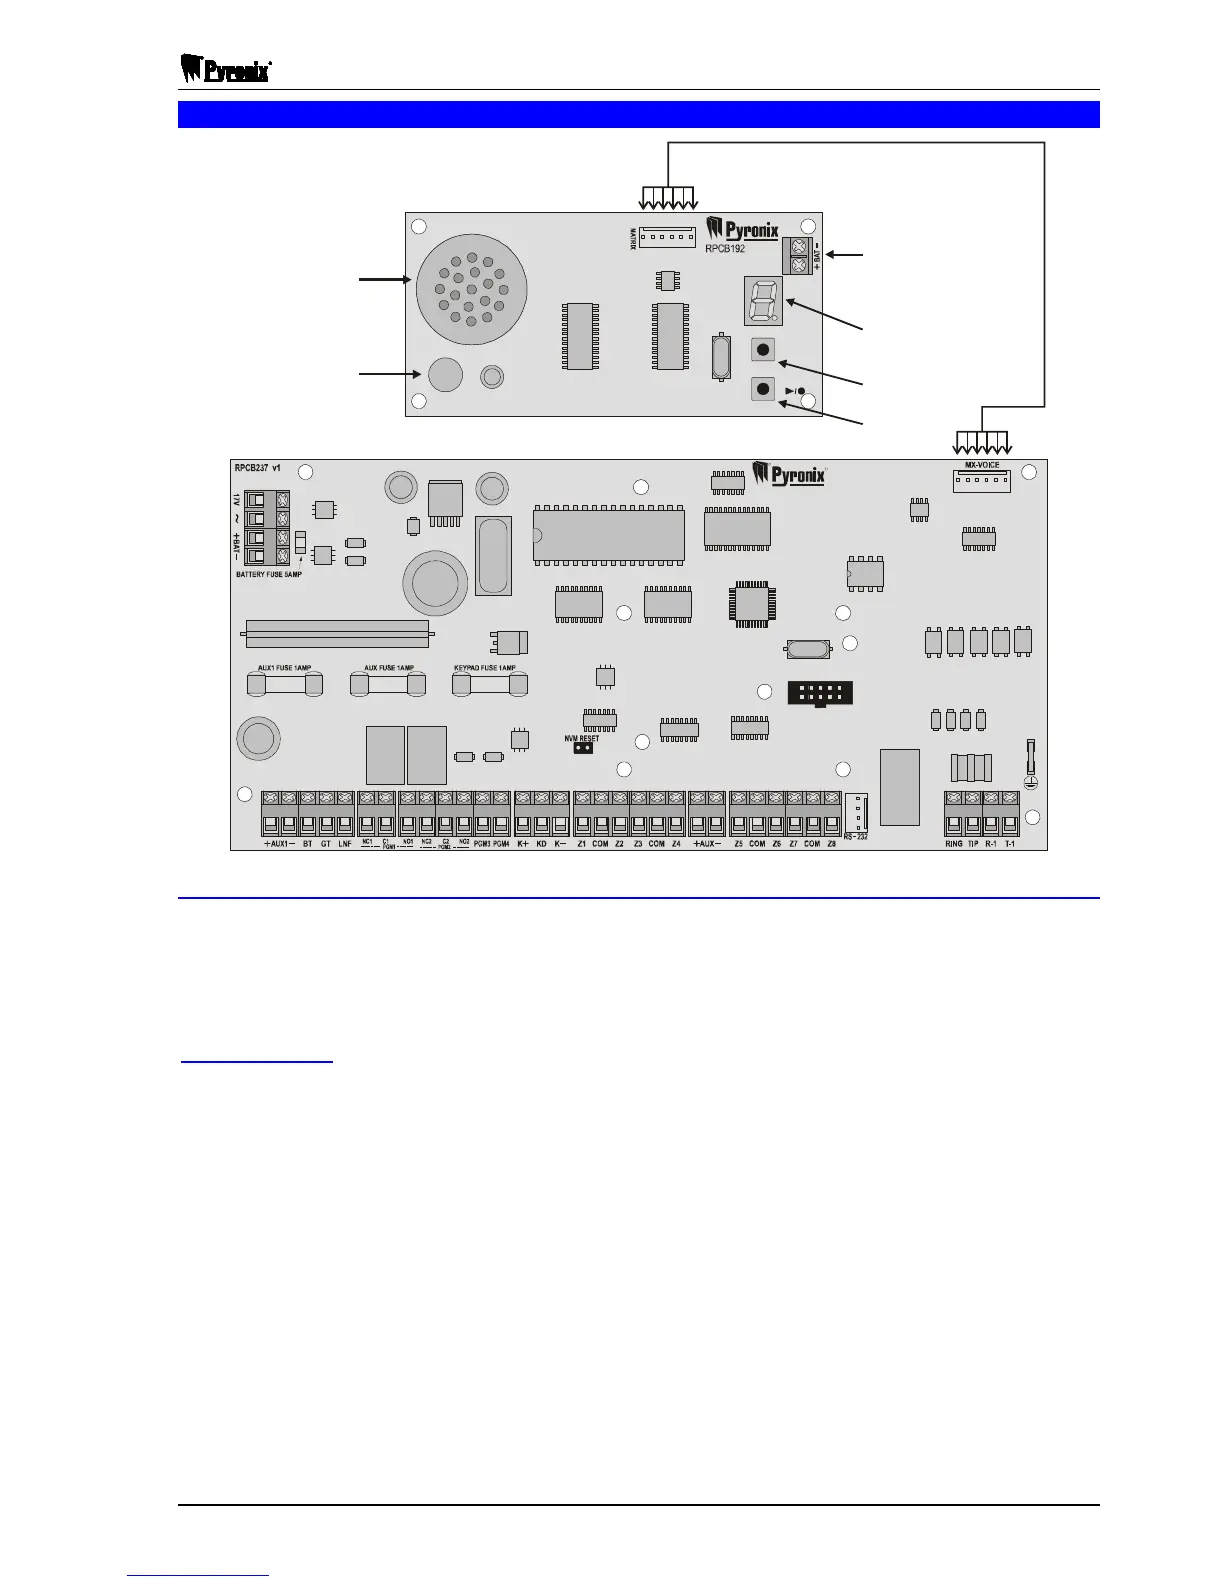
2.7 Matrix Voice Module
R
R
NBUSJY
832+
Data & power connection using the cable supplied
Supply input 9-12V
for recording/playing
messages if disconnected
from panel
Message number
indicator
Select
Message Key
Play / Record
Key
Speaker for playing
recorded messages
Microphone
MESSAGE
NUMBER
1-8
PLAY/RECORD
MICROPHONE
2.7.1 MX-VOICE Module Programming
Programming the MX-VOICE module consists of recording spoken messages (Voice message) via the onboard
microphone. The number of a voice message should be selected before recording and the message may be
played via the on-board speaker after recording. The MX-VOICE module can be programmed even if not
connected to the panel. In this case, a 9-12V power supply must be connected between the «+BAT-»
terminals.
PROGRAMMING
Initial state: MX-VOICE module should be connected to the panel or power supply unit.
Step 1 - SELECT VOICE MESSAGE NUMBER. Press the «MESSAGE NUMBER» key until the required number is
reached ( … is displayed on the LED).
Step 2 - RECORDING. Press the «PLAY/RECORD» key (the voice message number starts flashing to indicate
that recording has started) and hold it down while speaking into the on-board microphone. Release
the «PLAY/RECORD» key after the message is finished. End of recording will be indicated as . The
maximum length of one message is 7 seconds.
Step 3 - PLAYING A VOICE MESSAGE. Choose the required voice message by pressing the «MESSAGE
NUMBER» key (the message number is displayed on the LED), then press the «PLAY/RECORD» key
once. The voice message will be played via the on-board speaker.
NOTE 1: Recorded messages are stored in the MX-VOICE module which was used for programming
these messages only, and are not stored in the panel’s NVM. NOTE 2: To enable the MX-VOICE module
it is required to set the “Voice message” reporting format for the used telephone and allocate the
number of voice messages for the event groups (Send Options).

 Loading...