70
HSB Series LCD Display
Placing a Guard Zone
Placing and positioning guard zones on the Pathfinder Radar display is quick
and easy.
• If a guard zone is not already displayed, you can place one with a single press
of the ALARMS key.
• If you have already placed a guard zone, pressing the ALARMS key allows
you to toggle either guard zone on or off.
Note: When you turn on a guard zone, it is normally displayed in its last-used
position and shape. However, if this position is off-screen at the current range
setting, or within one quarter of the current range from your vessel, the guard
zone is placed at its default position and shape instead. This is at one third
(Zone 1) or two thirds (Zone 2) of the current range, as a sector zone occupying
30° either side of the ship’s heading marker.
➤ To place a guard zone when one is not already displayed:
1. Press ALARMS.
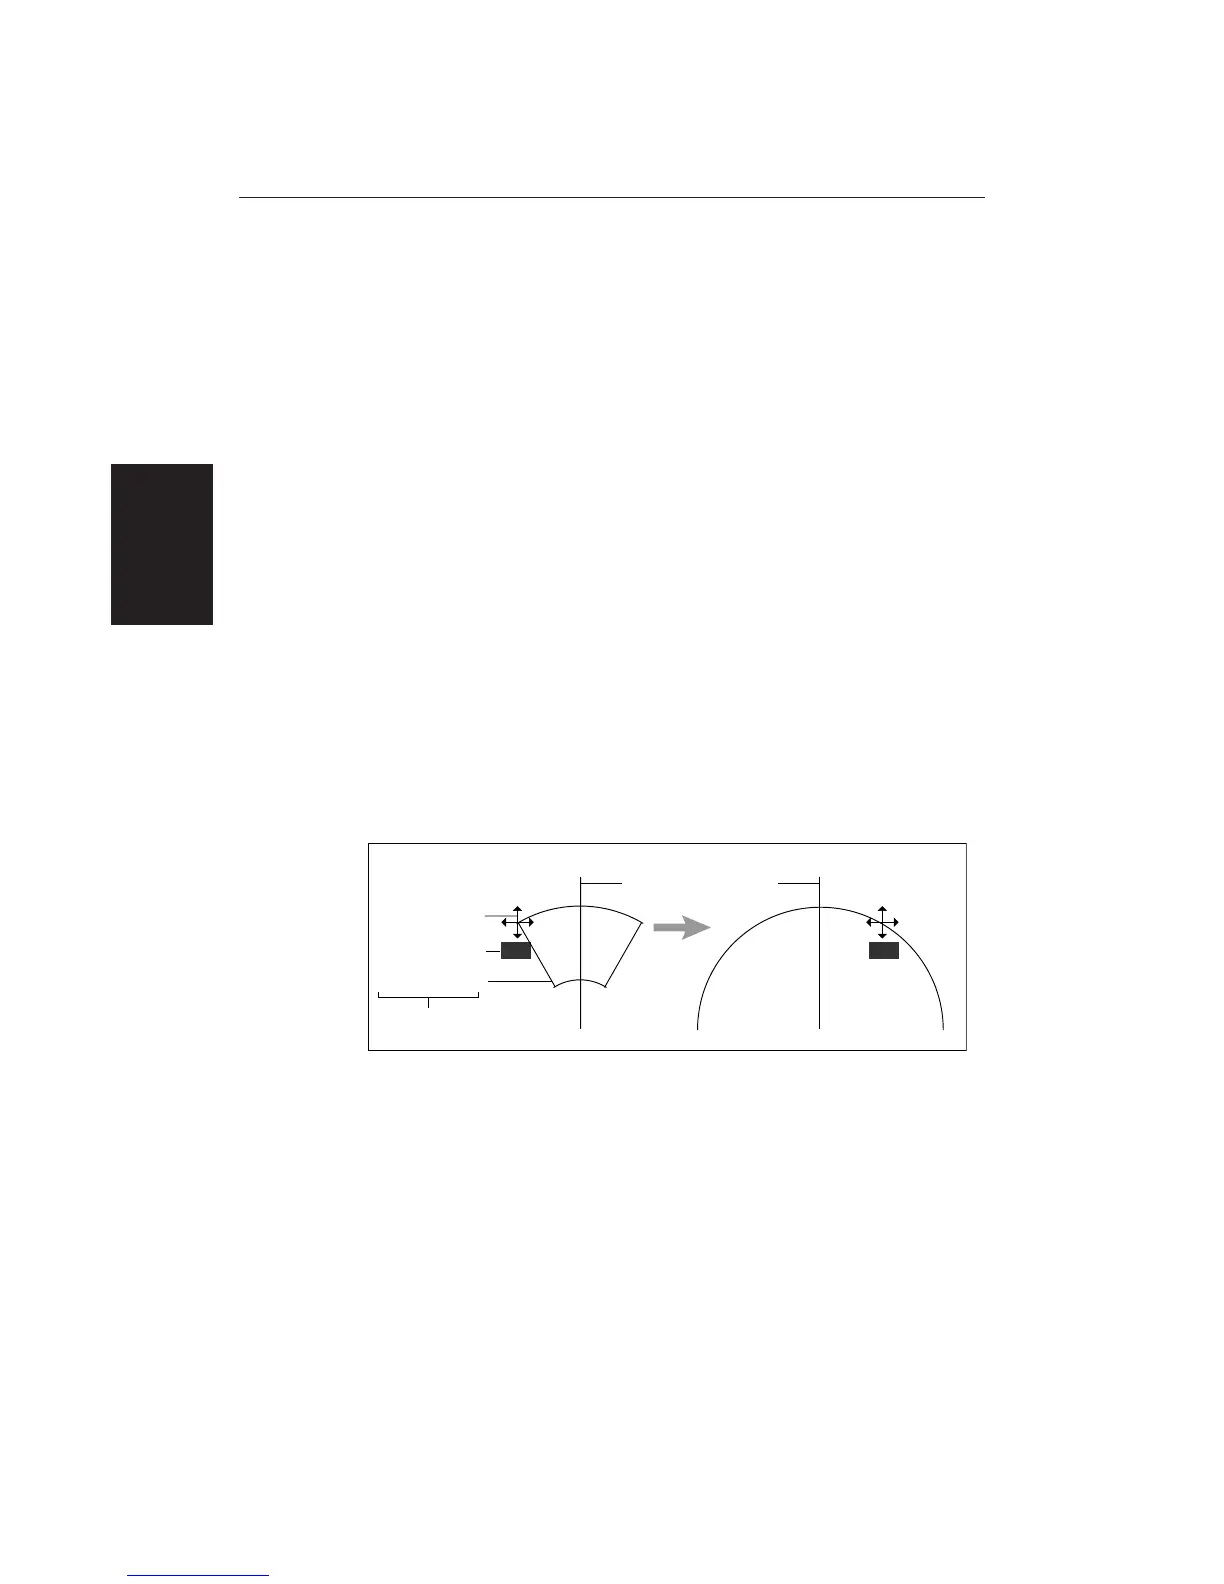
The radar picture shows the guard zone as a four-sided shape bounded by a
solid line (or a circle if previously set as one).
The cursor is positioned over an outer corner of the zone. The cursor has
control of this corner, as shown by the text GRD in inverse video, the four-
headed arrow, and the solid guard zone boundary.
D3971-1
Ship's Heading Marker
Cursor symbol as
four-way arrow
Cursor text in
inverse video
Indicate cursor control
of guard zone
Zone as solid line
Move
cursor
Sector Zone Circular Zone
GRD GRD
2. If necessary, use the trackpad to move the corner of the guard zone to the
required position. As you move the corner, the width and/or height of the
zone changes, but its general sector shape is retained.
Note: To create a 360° guard zone, rather than a sector guard zone, you
can either move the corner all the way round to form a circle, or move it
back to just the other side of the other outer corner.
3. Press ENTER to drop the corner in its new position and redraw the zone, or
CLEAR to abandon the operation and return the corner to its previous
position.
The display shows this zone boundary as a short-dashed line, and the cursor
returns to normal control.
Placing a Guard
Zone

 Loading...