122
Wireless Networks
12
Uploading Images to the SR-10 Server
To upload images to the SR-10 server, transfer the host list to the
camera and then follow the steps below.
1
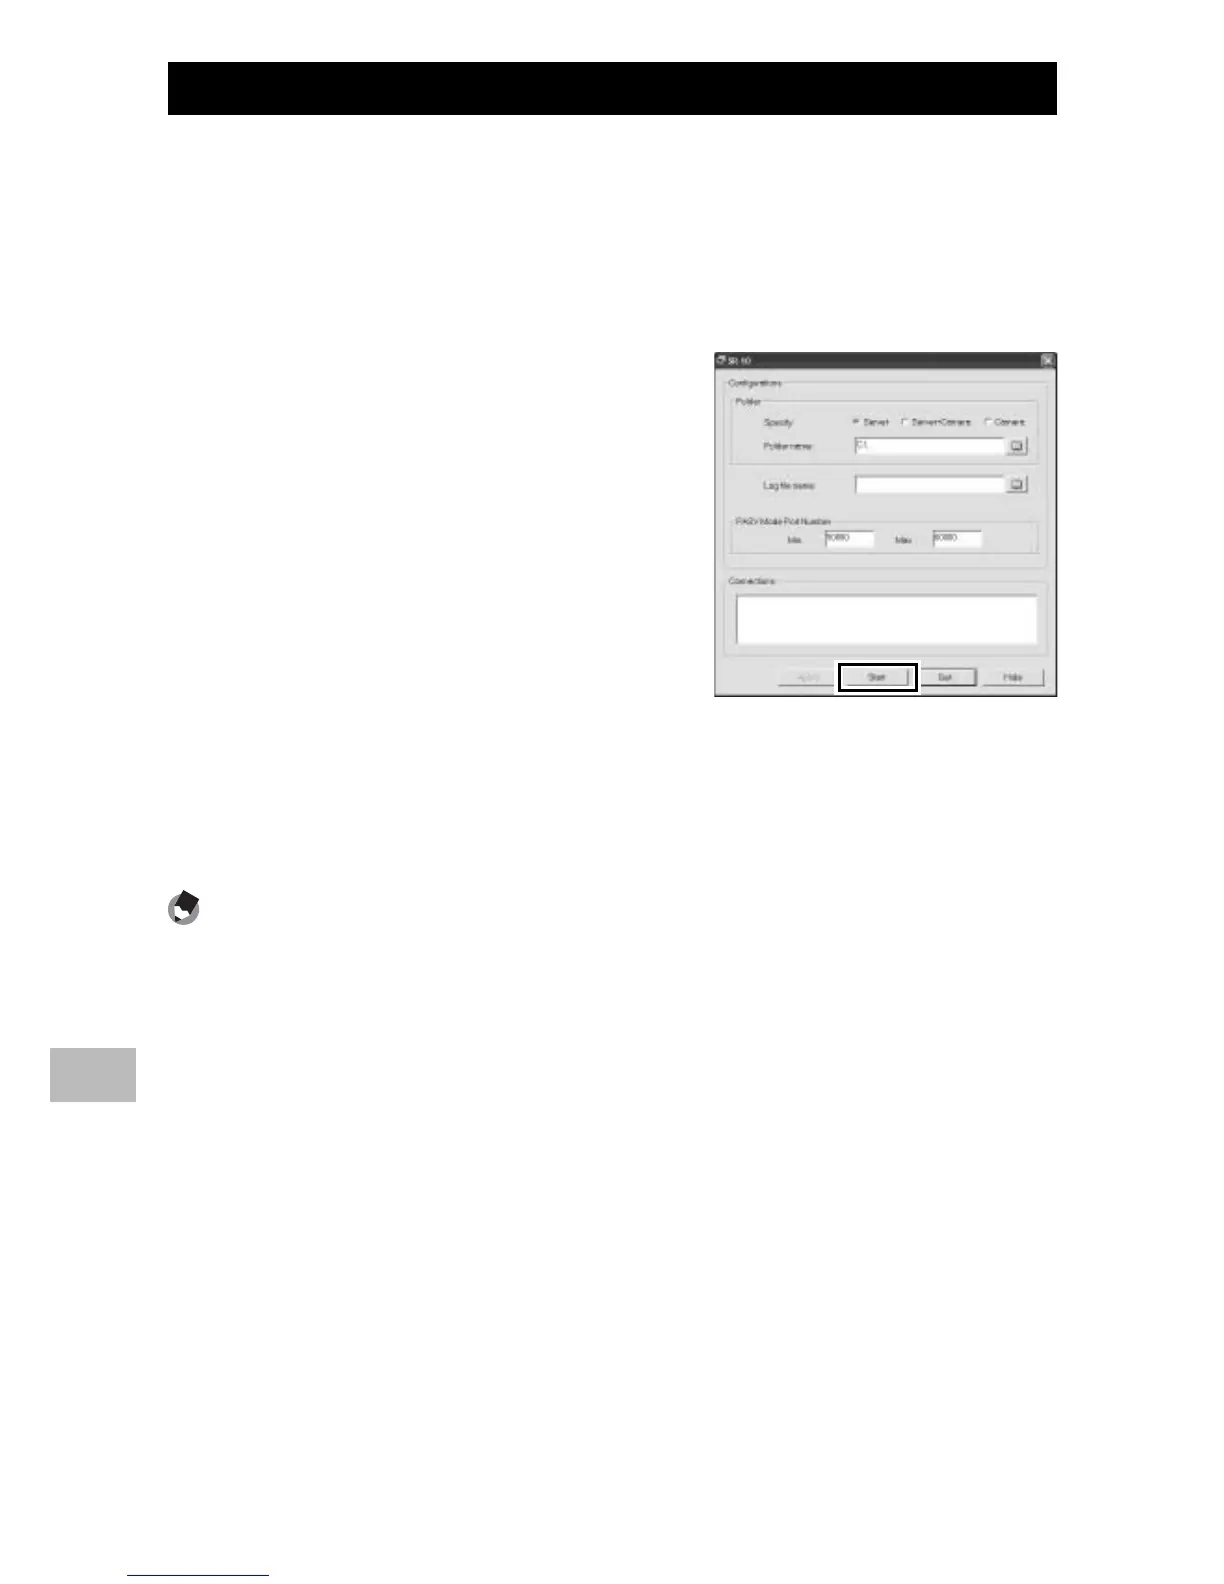
Start SR-10.
• In the Windows start menu, select [All Programs] > [Programs] >
[DC Software] > [SR-10].
2
Click [Start].
• The SR-10 window will be displayed;
click [Start] to start the ftp server. The
computer is now ready to receive
images from the camera. To hide the
SR-10 window during upload, click
[Hide]. SR-10 can be displayed again
by clicking the SR-10 icon in the
taskbar.
3
Upload images.
• Images are uploaded to the selected folder (GP.121). See P.105 and
112 for more information. Transfer status is displayed in the SR-10
[Connections] list.
Note -------------------------------------------------------------------------------------
If the destination folder contains an image with the same name as an image
uploaded from the camera, the image in the destination folder will be renamed
by adding a suffix assigned in ascending order from -001 to -999 to the end of
the file name. If an image with the same name and suffix already exists in the
destination folder, it will be overwritten.
 Loading...