4. Select the name whose fax destination you want to register.
Press the name key, or enter the registered number using the number keys.
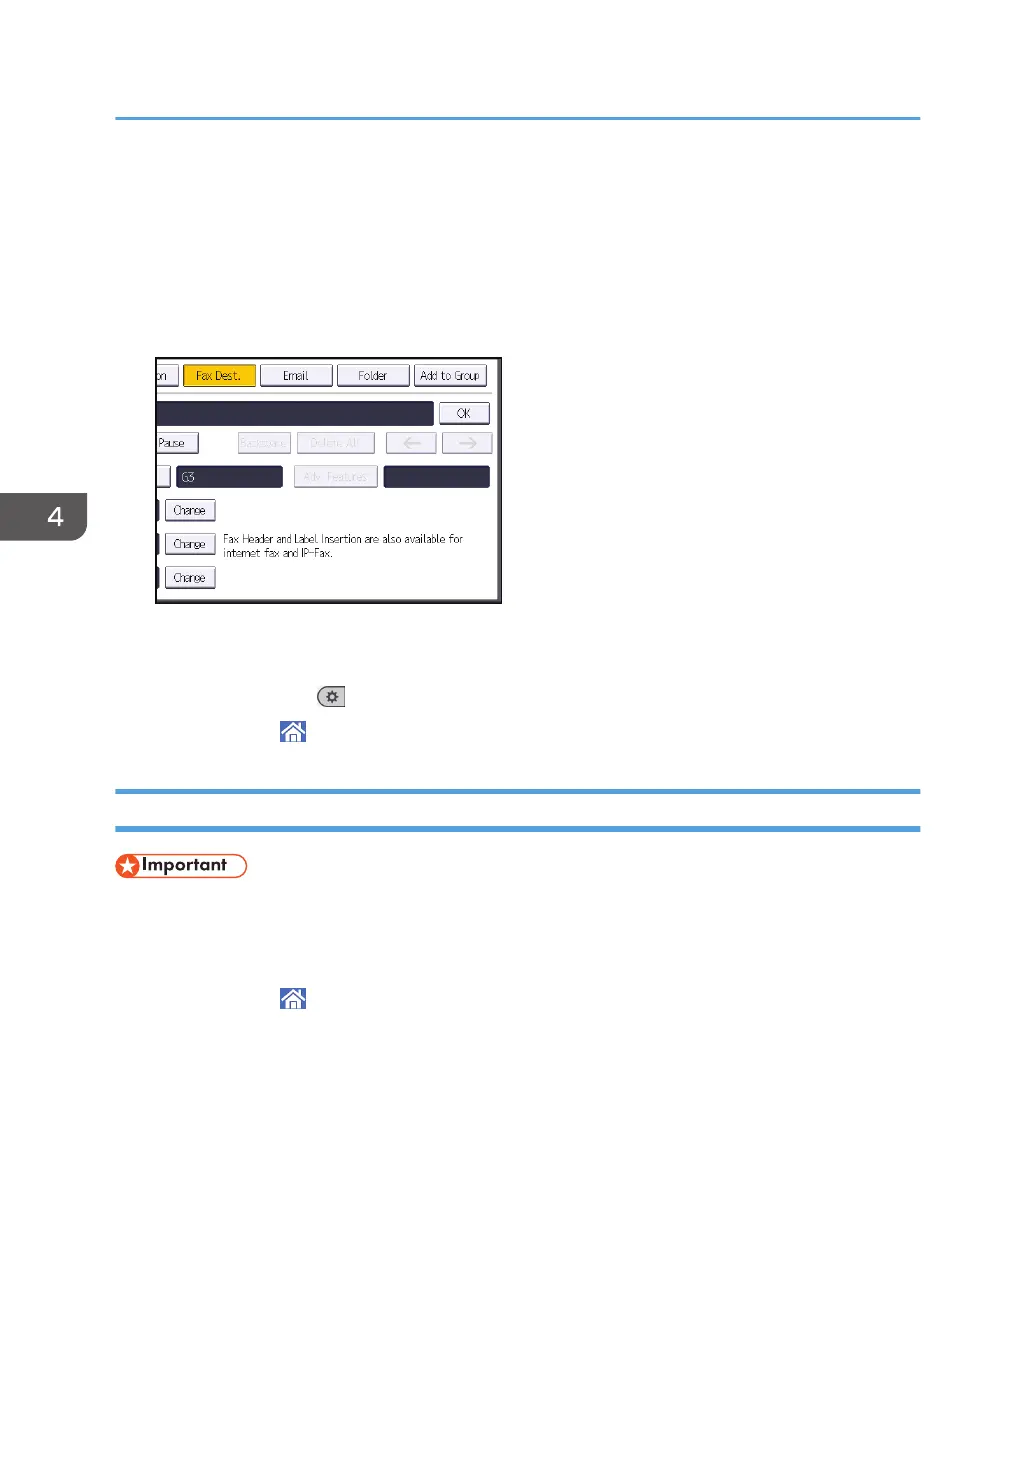
5. Press [Fax Dest.].
6. Press [Change] under "Fax Destination".
7. Enter the fax number using the number keys, and then press [OK].
8. Specify optional settings such as "SUB Code", "SEP Code", and "International TX Mode".
9. Press [OK].
10. Press [User Tools] (
) on the top right of the screen.
11. Press [Home] ( ) at the bottom of the screen in the center.
Deleting a Fax Destination
• If you delete a destination that is a specified delivery destination, messages to its registered
Personal Box, for example, cannot be delivered. Be sure to check the settings in the fax function
before deleting any destinations.
1. Press [Home] (
) at the bottom of the screen in the center.
2. Flick the screen to the left, and then press the [Address Book Management] icon.
3. Check that [Program / Change] is selected.
4. Select the name whose fax destination you want to delete.
Press the name key, or enter the registered number using the number keys.
You can search by the registered name, user code, fax number, folder name, e-mail address, or IP-
Fax destination.
5. Press [Fax Dest.].
6. Press [Change] under "Fax Destination".
4. Fax
82
 Loading...