46 Rockwell Automation Publication ENET-IN002H-EN-P - August 2017
Chapter 4 Set the Network IP Address
The 1756 EtherNet/IP communication modules are shipped with
this configuration:
• BOOTP/DHCP enabled
• Rotary switches set to 999 - when applicable
To reset the module factory default settings during normal module operation, see
Reset the Module IP Address to a Factory Default Value on page 54
.
These tools are used in this sequence to set the network IP address.
1. Set the Network IP Address with the Rotary Switches
2. Set the Network IP Address with the BOOTP/DHCP Server
3. Set the Network IP Address with RSLinx Software or the Studio 5000™
Environment
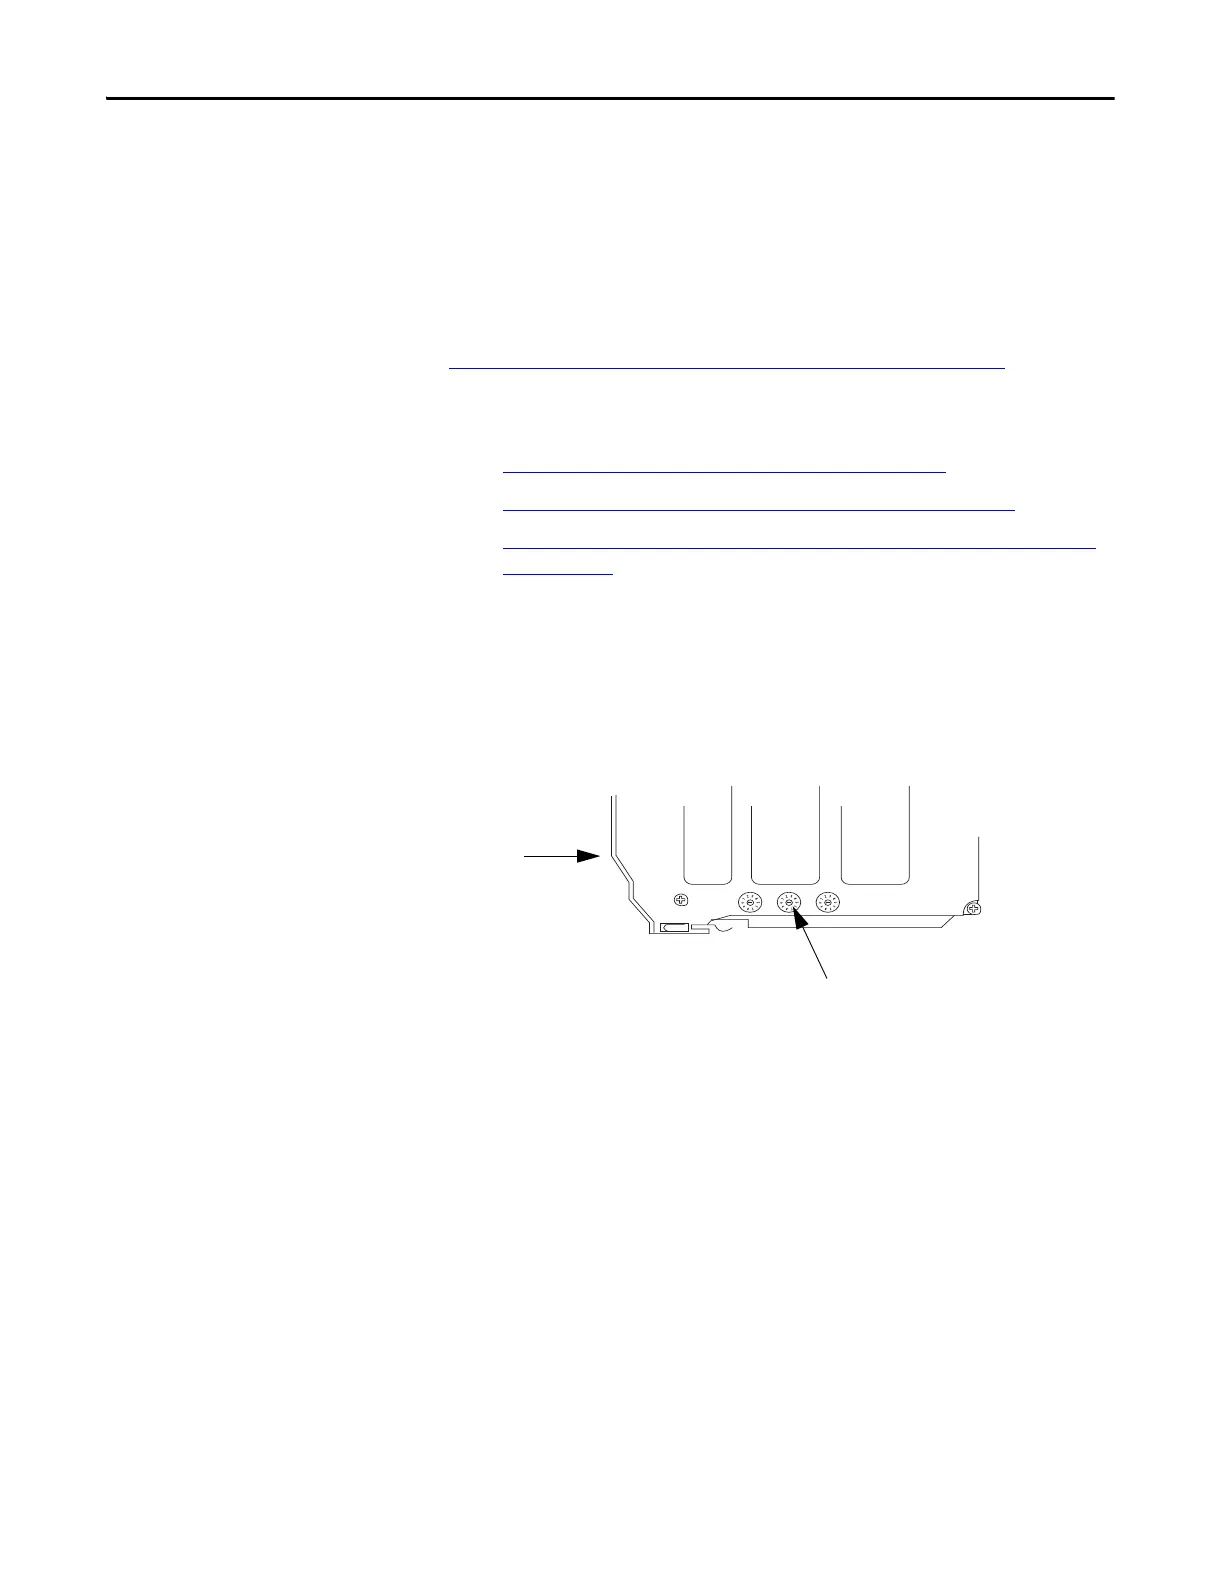
Set the Network IP Address with the Rotary Switches
This graphic shows the rotary switches on a 1756 EtherNet/IP communication
module. Depending on the module, the switches are on the top or the side of the
module.
At power-up, the module reads the rotary switches to determine if they are set to
a valid number for the last portion of the IP address. For example, if the numbers
are in the range from 001…254.
If the settings are a valid number, these conditions result:
• IP address = 192.168.1.xxx (where xxx represents the switch settings)
• Subnet mask = 255.255.255.0
• Gateway address
= 192.168.1.1 for firmware revision 5.008 or later
= 0.0.0.0 for firmware revision 5.007 or earlier
Rotary Switches
Front of
Module
 Loading...