118
Sampling
4.
Use or to select parameters that specify the input
source or triggering method for the sound you intend to
sample, and turn the VALUE dial or use [INC][DEC] to set
the value.
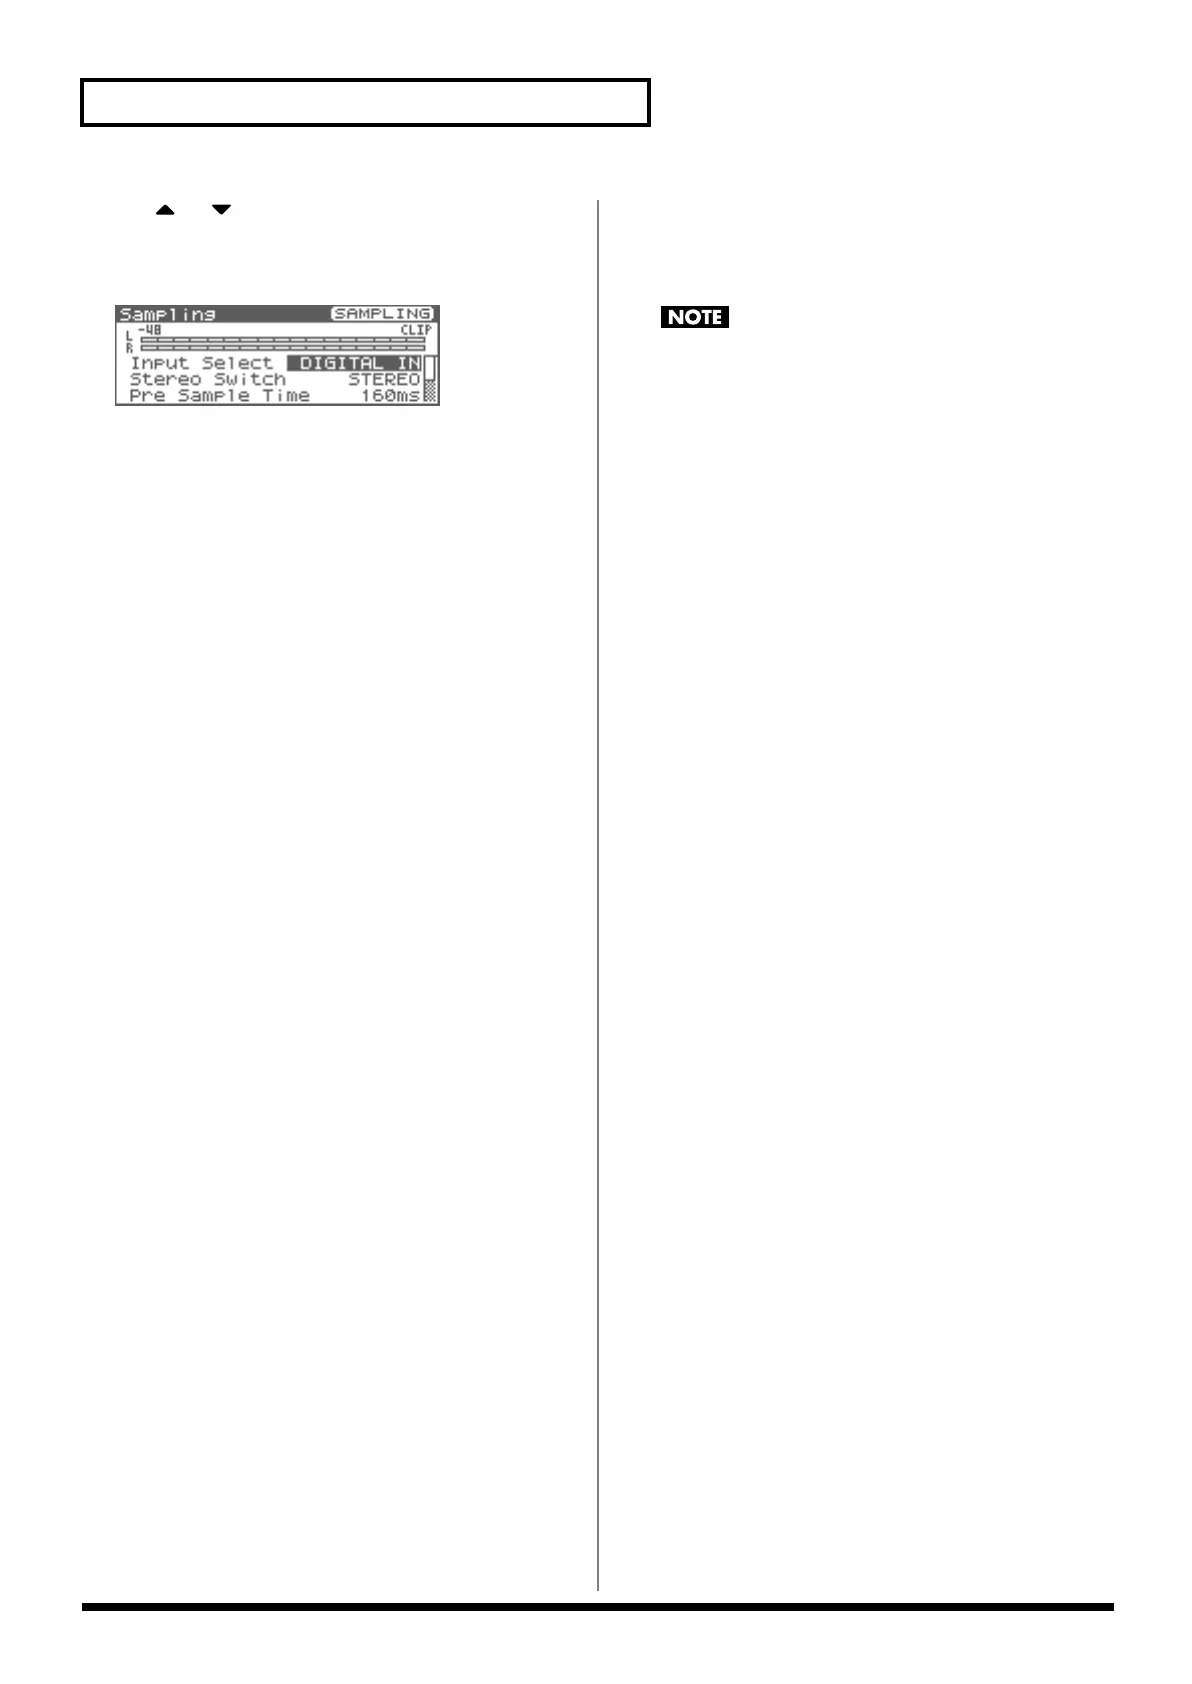
fig.14-006
•
Input Select
Specifies the input source of the sound that is to be sampled.
Value
DIGITAL IN:
DIGITAL IN connector
LINE IN L/R:
INPUT jacks L/R (stereo)
LINE IN L:
INPUT jack L (mono)
MICROPHONE:
INPUT jack L (mic level)
* This cannot be set when resampling.
•
Stereo Switch
Specifies whether the sound will be sampled in stereo or in
monaural. Mono sampling uses half as much memory space.
Value
MONO:
The sound will be sampled as one wave. If
the sound is stereo, the left and right signals
will be mixed.
STEREO:
The sound will be sampled as two waves, L
and R.
•
Pre Sample Time
The length of sound preceding the moment at which sampling
was manually or automatically initiated that will be captured in
the sample. This lets you prevent the attack portion of the
sound from being omitted from the sample.
Value:
0–1000 ms
•
Stop Trigger
Specifies how sampling will end.
Value
MANUAL:
Continue sampling until you press
[SAMPLING].
BEAT:
Sample the specified number of beats at the
current tempo (BPM).
TIME:
Sample the specified length of time.
•
Length
You can specify this if Stop Trigger is “BEAT” or “TIME.”
Value
Sampling Length When Stop Trigger is “BEAT”:1–20000:
Number of beats to continue sampling
When Stop Trigger is “TIME”:00’00”010–:length of time to
continue sampling. The sampling time actually available will
depend on the amount of memory.
• Auto Trigger Sw (Auto Trigger Switch)
If this is “ON,” sampling will begin automatically when the
input sound is detected.
Value:
ON–OFF
Before you turn Auto Trig on, perform steps 6 to set the input
level.
•
Auto Trigger Level
This specifies the volume at which sampling will begin when
Auto Trigger Sw is “ON.”
Value:
0–7 (A setting of 0 is the minimum.)
• Gap Time
Specifies the length of the silences at which the sample will be
divided if the Sampling Mode is set to Auto Divide. Whenever
there is a silent region longer than the specified time, the sample
will be divided at that point, and the next sample number will
be assigned to the sound that follows.
Value:
500, 1000, 1500, 2000 ms
* This parameter is valid only when you are using Auto Divide
Sampling.
•
Trimming Switch]
If this is turned on, the Start point and End point settings (p.
122) will be automatically adjusted after sampling is performed,
so any silent portions at the beginning or end of the sampled
sound are excluded.
5.
Play the external input source.
If you’re resampling, play the internal sound generator.
* If Auto Trigger Sw is “ON,” sampling will begin automatically.
6.
If you’re inputting from the INPUT jacks, turn the INPUT
knob to adjust the input level of the external source.
* If you’re using DIGITAL IN, this adjustment is not necessary.
* If the volume of the external source is too high, the PEAK indicator
will light. If this occurs, turn down the INPUT knob until the PEAK
indicator no longer lights.
* If the level meter in the display lights near “CLIP,” the level of the
sound you’re sampling is too high. In this case, adjust the level by
lowering the effect level or adjusting the mastering parameters.
926a*
* Using a connection cable that contains a resistor can cause the sound
level to be low. Use a connection cable that does not contain a resistor.
7.
Press [SAMPLING] to begin sampling.
Fantom-XR_r_e.book 118 ページ 2006年4月4日 火曜日 午前10時14分

 Loading...