InstallationInstallation
Ø Step 2: Hang the inverter on the bracket
c)
Expansion bolts
Rubber hammer
5.6 Mounting
Ø Preparation
Ø Step 1: Fix the wall bracket to the wall
Please prepare the following tools before installation.
Installation tools: screwdriver, wrench, Φ10 drill, rubber hammer, socket
wrench set, hexagon keys and spirit level.
Expansion bolts, Gasket, Tapping screws
a) Draw drilling holes as per the bracket's hole locations by a marker,
and ensure that the two top holes lie on the same straight line by spirit
level.
b) Drill holes at marked spots at depth of 80 mm.
Bracket
32
33
a)
Regarding the installation of M-series inverter, please refer to the X1-
Matebox Quick Installation Guide.
b)
Φ10 Drill
(Depth: 80 mm)
80
m
m
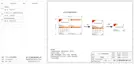
First find the expansion screw and the wall bracket in the accessory bag, as
shown below:
c) Insert expansion bolt into the holes, use rubber hammer to knock the
expansion screw bolt into the wall;
d) The bracket is aligned with the screw uses the outer hexagonal wrench
to screw the tapping screw until the expansion bolt "bang" is heard.
Self-tapping
screws
Gasket
d)
Outer hexagon wrench

 Loading...