7 mm
Wire stripper
Ø Battery Breaker
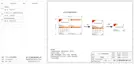
Ø Battery connection diagram
High voltage lithium battery
- +
CAN/RS485
Non-polar
DC MCB
Power line connection
Communication line connection
... ...
Ø Battery connection steps
Ø Connection requirements
Electrical Connection
Electrical Connection
6.4 Battery Connection
Battery port connection line of the M series inverter is on the X1-Matebox,
just connect it. It is necessary to wire the D series according to the
following steps.
48
49
The series inverter charge and discharge system can be equipped with high
voltage lithium battery and lead acid battery.
Please note that the maximum voltage of the battery should not exceed
480 V, battery communication should be compatible with the this inverter.
Before connecting the battery, a non-polar DC MCB must be installed to
ensure safety.
Before maintenance, the inverter need to be safely disconnected.
Notice:
When using batteries, it is recommended that the number
of battery control (T-BAT-5.8) is 1 and the number of battery
modules (HV11550) is 0-2 pcs. The number of battery control (MC0600)
is 1 and the number of battery modules (HV10230) is 1-4 pcs.
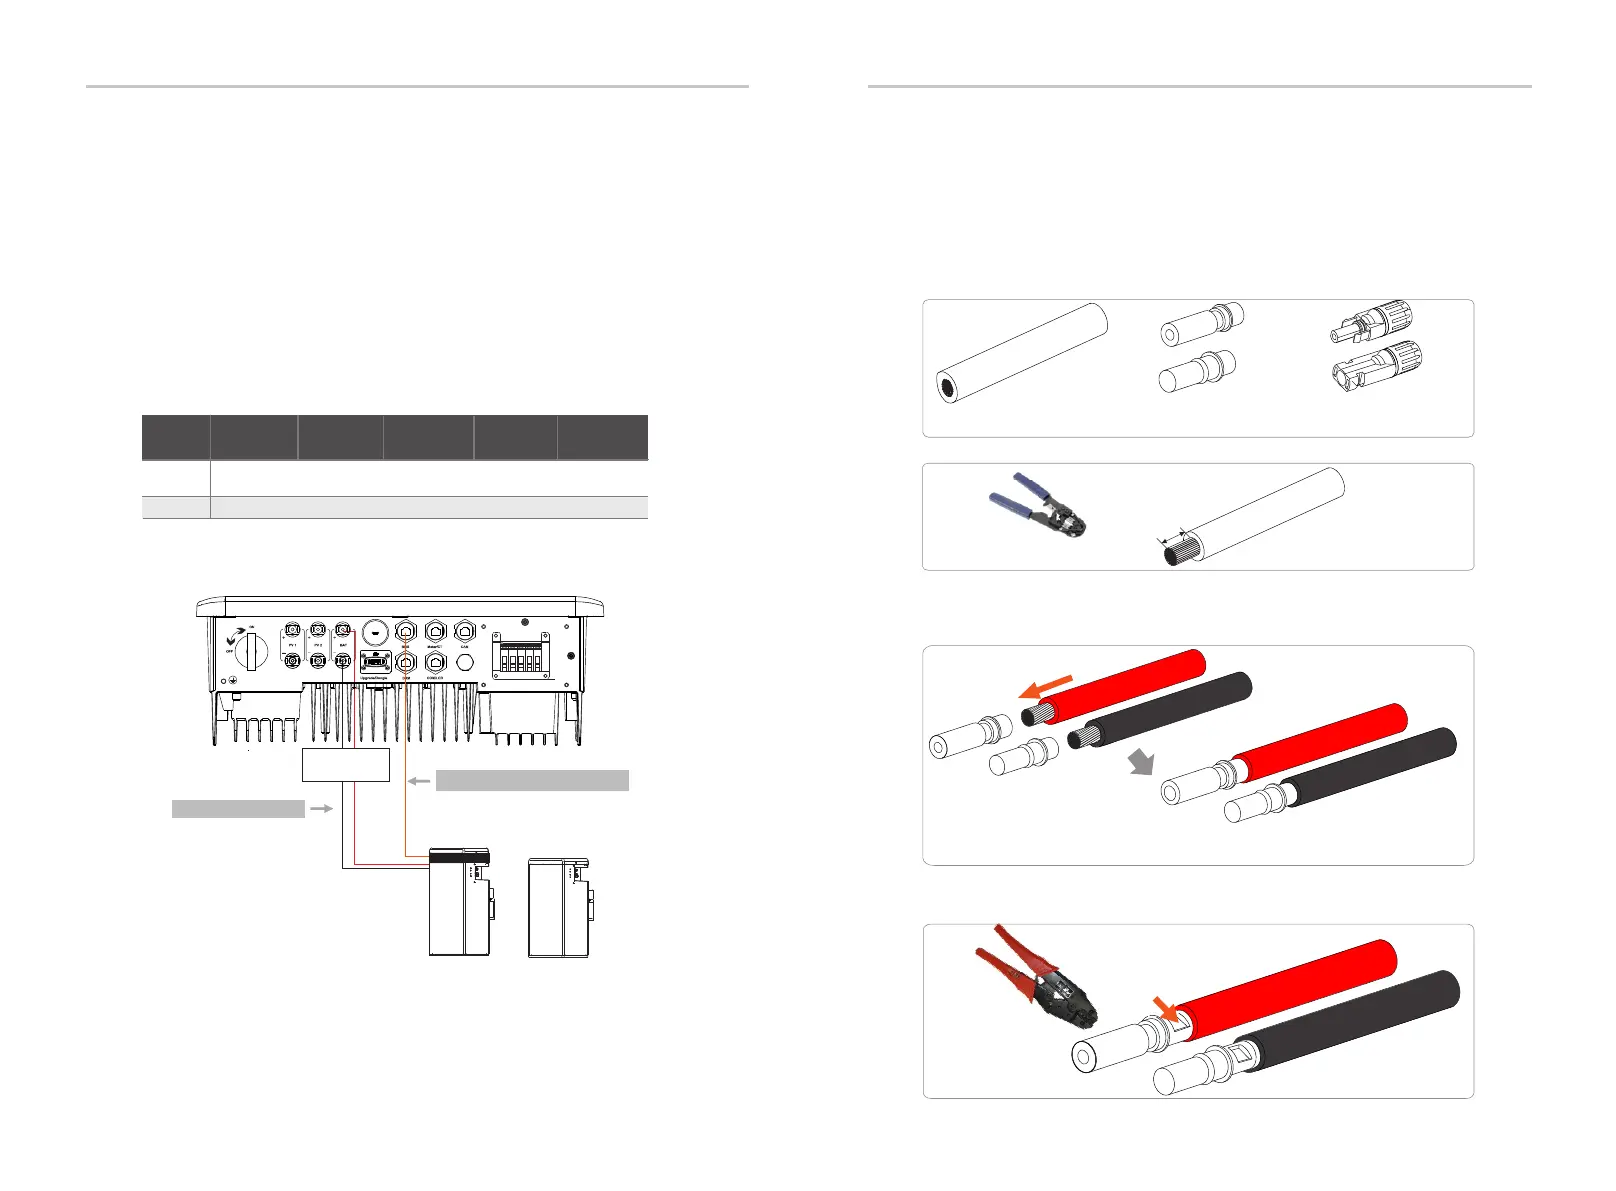
Step 1. Turn off the DC switch, connect the BAT module, prepare a 6 mm
Power line, and find the BAT (+) terminal and BAT (-) terminal in the package.
Step 2. Use a wire stripper to strip the 7 mm insulation layer of the wire end.
Figure 1
Positive BAT pin
Negative BAT pin
Figure 2
Positive metal terminal
Negative metal terminal
Step 3. Tighten the cable with the insulation layer stripped and insert it
into the metal terminal (see Figure 1), make sure all wires are inserted into
the metal terminal (see Figure 2).
Negative terminal
Positive terminal
Power line
Positive BAT pin
Negative BAT pin
Crimping Tool
Step 4. Tighten the BAT pin contact and the wiring harness to make the
connection tight without looseness.
Voltage
Current[A]
32 A
Nominal voltage of DC breaker should be larger than maximum
voltage of battery.
Model
X1-Hybrid-3.0-D
X1-Hybrid-3.0-M
X1-Hybrid-3.7-D
X1-Hybrid-3.7-M
X1-Hybrid-6.0-D
X1-Hybrid-6.0-M
X1-Hybrid-7.5-D
X1-Hybrid-7.5-M
X1-Hybrid-5.0-D
X1-Hybrid-5.0-M
X1-Hybrid-5.0K-D
 Loading...