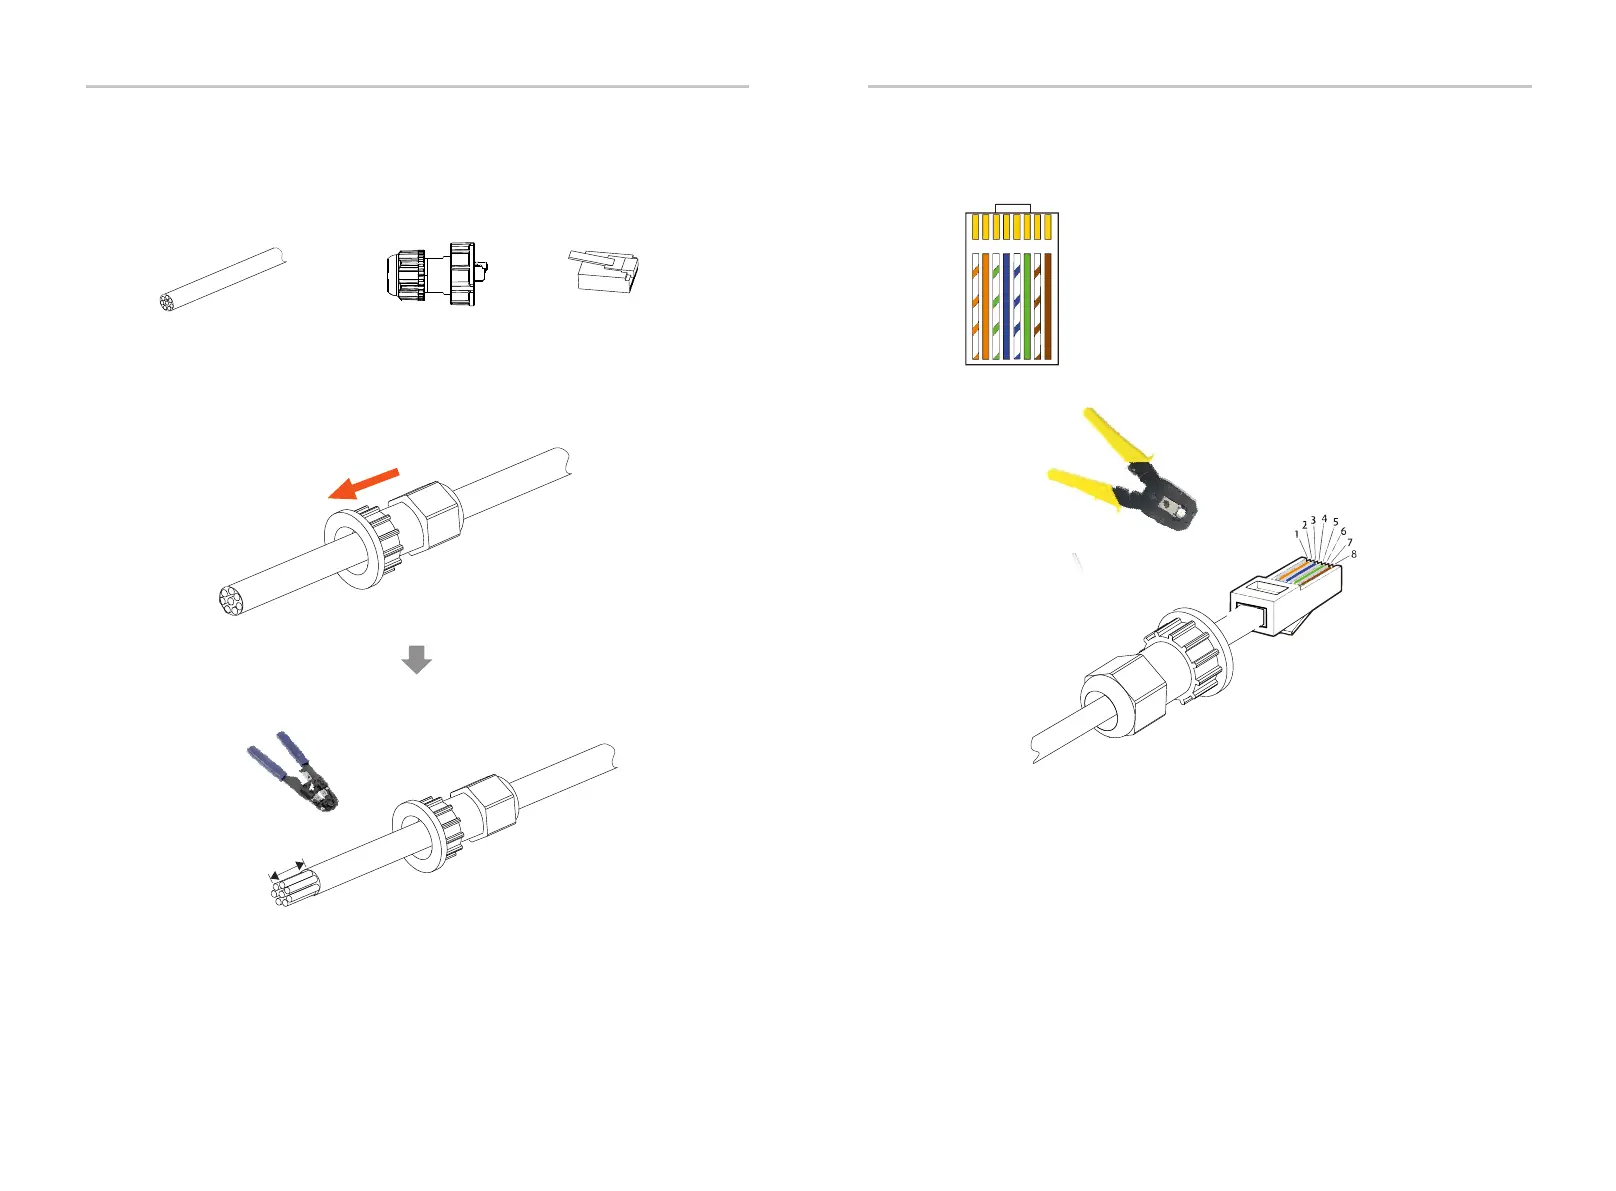
Communication cable
Waterproof connector with RJ45
1
5 mm
1 2
3
4
5
6 7 8
1) White with orange stripes
2) Orange
3) White with green stripes
4) Blue
5) White with blue stripes
6) Green
7) White with brown stripes
8) Brown
Multifunction terminal
Diagonal pliers
crimping tool (RJ45)
Electrical Connection
Electrical Connection
6.5.5 Communication Connection Steps
RJ45 terminal
64
65
Step 1. Prepare a communication cable, and then find the communication
adapter in the accessory bag.
Step 2. Insert the communication cable through the communication
adapter, and peel off the outer insulation layer of 15 mm.
Step 3. Insert the prepared communication cables into the RJ45 terminals
in sequence, and then use network cable crimping pliers to press them
tightly.

 Loading...