8 Setting
8.1 Control Panel
Setting
(k)
Upgrade(DSP)
Upgrade Successful
Update(DSP)
connect
Update(DSP)
>618.xxxxx.00_HYB_
1P_DSP_Vx.xx_
xxxxxxxx.usb
(g)
Update
ARM
>DSP
( f)
(h)
Caution!
Update(DSP)
Upgrading---------25%
Update(DSP)
(i)
(j)
DSP Erasing---------
Firmware Upgrading
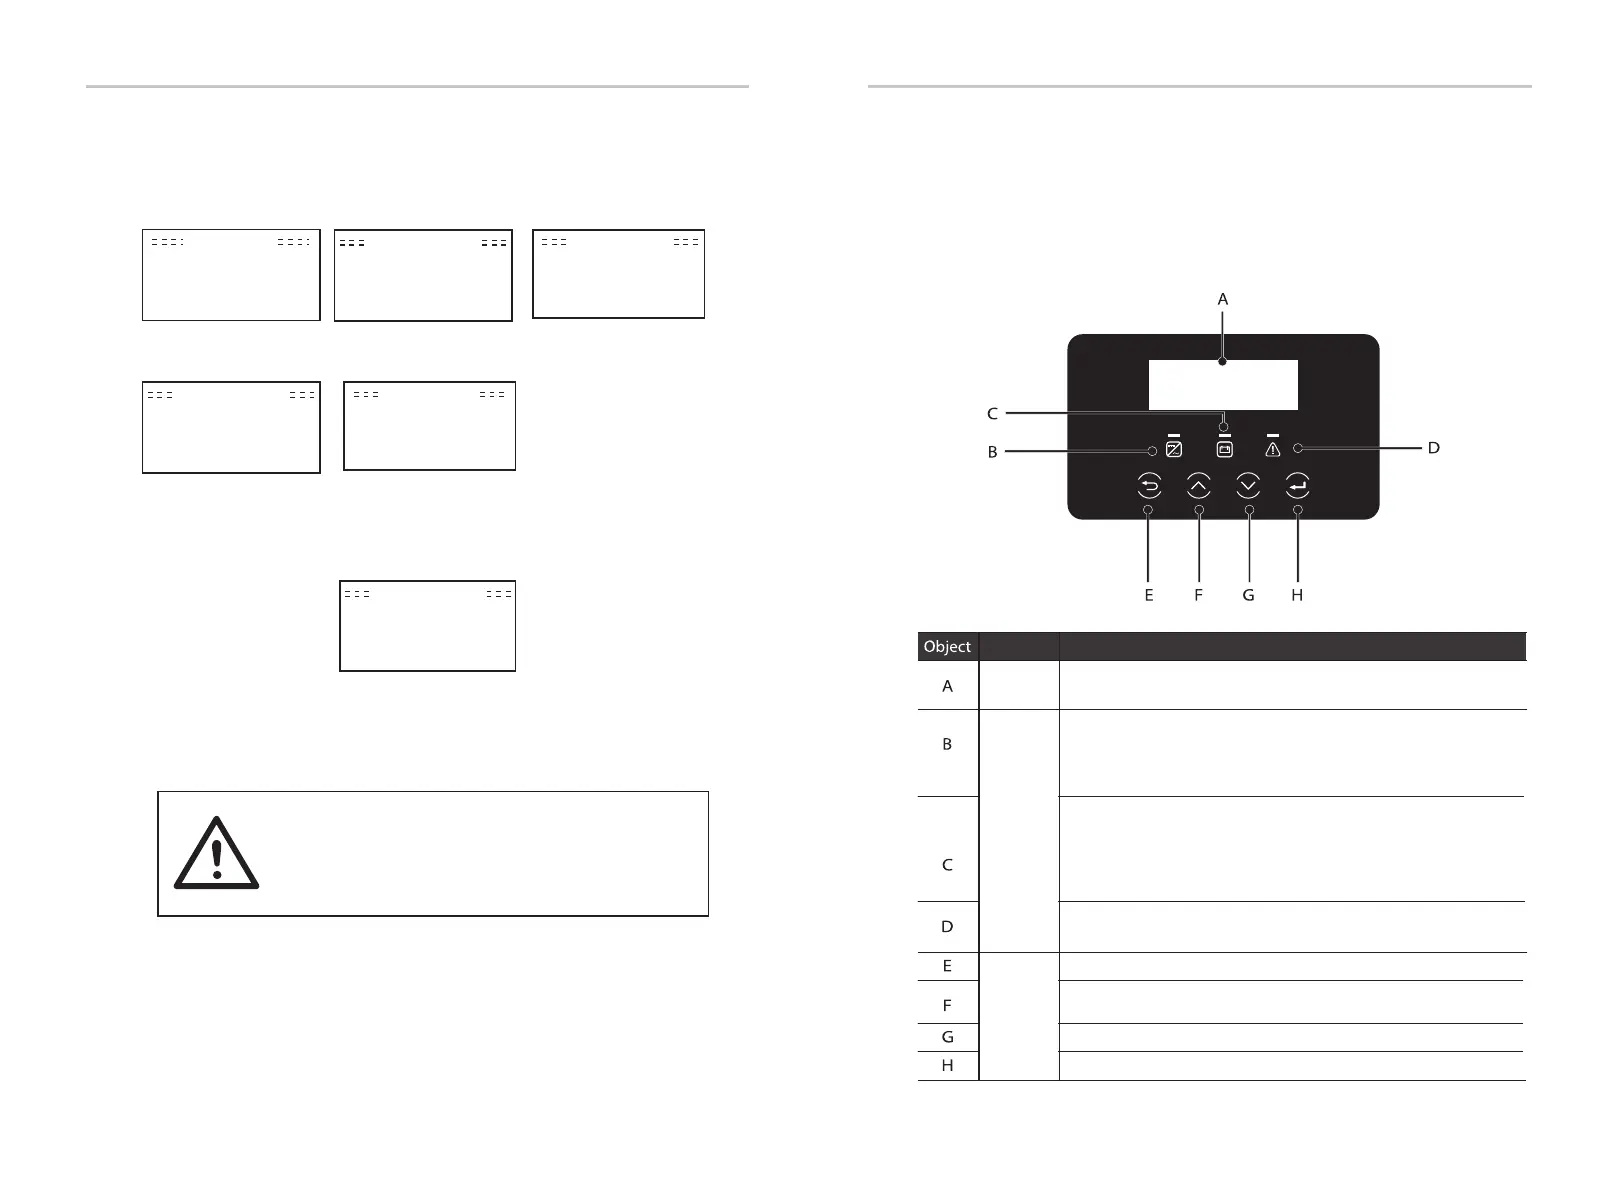
LED
Key
Down button: Move the cursor down or decrease the value.
ESC button: Return from the current interface or function.
Enter button: Confirm selection.
Up button: Move the cursor to the upper part or increase the
LCD
Display inverter information on the LCD display.
Description
Name
Blue light: The inverter is in normal state or EPS(Off-grid) mode.
Blue flashing: The inverter is in the waiting, checking state
or the system switch is off.
Off: The inverter is in a fault state.
Green: The battery communication is normal and working
normally.
Green flashing: The battery communication is normal and
in an idle state.
Off: The battery does not communicate with the inverter.
Red light on: The inverter is in a fault state.
Off: The inverter has no error.
Indicator
Screen
light
Function
value.
78
79
Step 6. After the upgrade is completed, the LCD screen displays "Upgrade
Successful".
Step 5. For DSP: Please wait for 10 seconds. When "Update" page shown as
as below, press down to select "DSP" and then press Enter. Please confirm
the firmware version again and press Enter to upgrade. The upgrade takes
about 2 minutes.
Step 7. Plug off the U disk, press "Esc" to return to the main interface, and
long press the enter key to exit the mode.
-Please strictly follow each step from step 1-6, don't miss
it.
-Please confirm the ARM/DSP firmware version on the
USB flash drive.
Tip: If the display screen is stuck on "X1-Hybrid G4" after the upgrade, please
turn off the photovoltaic power supply and restart, and the inverter will
restart and return to normal. If not, please contact us for help.
 Loading...