FUEL SYSTEM 4-19
CARBURETOR CLEANING
"
Some carburetor cleaning chemicals, especially dip-type
soaking solutions, are very corrosive and must be
handled carefully. Always follow the chemical
manufacturer’s instructions on proper use, handling and
storage.
• Clean all jets with a spray-type carburetor cleaner and dry them
using compressed air.
• Clean all circuits of the carburetor thoroughly – not just the
perceived problem area. Clean the circuits in the carburetor
body with a spray-type cleaner and allow each circuit to soak, if
necessary, to loosen dirt and varnish. Blow the body dry using
compressed air.
%
Do not use a wire to clean the jets or passageways. A
wire can damage the jets and passageways. If the com-
ponents cannot be cleaned with a spray cleaner it may
be necessary to use a dip-type cleaning solution and al-
low them to soak. Always follow the chemical
manufacturer’s instructions for proper use and cleaning
of the carburetor components.
• After cleaning, reassemble the carburetor with new seals and
gaskets.
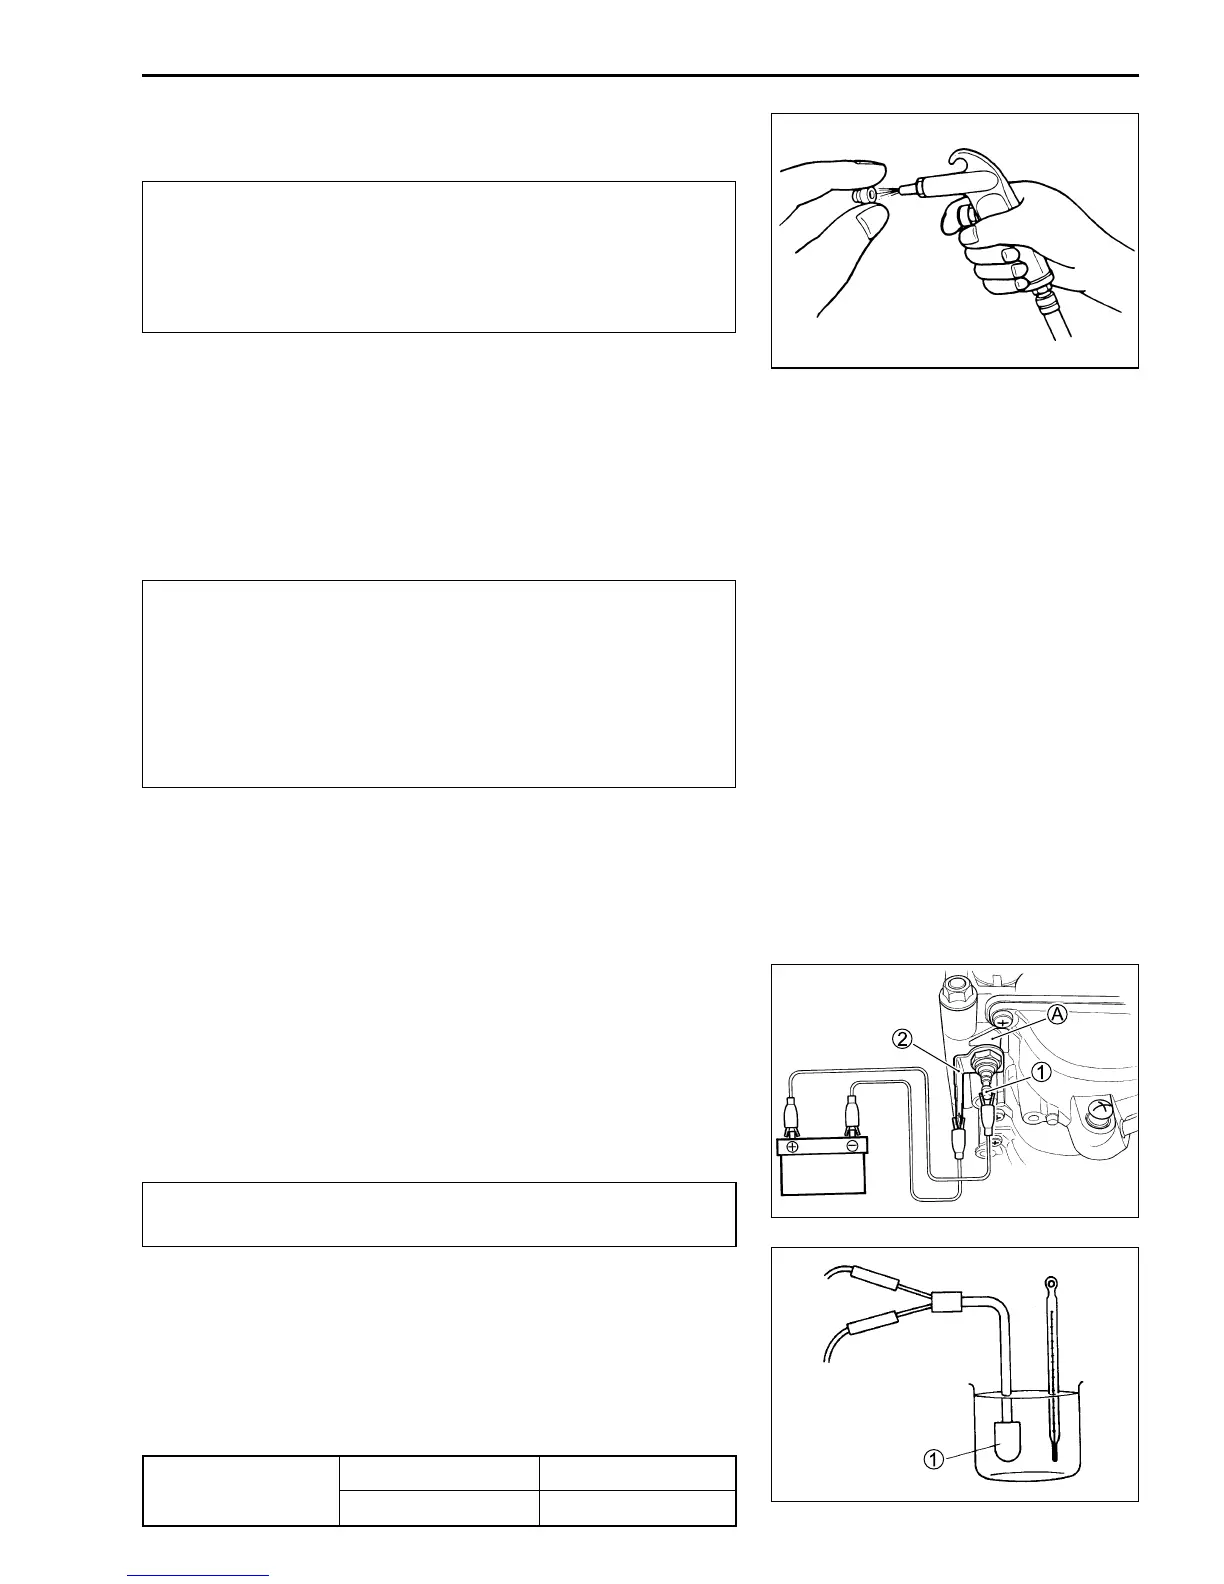
CARBURETOR HEATER INSPECTION
(Only for E-02)
• Remove the carburetor assembly. (!4-14)
• Disconnect the carburetor heater terminal lead wires.
• Connect the positive
+
terminal of a 12V battery to the termi-
nal 1 of the carburetor heater and the battery negative
-
ter-
minal to the terminal 2.
• Check that the heater section A is heated in 5 minutes after
the battery has been connected. If the carburetor heater is not
heated up, replace the carburetor heater with a new one.
"
Do not touch the carburetor heater directly to prevent
burn.
THERMO-SWITCH INSPECTION
(Only for E-02)
• Cool the thermo-switch 1 with ice water and check for continu-
ity.
& 09900-25008: Multi-circuit tester
'
Thermo-switch
Below 8 – 14°CYes
continuity
Above 15 – 21°CNo

 Loading...