InstallingtheBattery
1.Alignthebatterytothebatterytrayofthe
machine(Figure40).
Note:Ensurethatthepositiveandnegative
postsofthebatteryarealignedasshownin
Figure40.
2.Securethebatterytothebatterytraywiththe
batteryclamp,carriagebolt,andlocknut(Figure
40).
3.Connectthebatterycables;refertoConnecting
theBattery(page39).
ConnectingtheBattery
1.Connectthepositivebatterycabletotheterminal
ofthebattery(Figure40).
2.Connectthenegativebatterycabletothe
terminalofthebattery(Figure40).
3.Installthebatterycoverontothetopofthe
battery(Figure40).
ChargingtheBattery
WARNING
Chargingthebatteryproducesgassesthat
canexplode.
Neversmokenearthebatteryandkeepsparks
andamesawayfrombattery.
Important:Alwayskeepthebatteryfullycharged
(1.260specicgravity).Thisisespecially
importanttopreventbatterydamagewhenthe
temperatureisbelow0°C(32°F).
1.Removethebatteryfromthemachine;referto
DisconnectingtheBattery(page38).
2.Connecta3to4Abatterychargertothebattery
posts.Chargethebatteryatarateof3to4A
for4to8hours(12V).
Note:Donotoverchargethebattery.
3.Installthebatteryinthechassis;referto
InstallingtheBattery(page39).
StoringtheBattery
Ifyouarestoringthemachineformorethan30days,
removethebatteryandchargeitfully.Eitherstore
itontheshelforonthemachine.Leavethecables
disconnectedifitisstoredonthemachine.Store
thebatteryinacoolatmospheretoavoidquick
deteriorationofthechargeinthebattery.Toprevent
thebatteryfromfreezing,makesurethatitisfully
charged.
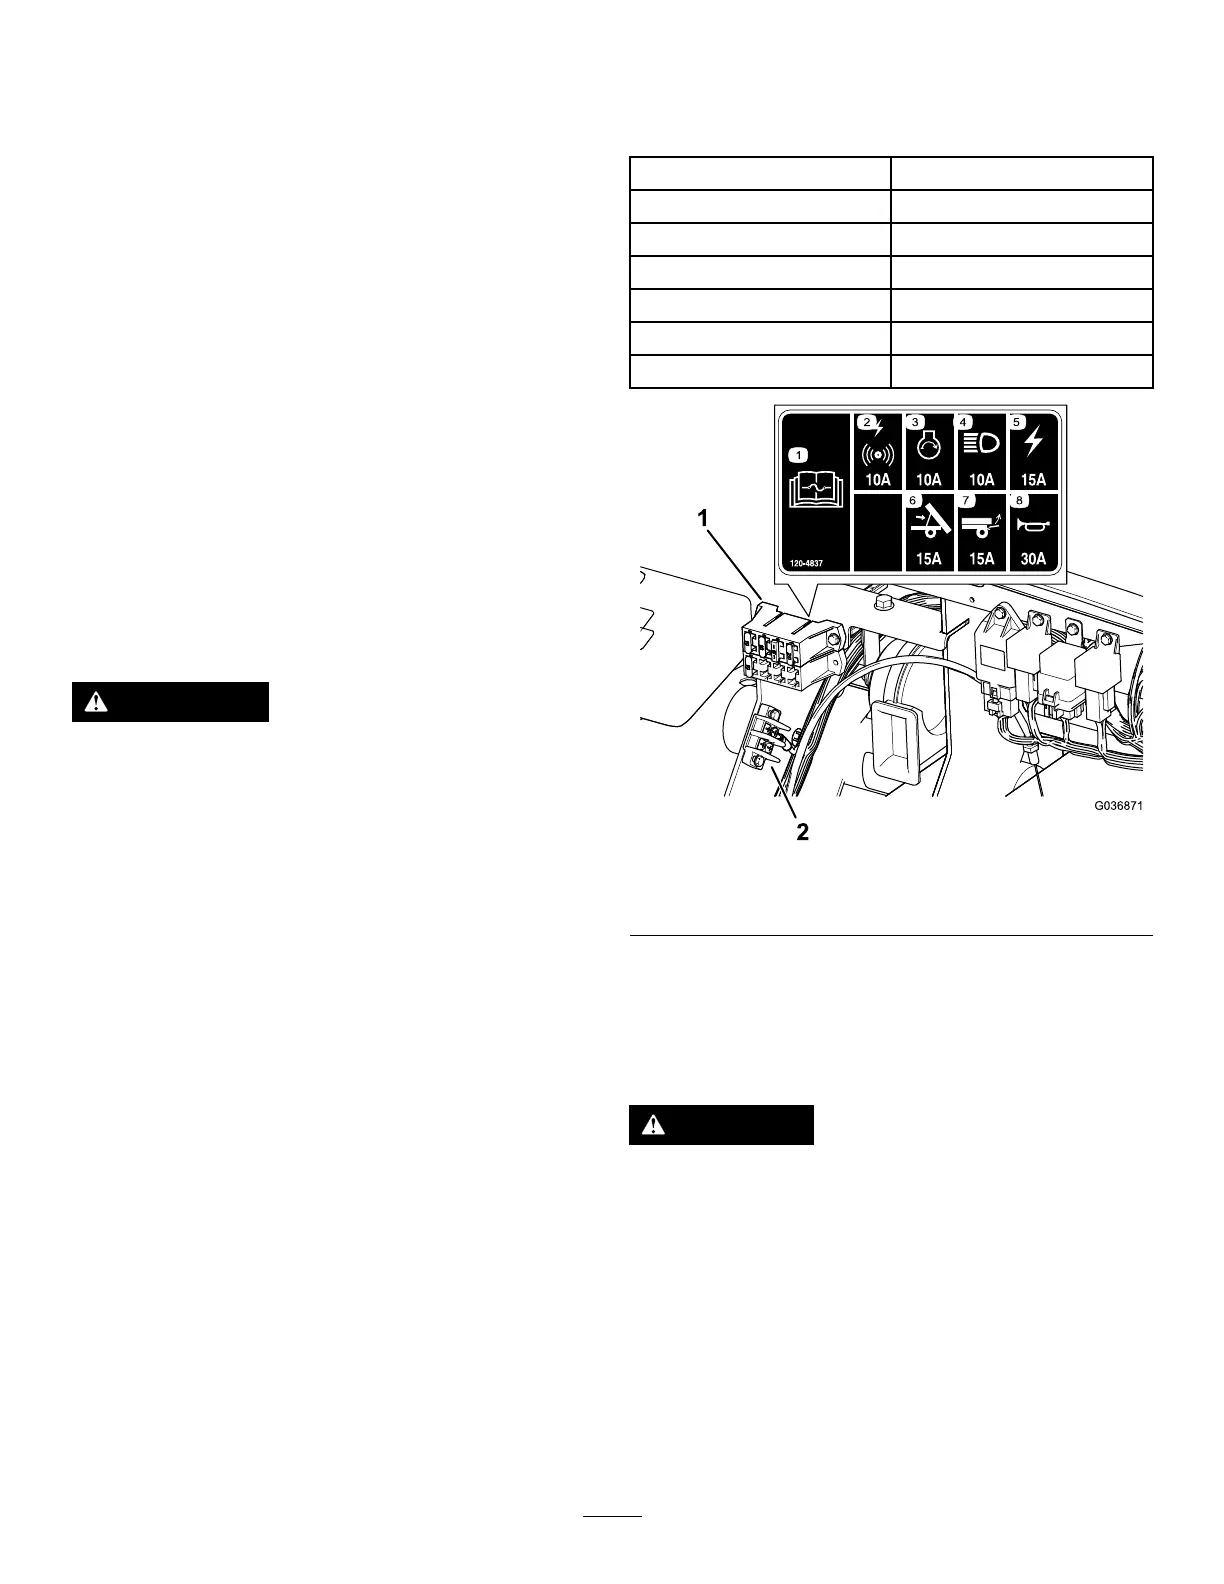
ReplacingtheFuses
Thereare7fusesintheelectricalsystem.Theyare
locatedbeneaththehood(Figure41).
Alarm/PowerPoint
10A
Engine10A
Headlights10A
Machinefuse
15A
Lift
15A
Rearlift
15A
Horn30A
g036871
Figure41
1.Fuseblock
2.Groundblock
MaintainingtheHeadlights
ReplacingtheBulbs
CAUTION
Ifyouinstallahigherwattagebulbthanthe
systemisdesignedfor,youmaydamagethe
12Vpowersupply,orataminimum,blowthe
fuse.
AlwaysusethespeciedToroLEDbulbto
preventthisissue.
39

 Loading...