BAS-SVX04A-EN • Wireless Zone Sensor 13
The following procedure list shows the recommended order for installation:
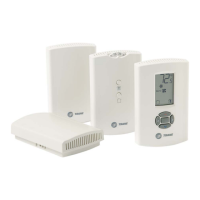
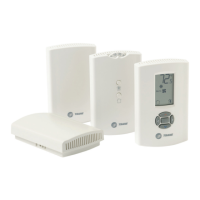
• Choosing a location for mounting the receiver and sensor
• Setting the rotary switches on the receiver and the sensor
• Mounting the base plate of the receiver
• Wiring the receiver to the unit controller
• Replacing and securing the receiver cover
• Applying power to the receiver
• Powering the sensor and associating the sensor to the receiver
• Testing signal and battery strength
• Automatic association
• Manual association
• Mounting the base plate of the sensor
• Replacing and securing the sensor cover
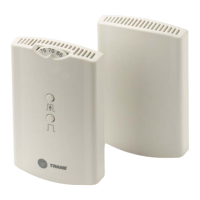
Choosing a Location for Mounting the Receiver and Sensor
Placement of the receiver and the sensor set is critical to proper operation. In
most installations, distance is not the limiting factor for proper radio signal
quality. It is more greatly affected by walls, barriers, and general clutter. For best
radio transmission range and reliability, wherever possible, mount the receiver
and sensor in line of sight. Try to minimize the number of barriers between the
pair of devices. In general, sheetrock walls and ceiling tiles offer little restriction
to the propagation of the radio signal throughout the building; concrete or metal
barriers offer the most restriction.
The transmission range for the sensor is as follows:
• Open range: 2,500 ft (762 m) (packet error rate = 2%)
• Usable range: 200 ft (61 m)
• Typical range: 75 ft (23 m)
Location Considerations for the Receiver
When selecting a location for the receiver, consider both ambient and radio
transmission characteristics of the location.
Ambient considerations
• Avoid locations that are outside the operating temperature and humidity
range (refer to
Tab l e 11 , p . 45).
Setting the Address, Mounting, Wiring,
and Associating the Receiver and
Sensor
 Loading...