79
Repair instructions
Assembly
Oil all moving parts and the screws prior to as-
sembly.
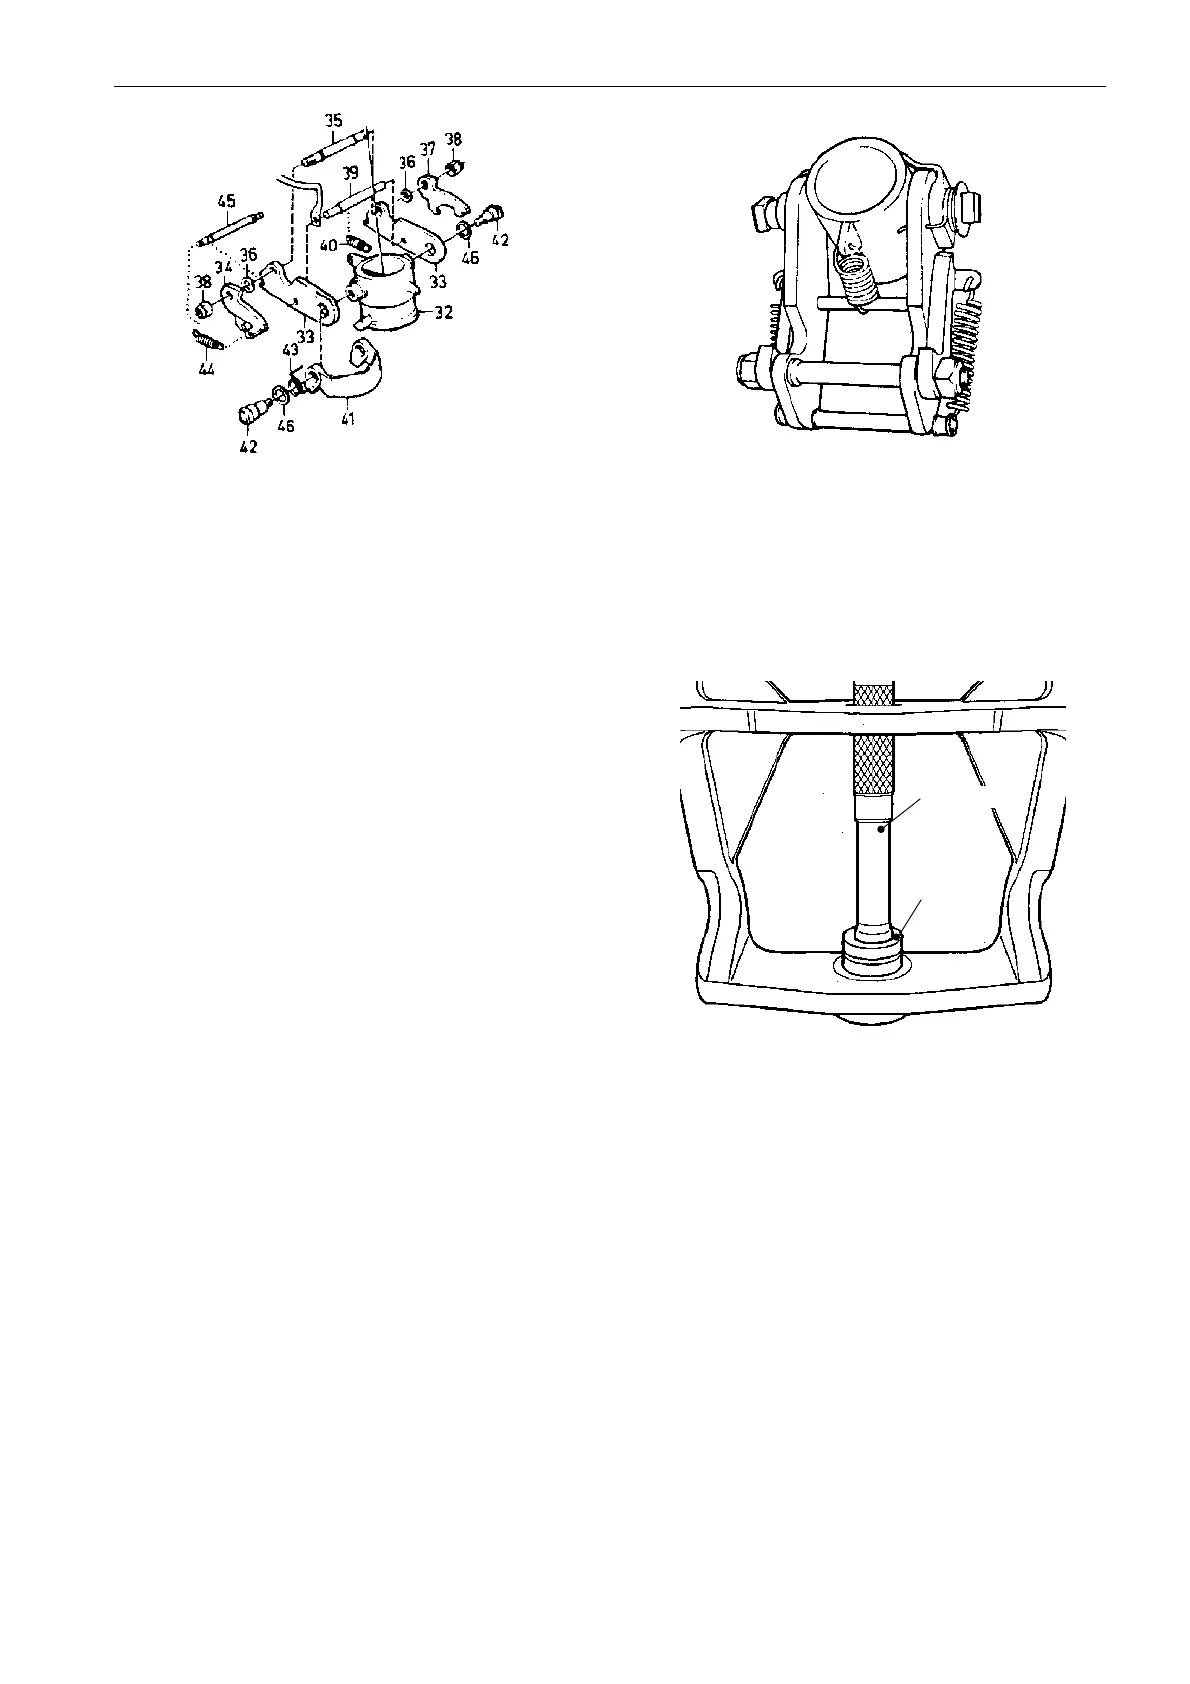
7. If necessary the retaining pawl is dismantled as fol-
lows:
Remove the shaft journals (42). Remove the spring
(43) the spring (40) and the springs (44).
NOTE! Hold the spring shaft (45). Remove the nuts
(38) and spring catches (34) and (37) and the spacer
washers (36) as well as the retaining pawl (33). Re-
move the bearing (32) and the shaft (35). Clean the
parts and check for wear. Replace parts if necessary.
8. Install the shaft (35, picture above) on one of the
retaining pawls (33) and install the spacer washer (36)
and the spring catch (34). Install one of the nuts (38)
on the shaft. Then place the stop shaft (39) and the
bearing (32) in the retaining pawl half. Then install
the remaining retaining pawl (33) and the spring
catch (37) the spacer sleeve (36) on the shaft (35)
and the bearing (32). Install the second nut (38).
NOTE! Tighten the nuts (38) completely. Then ease
off a 1/8 turn to allow the spring catches to move
without adding a play. Then install the locking yoke
(41) and the shaft journals (42) with the spring (43)
and the washer (46) in the bearing (32). Install the
spring shaft (45) in its location with the assistance of
the springs (44) and install the spring (40) between
the bearing (32) and the stop shaft (39).
9. Paint the retaining pawl with a thin layer of
”touch-up paint”. Painting is hard to do when the pawl
is assembled.
The picture reflects an assembled retaining pawl.
10. Grease the needle bearing with an universal type
of grease and press it into the center of the yoke. Use
special tools 884259 and 9991801. Turn the bearing
in a way that the tool is pressing against the side
where the material is at the thickest (where the text is
stamped into the material).
9991801
884259
 Loading...