38
38
Index
Contents
IndexContents
ORIENTATION
From the MAPPING tab, you can choose a different tablet ORIENTATION and then physically rotate your tablet to
match the selection you have made. This feature allows you to set up the tablet controls for left- or right-
handed use, or to configure your tablet to work with a tall monitor. See configuring the tablet orientation
.
After making changes, verify you have correctly set the orientation by moving your pen “up” on the tablet –
the screen cursor should move up as well. The selected orientation is a global tablet setting and applies to
all applications.
SCREEN AREA
Use the MAPPING tab SCREEN AREA options to define the portion of the display screen your tablet will map to.
E
XPRESSKEYS LEFT Tablet orientation is horizontal, with Touch Ring and ExpressKeys located to the
left. This is the orientation for right-handed users.
E
XPRESSKEYS TOP Tablet is rotated 90 degrees clockwise, with Touch Ring and ExpressKeys
oriented toward the top.
E
XPRESSKEYS RIGHT Tablet orientation is horizontal, with Touch Ring and ExpressKeys located to the
right. When this option is selected, the tablet operation and the Wacom Tablet
control panel options are automatically configured for correct left-handed use.
Note: If you have an Intuos4 Mouse or Lens Cursor, click the control panel
O
PTIONS button to set the device for right- or left-handed use. See advanced
options.
E
XPRESSKEYS BOTTOM Tablet is rotated 90 degrees counter-clockwise, with Touch Ring and
ExpressKeys oriented toward the bottom.
F
ULL Maps the entire monitor(s) area. This is the default setting. See also mapping
to multiple monitors.
M
ONITOR Maps the entire area of a single monitor that you choose. If more than one
monitor is connected to your system, an option will be available for each
detected monitor.
P
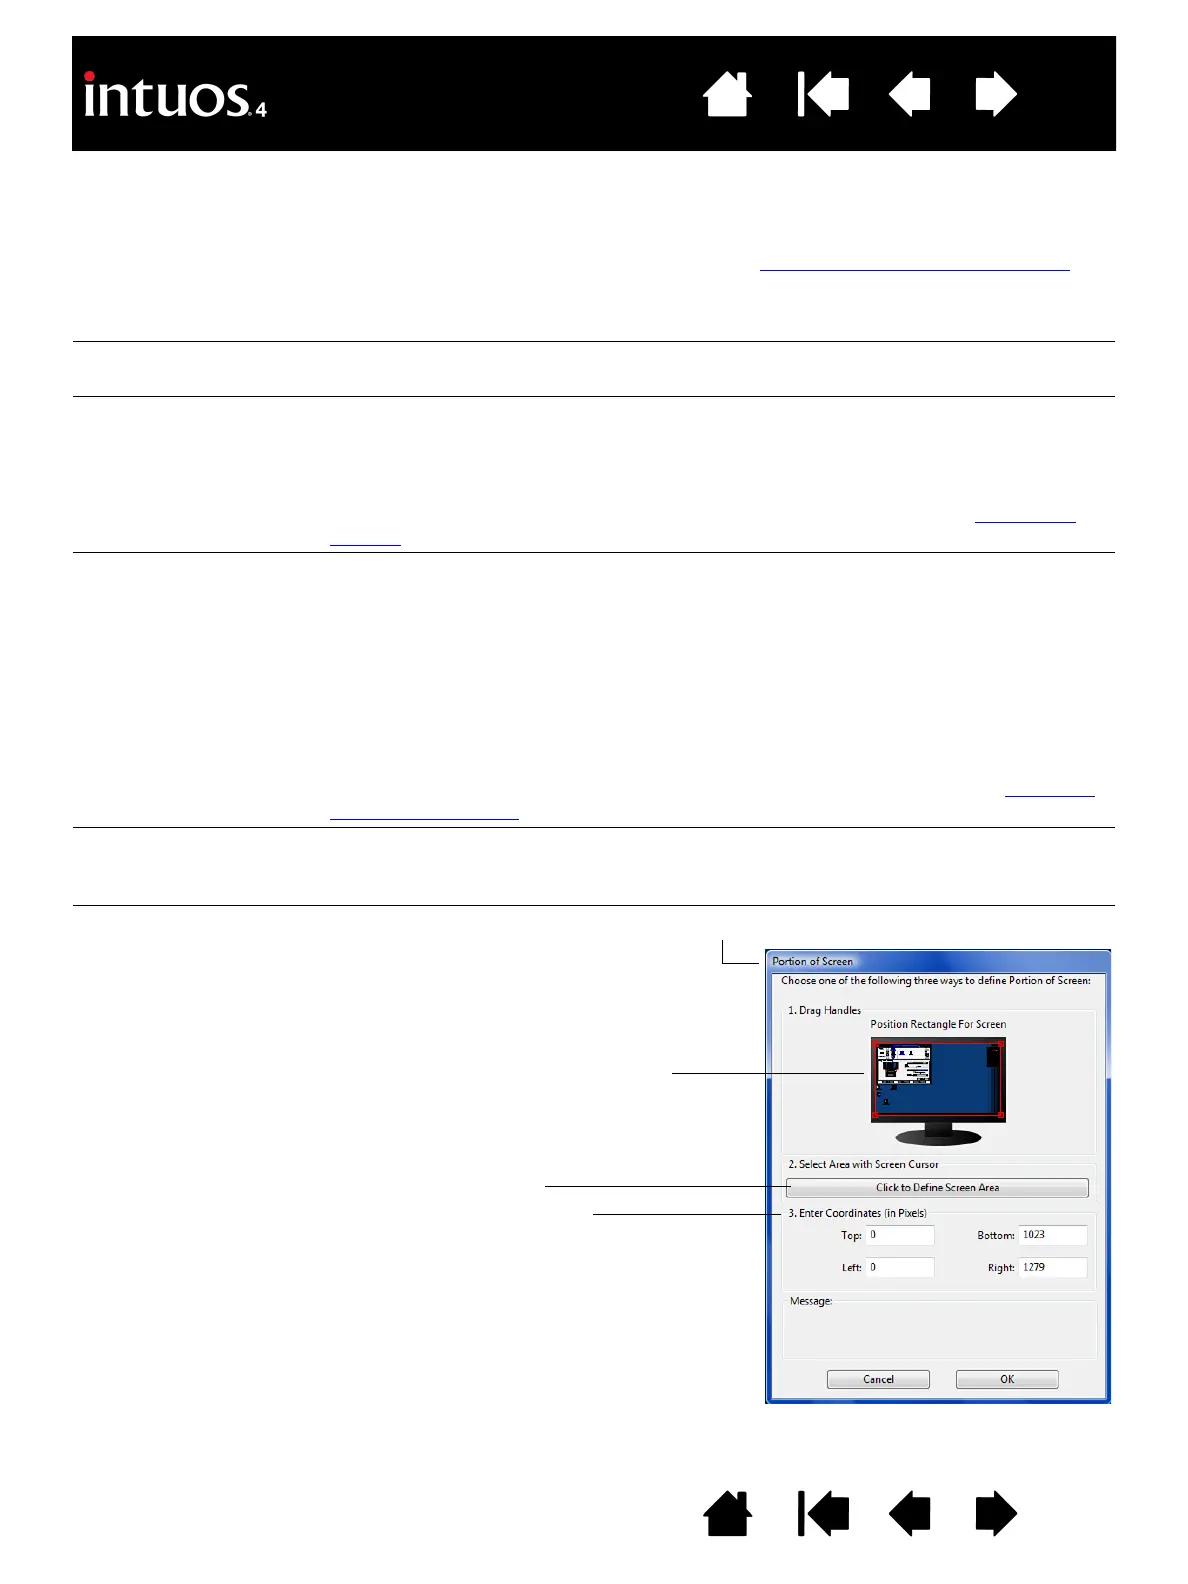
ORTION... Selecting PORTION... brings up the PORTION OF SCREEN dialog box.
Choose a method for defining a
portion of the display:
• Drag corners of the foreground
graphic to select the screen area.
• Select the C
LICK TO DEFINE
S
CREEN AREA button and move the
screen cursor to select the screen
area. Be sure to follow any
M
ESSAGE prompts.
• Enter coordinate values.
After defining a portion of the screen,
you may need to use a different input
device to access other portions of the
screen area.
 Loading...