XO FLEX – Installation instructions Installation
24
Note that installation with steel plate is not allowed if the unit is delivered with X-Ray
adaptor.
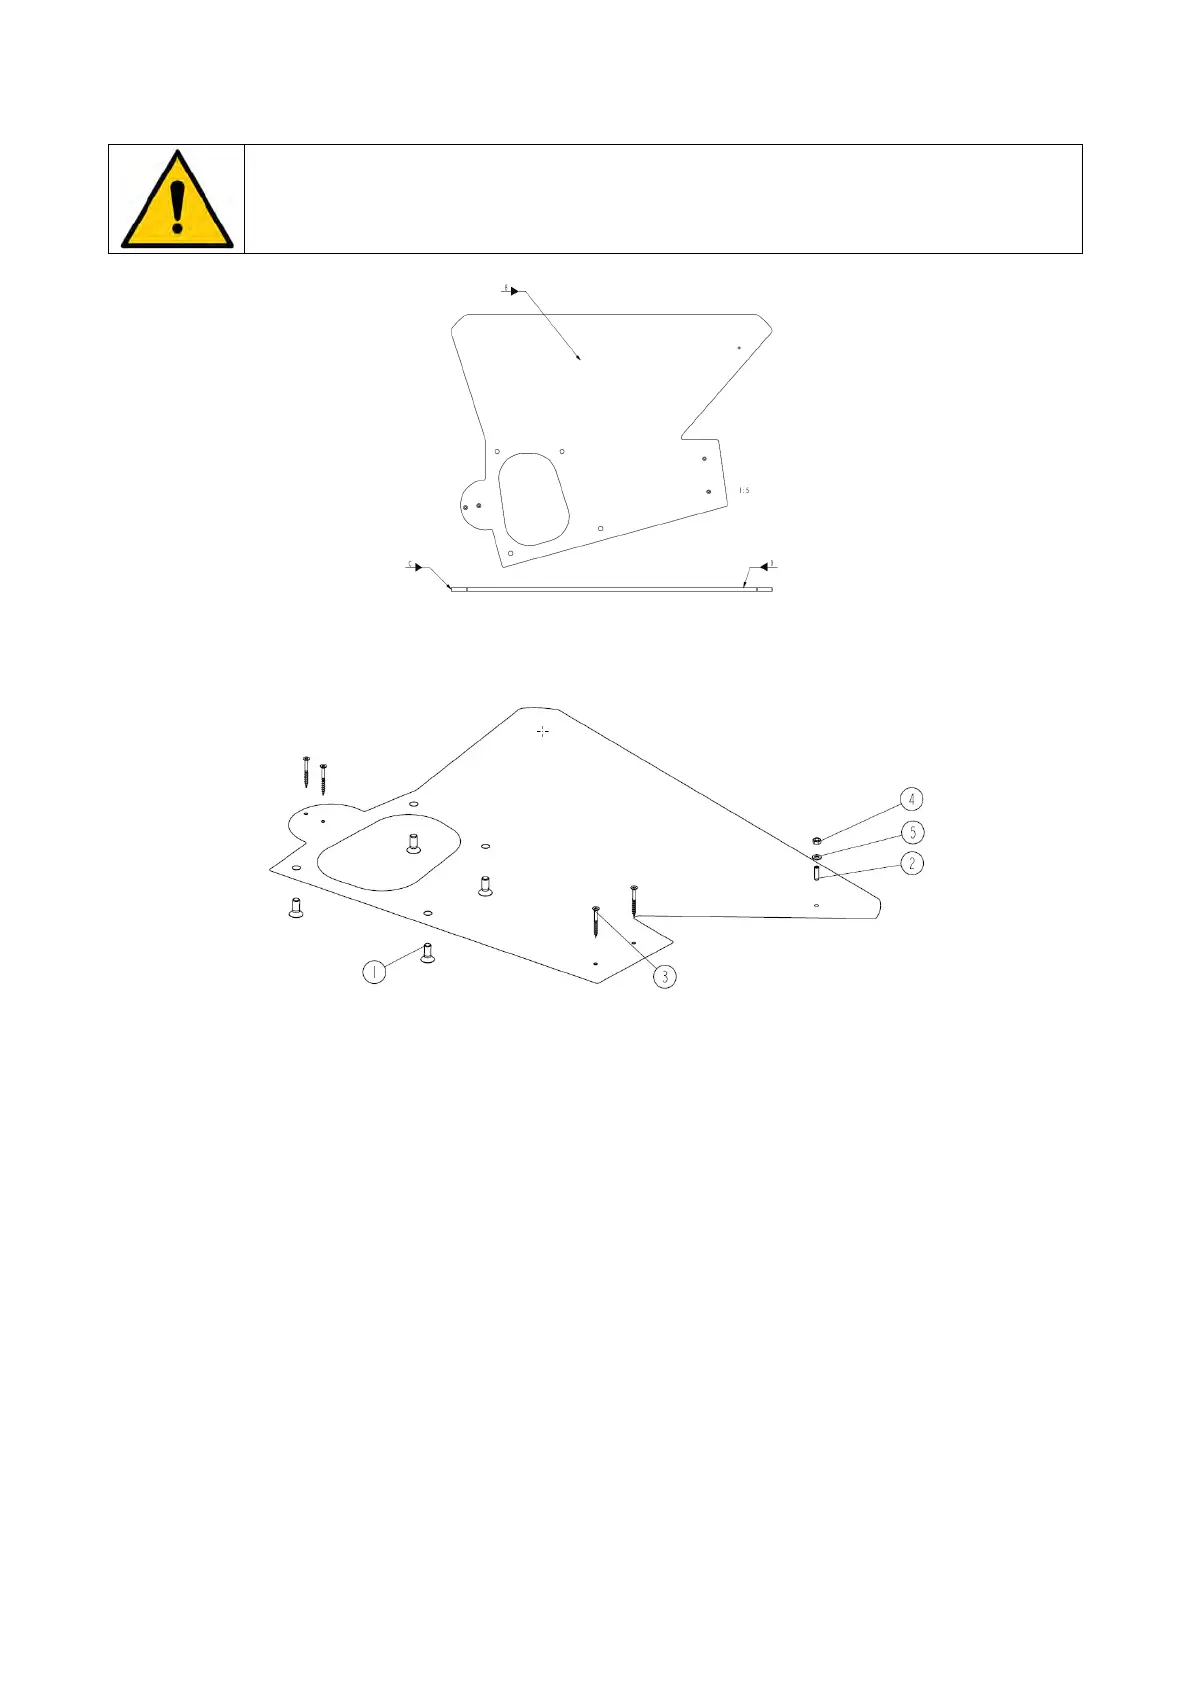
Figure 24 – Steel installation plate
Figure 25 – Parts for installation on steel plate
1. Assemble the four bolts – (1) in Figure 25 – to the four bushings – (4) in Figure 11.
2. If installed on a wooden floor, place the steel plate on the floor and secure it to the floor
with five 6 x 60 mm screws – (3) in Figure 25.
3. With the special wrench (MG-416), adjust the brass adjustment bushing – (5) in Figure 19 –
in the supporting leg and allow for approximately 5 mm clearance between the supporting
leg and the steel plate surface.
4. Fit the long rod, washer and nut – (2), (5) and (4) in Figure 25 – in the hole through the
adjustment bushing – (5) in Figure 19 – do not tighten.
5. Fit the four long rods – (5) in Figure 11 – through the holes in the unit base into the
bushings.
6. Fit the washers and nuts – (12) and (11) in Figure 11 – onto the long rods; do not tighten.
7. Turn the adjustment nuts – (1) – (4) in Figure 19 – in the unit base, allowing for
approximately 5 mm clearance all the way between the unit base and the steel plate
surface, and make sure that all four adjustment nuts rest on the bushings in the steel plate.
The nuts on top of the long rods should be loose.
 Loading...

