Page 20 FT-450 OPERATION MANUAL
RECEIVING
A
BOUT
THE
[
UP
]
/
[
DWN
]
BUTTONS
OF
THE
OPTIONAL
MH-31
A8J
AND
MD-100
A8X
The microphone’s
[
UP
]
/
[
DWN
]
buttons utilize the
tuning steps of the
[
MAIN DIAL
]
knob on the SSB/
CW/DATA mode, and utilize the tuning steps of
the
[
DSP/SEL
]
knob on the AM/FM mode.
In the factory default, the microphone’s
[
FST
]
but-
ton does not activate. However, you may activate
the microphone’s
[
FST
]
button via the Menu Item
“P M-FST”.
NOTE:
The microphone holder is affixed to the place
where is contacted to the ground (for example,
the chassis of your car), and the microphone is
hooked on the microphone holder, the
[
FST
]
func-
tion becomes “ON”.
We recommend that not to contact the micro-
phone holder to the ground, nor set menu item
“P M-FST” to “N/A”.
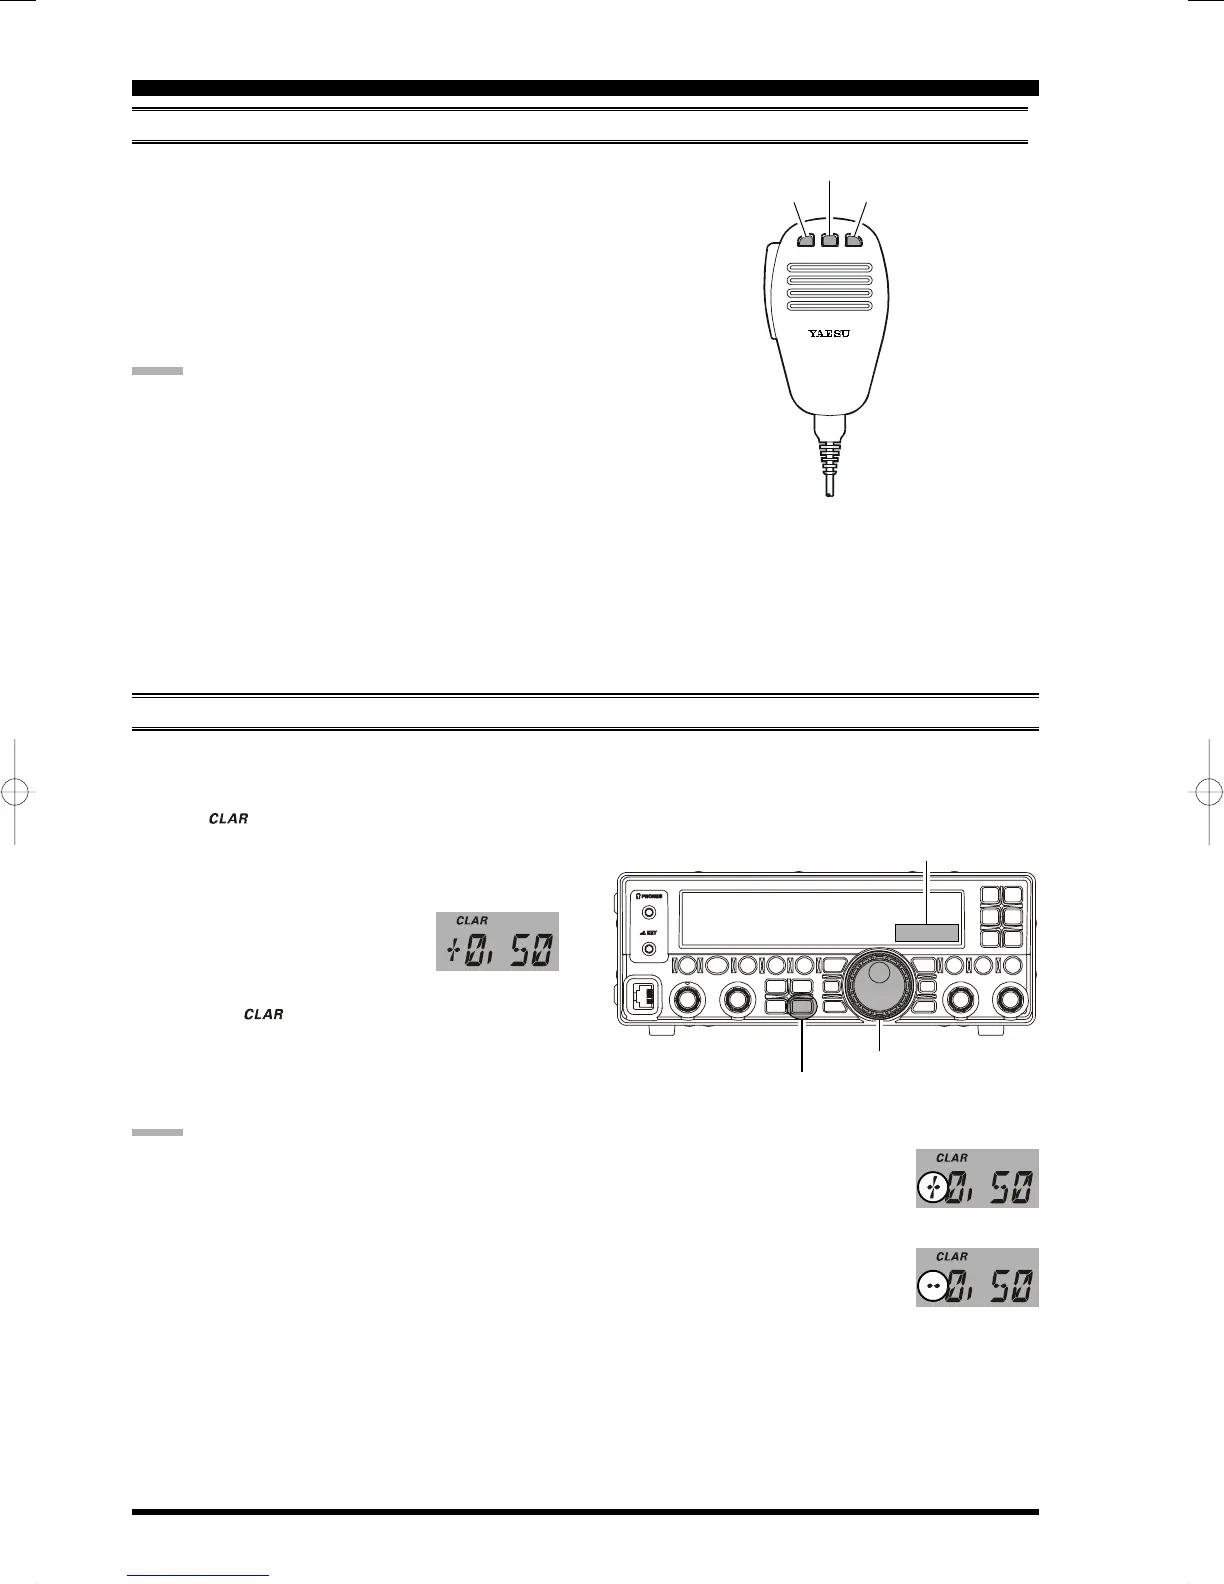
CLARIFIER
You may change the receiving frequency only without changing the transmit frequency.
1. Press the
[
CLAR
]
button to activate the clarifier.
The “ ” icon will appear on the display.
2. Rotate the
[
MAIN DIAL
]
knob to tune the desired
receive frequency. (Offset of up to ±9.99 kHz may
be set using the clarifier.)
The offset frequency will appear
at the bottom right corner of the
display.
3. Press the
[
CLAR
]
button again to disable the clari-
fier. The “ ” icon will disappear from the dis-
play.
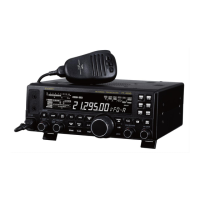
DYNAMIC MICROPHONE
MH-31
DWN FST UP
[
DWN
]
Button
[
FST
]
Button
[
UP
]
Button
[
MAIN DIAL
]
knob
[
CLAR
]
button
Clarifier Offset
When the receiving frequency is
higher than transmit frequency,
“+” will be appended to the off-
set frequency.
When the receiving frequency is
lower than transmit frequency, “–”
will be appended to the offset fre-
quency.
You may assign the CLAR function to the
[
DSP/
SEL
]
knob via the Menu Item “CLAR”.
NOTE:
Even when the clarifier is disabled, the variance
of the clarifier remains (both TX and RX frequen-
cies).
Press and hold in the
[
CLAR
]
button for one sec-
ond to clear the clarifier offset, meaning the re-
ceiving frequency is equal to the transmit fre-
quency.
When the
[
MAIN DIAL
]
knob is rotated to change
the frequency after disabling the clarifier, the clari-
fier offset becomes “zero”, meaning the receiv-
ing frequency is equal to the transmit frequency.
 Loading...