Page 66 FT-450 OPERATION MANUAL
P
ROGRAMMABLE
M
EMORY
S
CANNING
(
PMS
)
To limit scanning (and manual tuning) within a particular frequency range, you can use the Programmable
Memory Scanning (PMS) feature, which utilizes two special-purpose memory pairs (“MEM-P1L/MEM-P1U” and
“MEM-P2L/MEM-P2U”). The PMS feature is especially useful in helping you to observe any operating sub-band
limits, which apply to your Amateur license class.
1. Store the Lower and Upper tuning/scanning limit
frequencies into the memory pair “MEM-P1L” and
“MEM-P1U”, respectively, or “MEM-P2L” and
“MEM-P2U”. See page 58 for details regarding
memory storage.
2. Press the
[
F
]
button, followed by the
[
PMS/SCAN
]
button.
3. Rotate the
[
DSP/SEL
]
knob to select “PMS-1”
“PMS2” or “PMS1+2”.
PMS-1: The scanner will be limited within the
frequency range programmed in the
memory pair “MEM-P1L/MEM-P1U”.
PMS-2: The scanner will be limited within the
frequency range programmed in the
memory pair “MEM-P2L/MEM-P2U”.
PMS-1+2: The scanner will be limited within the
frequency ranges programmed by both
memory pairs (“MEM-P1L/MEM-P1U”
and “MEM-P2L/MEM-P2U”).
If a memory pair is vacant, the PMS-1+2 selec-
tion is not available.
4. Press the
[
PMS/SCAN
]
button.
5. Rotate the
[
SQL/RF GAIN
]
knob just to the point
where the noise is silenced and the “ ” indi-
cator on the display turns off.
6. Press the
[
PMS/SCAN
]
key to initiate upward
scanning (toward higher frequencies or higher
memory channel numbers).
7. If you want to change direction of the scan while it
is underway, rotate the
[
MAIN DIAL
]
knob one click
in the opposite direction (in this case, one click
counter-clockwise). You will see the scanner re-
verse direction and scan down in frequency.
You may change the direction of the scanner by
pressing and holding the microphone’s
[
UP
]
/
[
DWN
]
key for one second, if you are using the
optional MH-31A8J Hand Microphone or MD-
100A8X Desktop Microphone.
8. In FM/AM mode, when the scanner encounters a
signal strong enough to open the squelch, the
scanner will halt for five seconds, after which scan-
ning will resume.
In the SSB/CW and SSB-based Data modes,
when the scanner encounters a signal strong
enough to open the squelch, the scanner will step
across the signal very slowly, giving you time to
stop the scan, if you like.
ADVICE:
You may select the manner in which the scanner re-
sumes while it has paused on a signal, using Menu
Item “SCN RES” The default “5Sec” setting will cause
the scanner to resume scanning after five seconds;
you may change it, however, to resume only after the
carrier has dropped out, if you like See page 83.
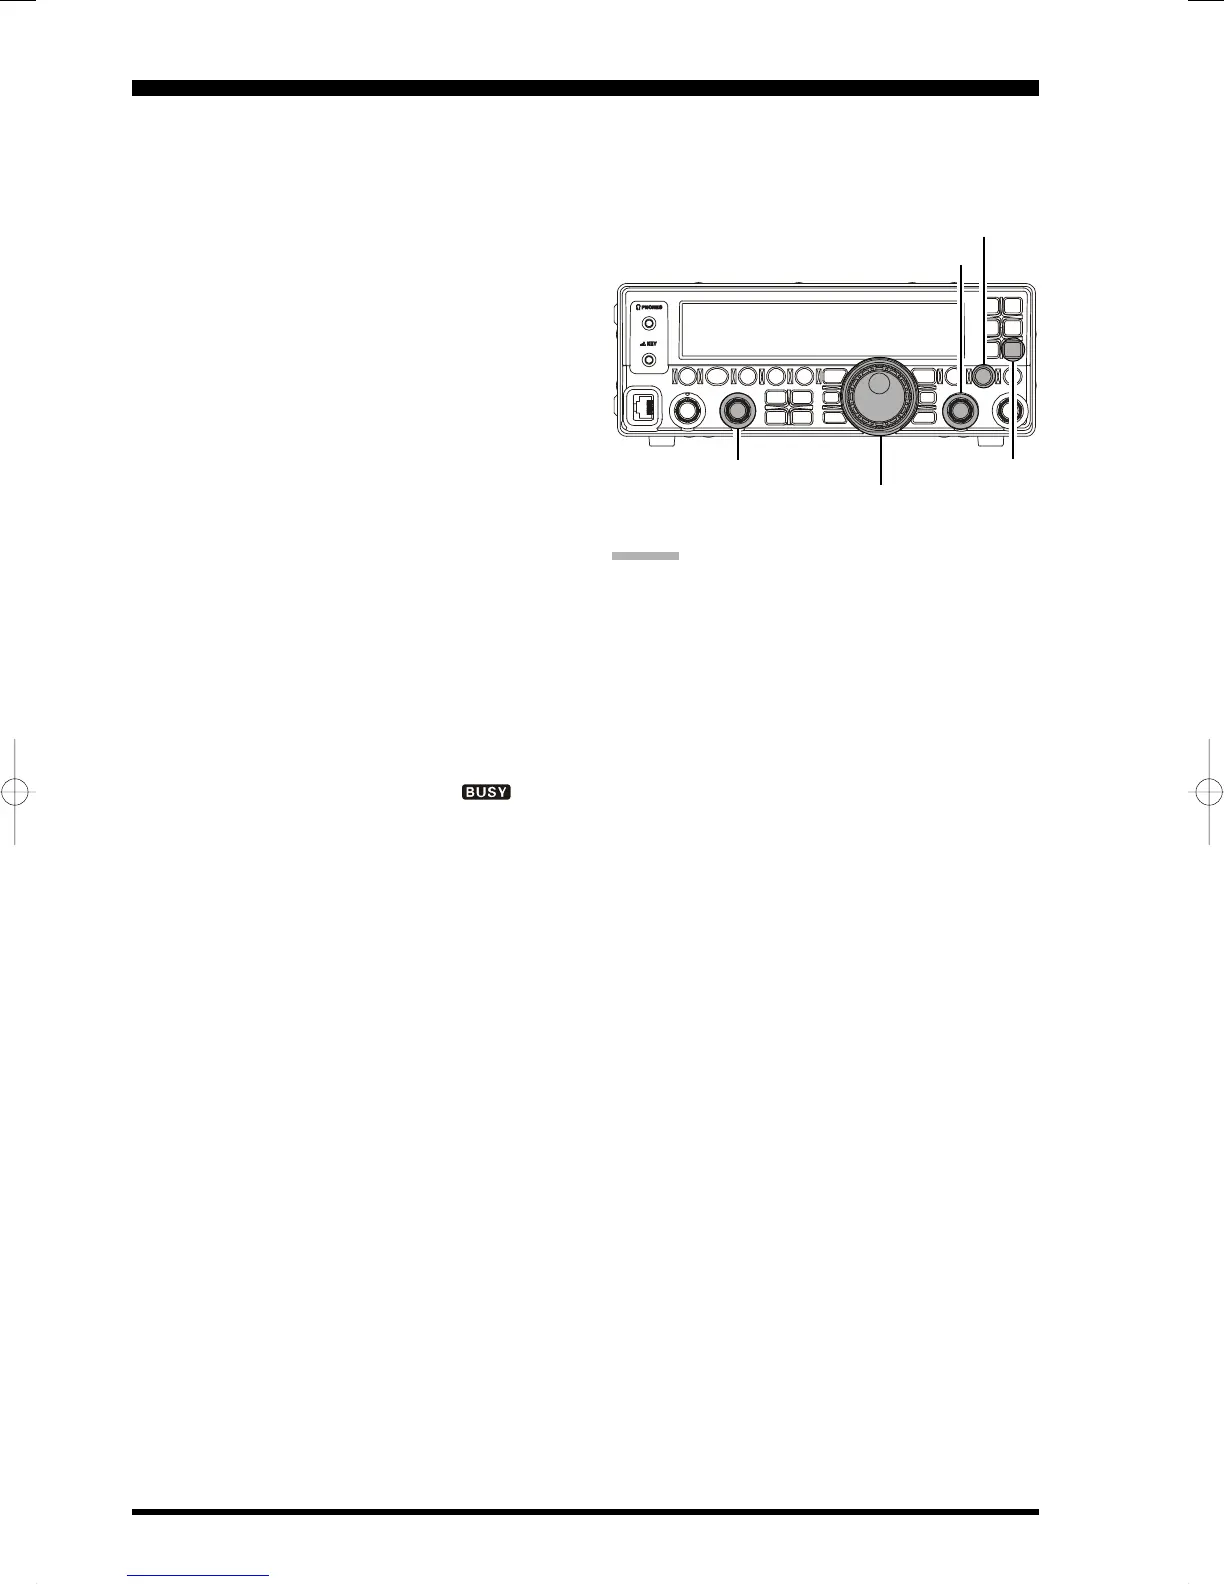
[
DSP/SEL
]
Knob
[
PMS/SCAN
]
button
[
SQL/RF GAIN
]
Knob
[
MAIN DIAL
]
Knob
[
F
]
button
 Loading...