20
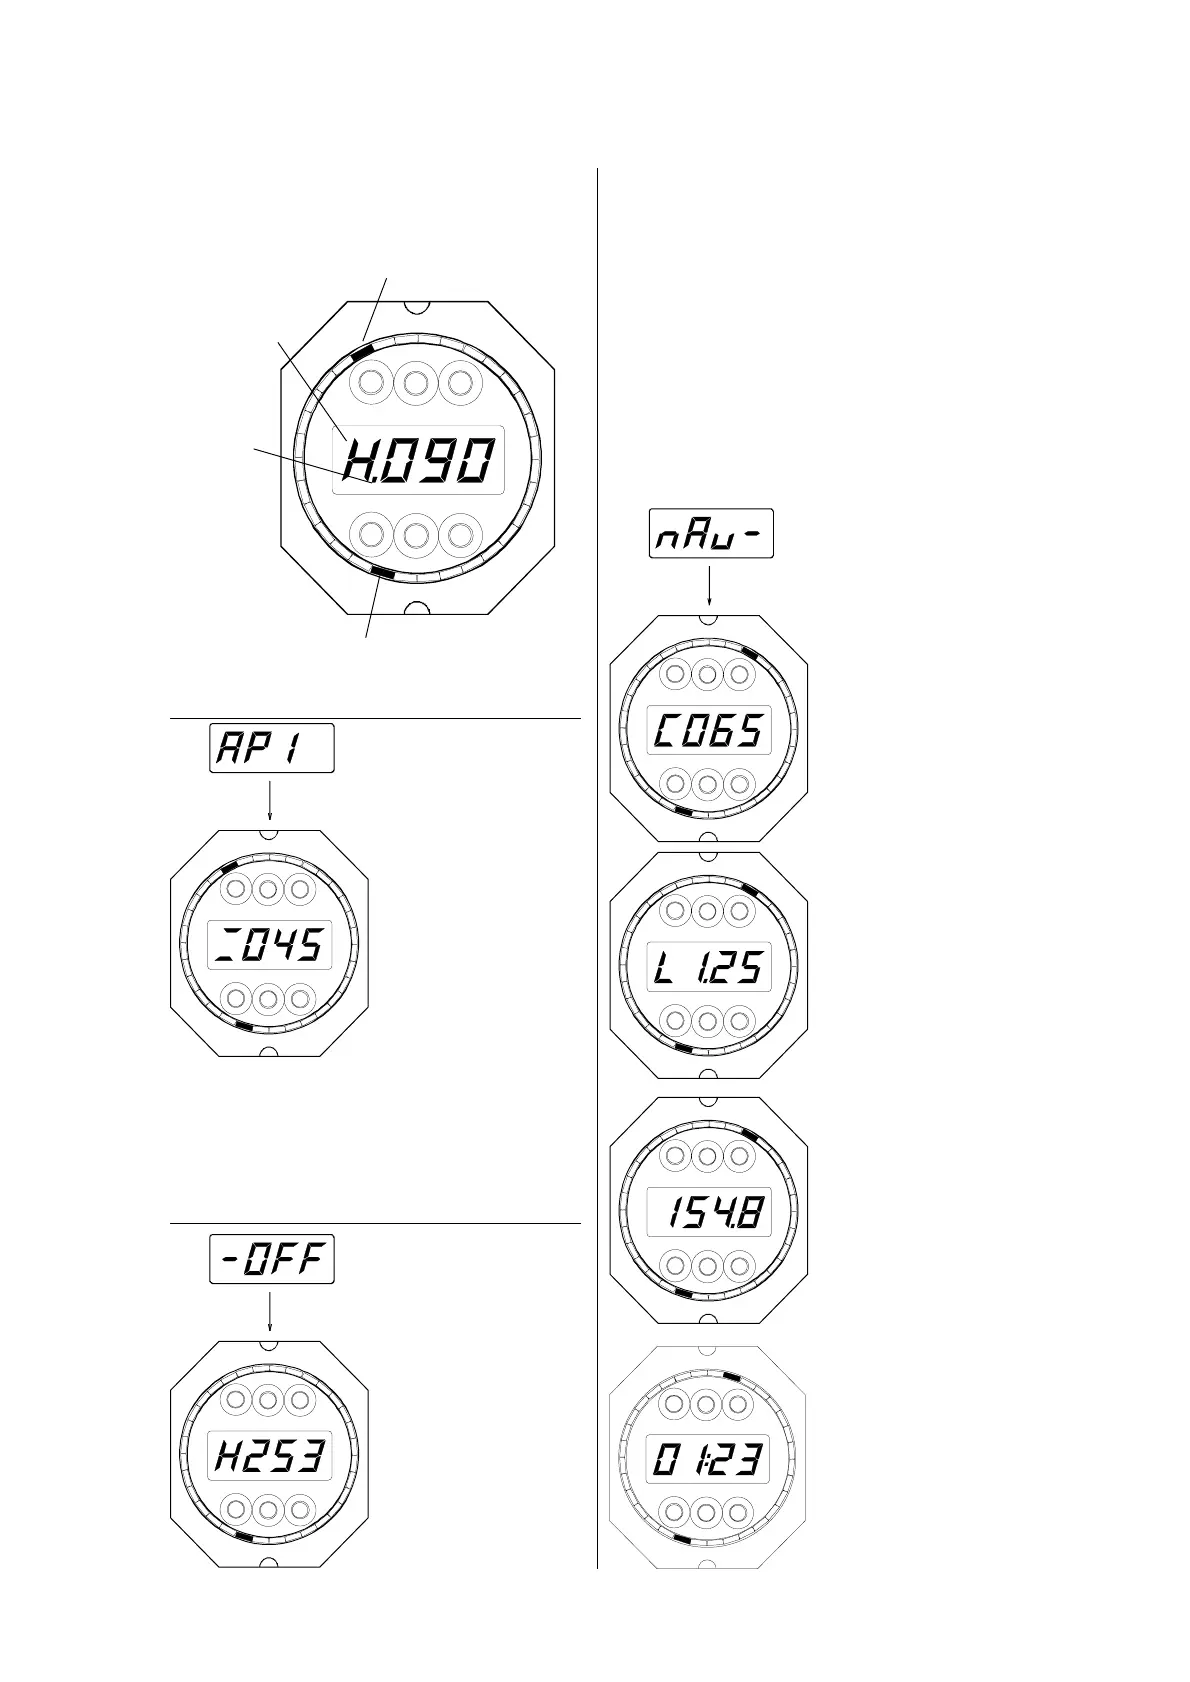
Autopilot Functions
With Autopilot Display
Digital Display
(LCD)
➤
➤
Mode Display
(HDG, WIND and NAV)
with yellow and red LED's
LED-pointer for rudder angle. An absent rud-
der-LED is an indication that the autopilot drive
box is not powered or not wired to the bus.
➤
➤
➤
➤
Decimal:
Symbol for
Heading
Gyro opera-
tion (comes
on 5 minutes
after power up)
Heading Mode ("H")
and Track Mode ("C")
Press the HDG-button briefly.
Verify "AP 1" or "AP 2", followed
briefly by the SELECTED
heading or track (which
was taken initially from
the actual heading). It
can be modified with
the left or right arrow
button as required.
With a GPS in the
system, you may press
HDG again to toggle be-
tween HDG and TRK mode. The yellow HDG-
LED is ON in both modes. It starts blinking
whenever the autopilot deviates more than 15
degrees from the SELECTED heading or
when an automatic mode change into HDG
mode has occurred (page 50).
Autopilot OFF
(OFF-Mode)
Press the OFF-button
briefly to switch off the autopi-
lot. The OFF-warning comes
on. It can be extin-
guished by briefly
pressing either of the
three lower buttons.
Holding the OFF
button for 3 seconds
will temporarily con-
vert the AP display into
a multi function display.
➤
➤
➤
➤
➤
➤
The top picture
shows the LCD with
the programmed
course "C". Scroll
with lower right but-
ton for XTE, distance
and time to WP.
In the second pic-
ture the LCD shows the
Cross Track Error (L or R,
0...9.999 NM).
Third picture gives
Distance to next way
point, (0.01- 299.9
NM).
Bottom: Estimated
Elapsed Time to next
way point, hours and
minutes
NAV Mode and LAND Mode
Press the NAV-button briefly. This brings up
the programmed track C (bearing to WPT) as
set up in the plotter or GPS. The right arrow
button can be used to switch to the Cross
Track Error XTE (L or r) and distance or time
to the next waypoint.
The NAV-button has to be pushed a sec-
ond time (within ten seconds) to actually arm
or engage the autopilot in NAV-mode. Before
doing so, you should verify that the displayed
programmed track C is safe (what you really
want) and what eventual heading change
might be resulting to intercept it. A yellow
NAV-LED will come ON, when the autopilot is
intercepting or tracking the programmed
course. A red NAV-LED
however means that you
are still responsible to
select a reasonable intercept
heading (normally when
XTE is > 0.030 NM). An
automatic intercept
can be forced by dou-
ble clicking the NAV-
button, when the red
NAV-LED is on.
The LAND-mode
may be selected by
double clicking the NAV
button again, after track-
ing already in NAV-mode.
Make sure to stay
below 6 kt and veri-
fy the plotter is
sending the XTE
with three decimal
digits or more. The
AP then tries to steer
within 0.001 NM XTE.
➤
➤
 Loading...