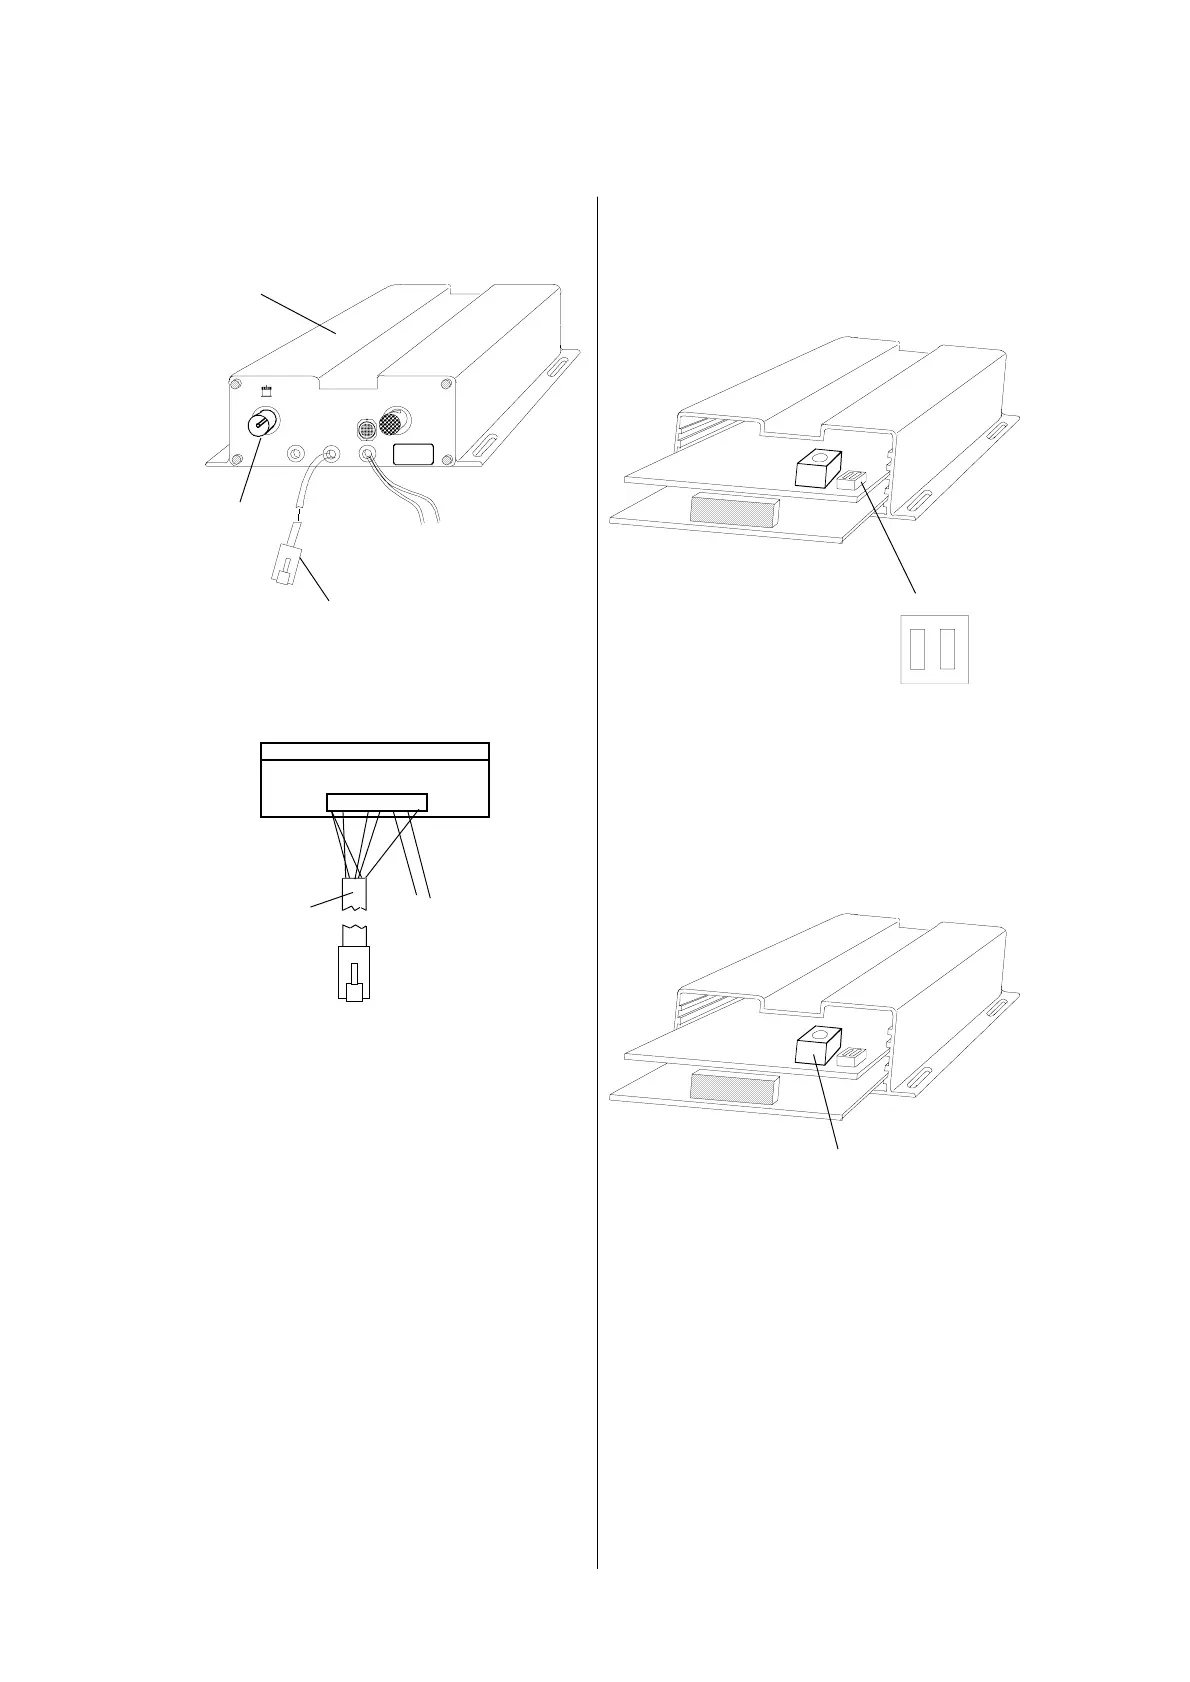
Echo-Box-1 and -2
36
The Echo-Box should be mounted at a dry
and accessible location.
Echo-Box
Sensor
Connection
To Depth
Display
Language Selection
Echobox-1
E...english announcement
D...german announcement
M and F...not used
Switch
Sensor-Frequency Se-
lection Echobox-1
Selector Switch
The Echo-Box1 can work with depth trans-
ducers of various frequencies within the range
of 140 kHz to 160 kHz. Switch position # 8 is
the lowest frequency, # 7 is the next higher
one, and so on, and # 9 is the highest fre-
quency.
In case the depth transducer is replaced,
the new number must be selected on the
switch. It can be read from a tag on the cable
on all Tecnautic-supplied sensors.
An unknown sensor frequency can be
found by selecting a switch position with which
the echo sounder would work satisfactory at
higher depth values.
To Speaker
Lead Lead Terminal
Nr. Color Signal Number in
in the plug Echo-Box
1 white +10..28V 2
2 brown GND 1
3 green CAN+ .... do not connect!
4 yellow CAN- .... do not connect!
5 grey IN-B (to Box) 4
6 pink IN-A (to Box) 5
7 blue OUT-B 1
8 red OUT-A 8
1 2 3 4 5 6 7 8
two leads to
speaker
8 lead flat ca-
ble to Depth
Display
Inside Echo-Box
Electrical Connection
Echobox-1
Speaker Installation
Echobox-1
The speaker should be placed into a cabi-
net in such a way, that the speaker is sealed
from the rear side. This is important for good
sound quality. Without such a sealed cabinet,
the sound will be distorted and rather weak.
 Loading...