Chapter 2, Installing the Accu-Chek Smart Pix system
2-8
Accu-Chek Smart Pix user's manual
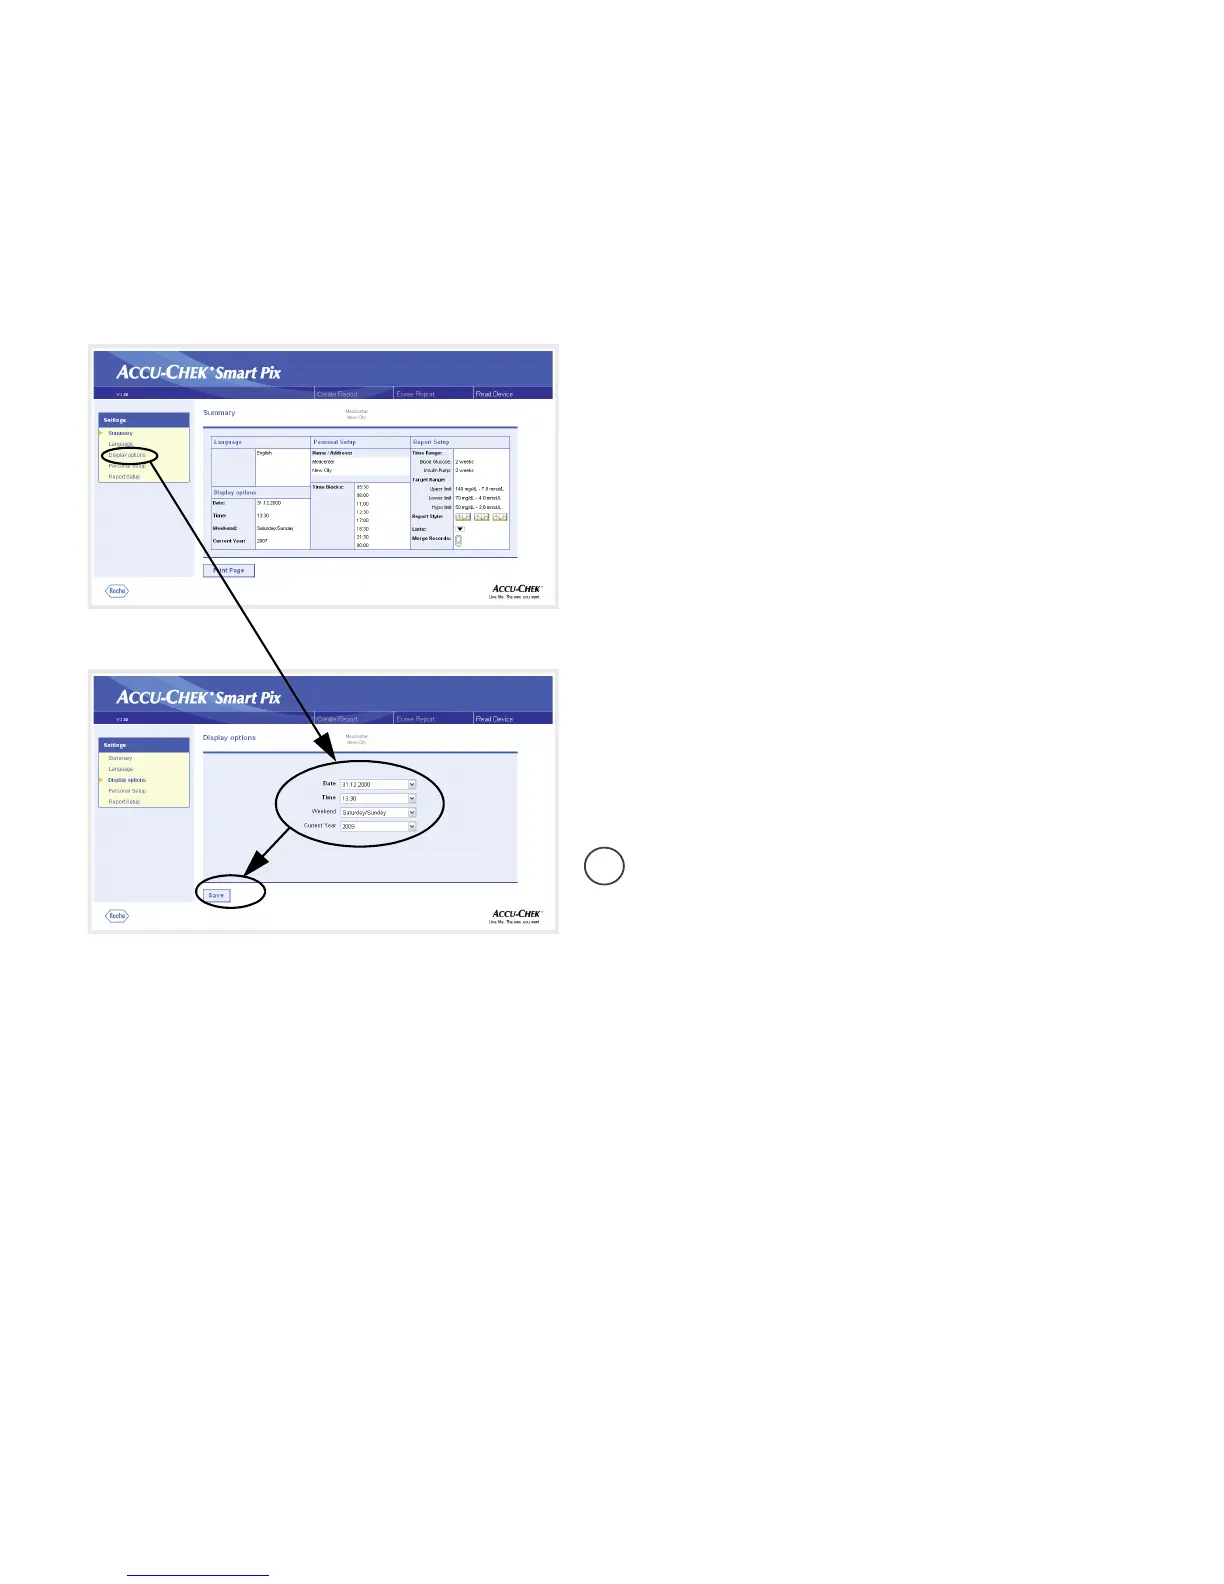
Display options
On the navigation bar, click on the
Display options
link. The
display pane now shows the options for the various formats.
Select the following settings here:
• Date and time format.
• Weekend days, usually non-working days. These are
highlighted in some analyses.
• Current year (only for the analysis of data from meters
which do not allow you to set the year).
The selection procedure is identical for all options:
• Click on the arrow pointing down to open the
selection list.
• Click the desired setting to select it.
• When you have completed all your settings on this
page, click the
Save
button to send the new selection
made to the Accu-Chek Smart Pix system.
If you leave this page (e.g. by clicking on another link
or closing the browser) without saving your selection,
any change you have made will have no effect.
i
 Loading...