Chapter 2, Installing the Accu-Chek Smart Pix system
Accu-Chek Smart Pix user's manual
2-9
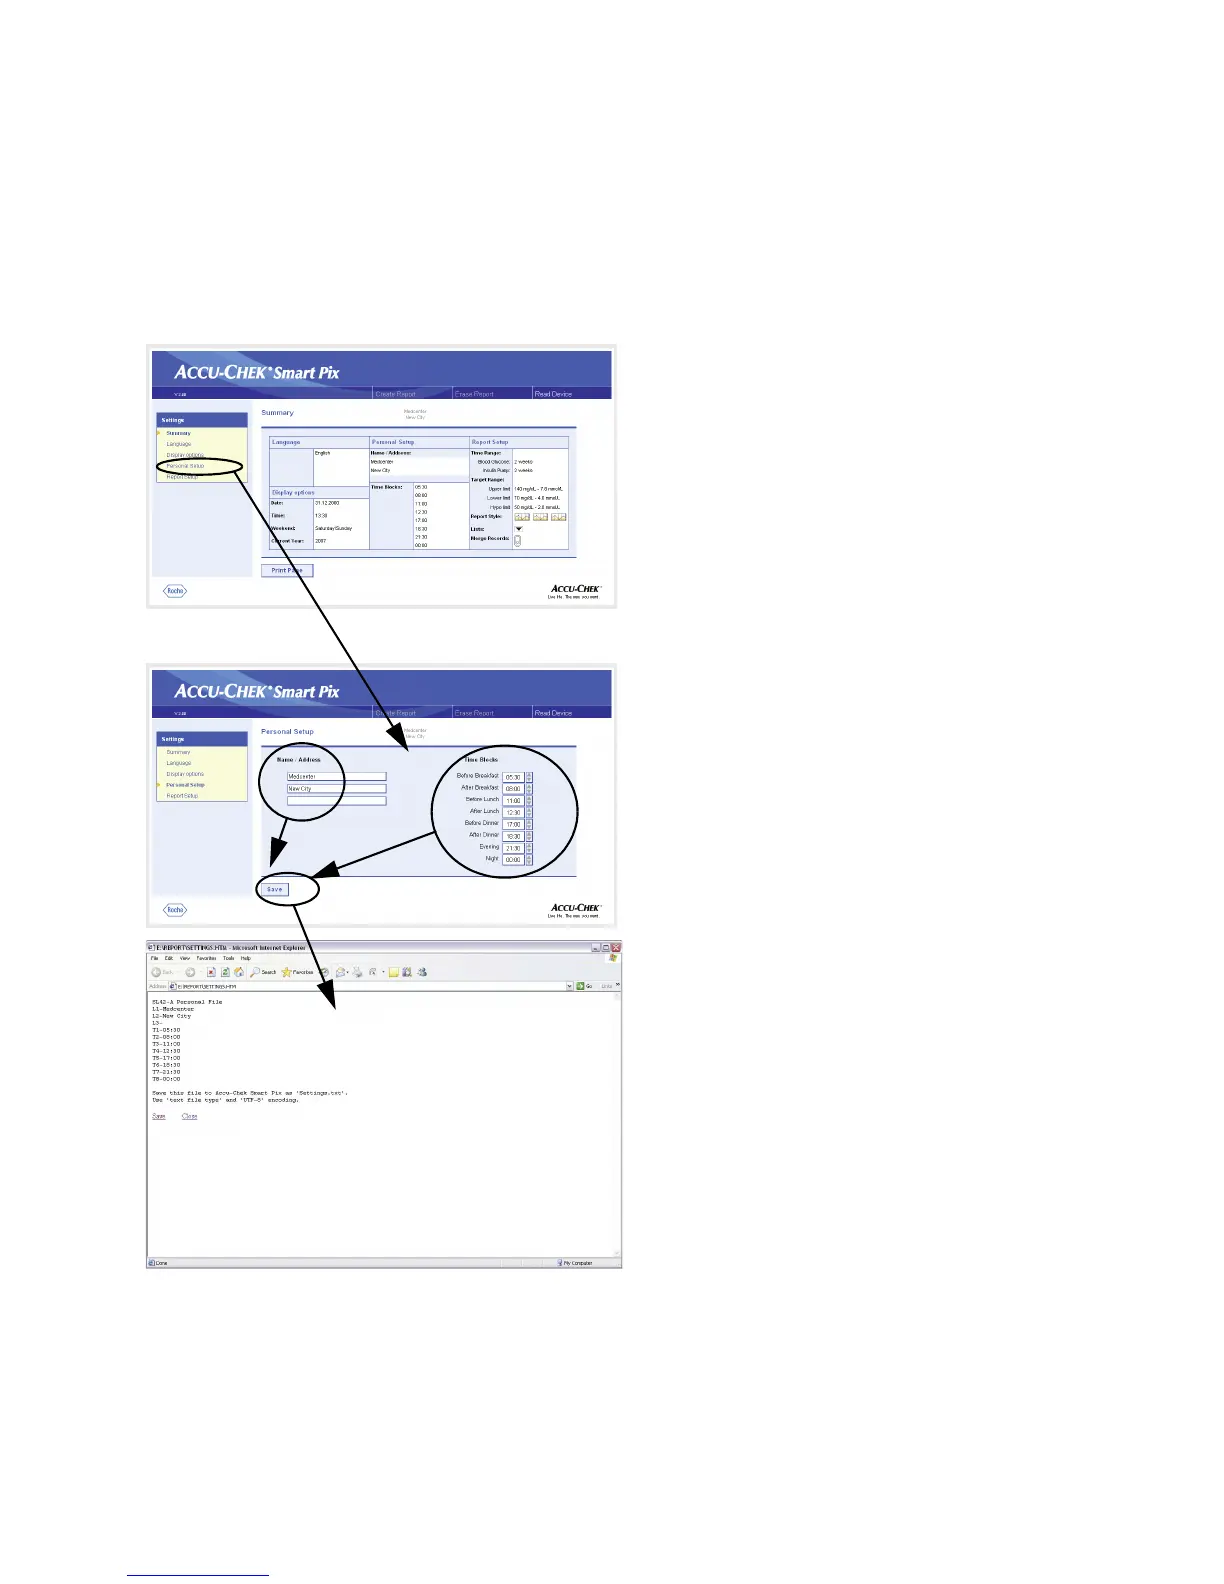
Personal Setup
On the navigation bar, click on the
Personal Setup
link. The
display pane now shows the available options.
• Input fields for personalising the printouts (here you
can enter, for example, the name of a doctor's practice
or pharmacy). This is where you can enter whatever
text you want. The length of each text is limited.
Therefore use abbreviations or another line for your
entries.
• Setting the time ranges. By setting time ranges, you
divide a 24-hour day into eight periods which are
determined by important regular events (e.g. main
meals). For each period, you can specify the start time
while the end time is automatically given with the start
time set for the next period.
The time ranges set here are used in reports to structure
them visually and chronologically in case there is no relevant
information from the meter or insulin pump. The time ranges
can be set in 30-minute increments.
• Click on the arrow pointing
up
(next to the display on
the right of a start time) in order to set it to a
later
time.
• Click on the arrow pointing
down
(next to the display
on the right of a start time) in order to set it to an
earlier
time.
• When you have completed all your settings on this
page, click on the
Save
button.
 Loading...