Configuring Communication
31
MVP-5200i Modero® ViewPoint® Touch Panel with Intercom - Instruction Manual
NOTE: If the panel detects more than 10 APs, the Up/Down arrows at the far right side of the page become active (blue) and
allow the user to scroll through the list of entries.
4. Select a desired Access Point by touching the corresponding row. The up arrow and down arrow will be grayed out if ten or
fewer access points are detected. If more are detected, then they will be enabled as appropriate so that the user can scroll
through the list.
NOTE: Access points using channel 8 should never be used, as the MVP-5200i may receive too much interference from other
devices in the area.
NOTE: If active roaming between channels is necessary, make sure to enable the Active Roaming on Channels 1,6,11 f ield in the
Wireless Settings page.
5. With the desired AP selected and highlighted, click the Connect button to be directed to the selected security mode’s Settings
page with the SSID field filled in. From there, either Cancel the operation or fill in any necessary information fields and then
click Save.
Selecting an Open, WEP, and WPA-PSK Access Point and then clicking Connect will open the corresponding Settings page. For
any other security mode, clicking Connect will only return to the previous page without any information being entered.
In an Open security mode, after selection and connection to a target AP, the SSID name of the selected AP is saved for the
open security mode.
In a Static WEP security mode, after selection and connection to a WEP Access Point, the user is then redirected back to the
Static WEP security screen, where the SSID field is already filled out. The user is only required to enter in the remaining
WEP key settings.
A similar process occurs for WPA-PSK access points. For any other situation, the security mode switches back to the
previous page and security and connection parameters must be entered in as usual.
Step 2: Conf igure the Card’s Wireless Security Settings
The second step in setting up the wireless card is to configure the Wireless Settings page. This section configures both the
communication and security parameters from the internal wireless card to the AP. The procedures outlined within the following
sections for an 802.11g card facilitate a common security configuration to a target AP.
Refer to the Appendix B: Wireless Technology section on page 180 for more information on other security methods.
After setting up the wireless card parameters, configure the communication parameters for the target Master; see Ethernet Over
USB section on page 34.
Conf iguring the Device’s Wireless Card for Unsecured Access To a WEP
In the Protected Setup page:
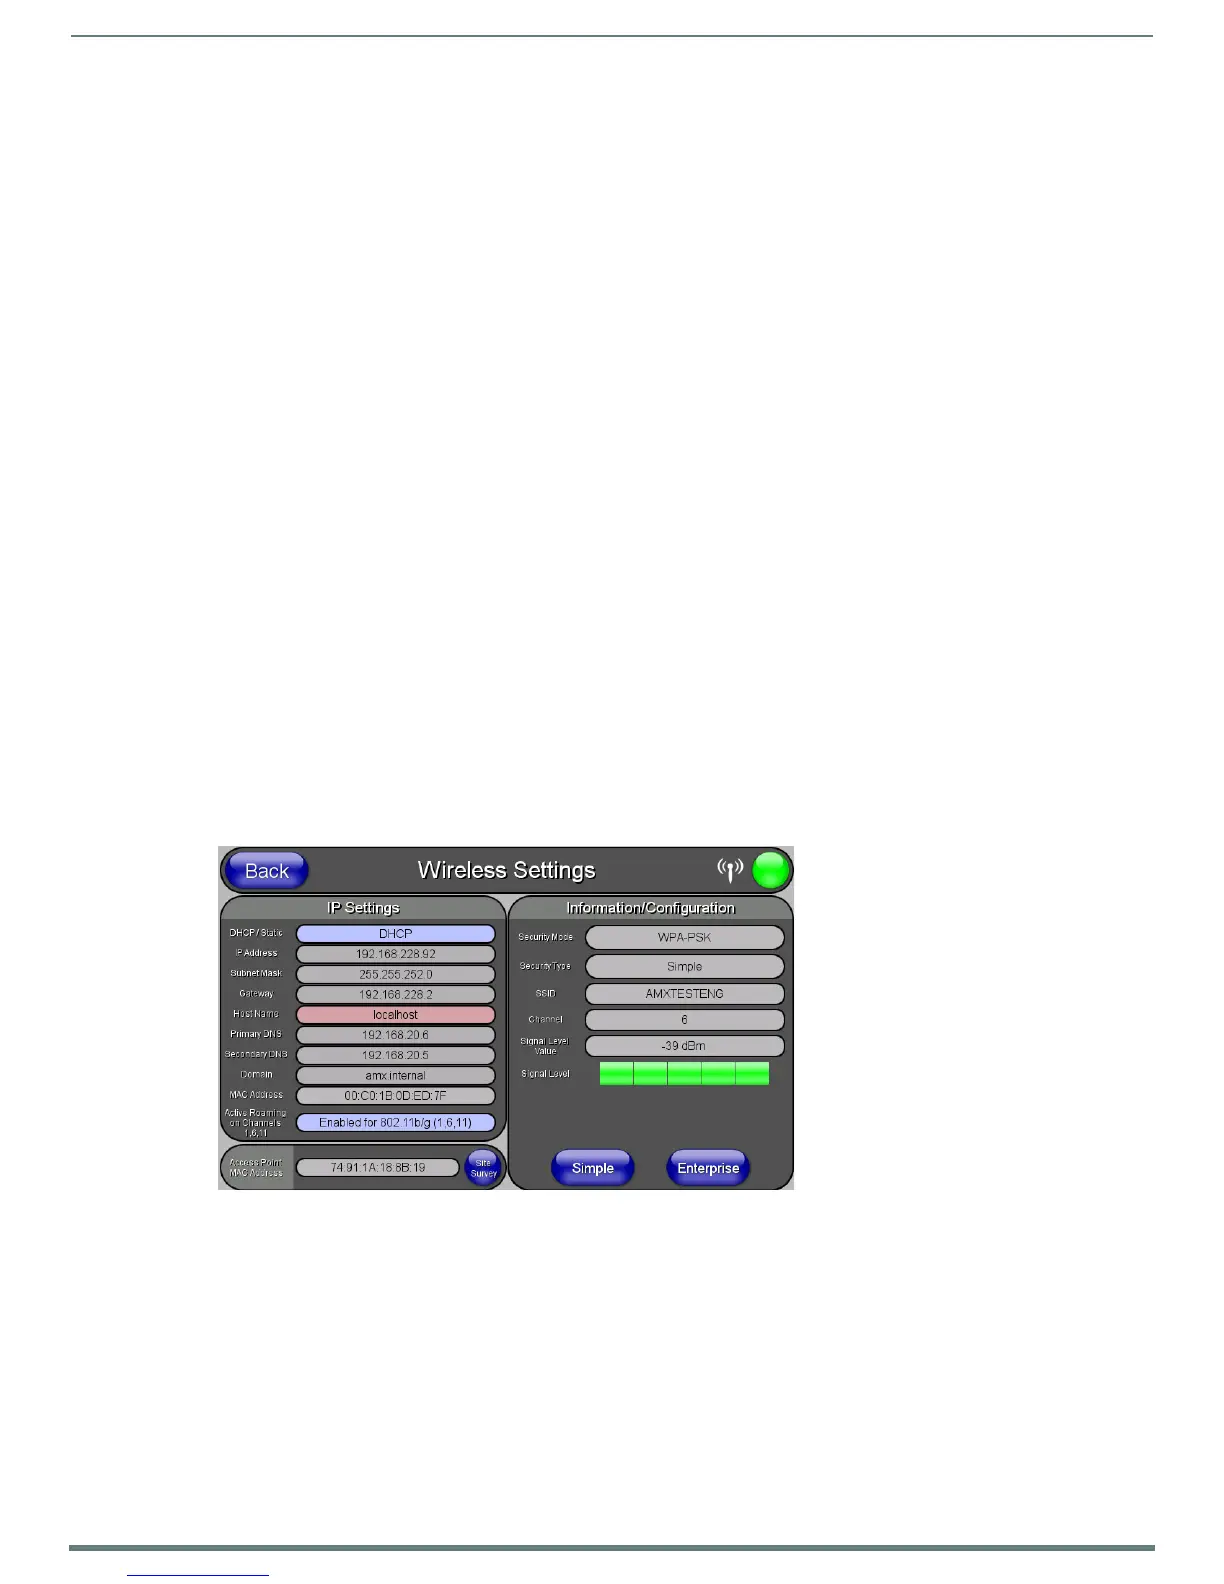
1. Press the Wireless Settings button (located on the lower-left) to open the Wireless Settings page (FIG. 23).
2. Enter the SSID information by:
Automatically filling it by pressing the Site Survey button. From the Site Survey page, choose an Open AP from within the
Site Survey page and then pressing the Connect button at the bottom of the page (FIG. 24).
FIG. 23
Wireless Settings page

 Loading...