Setup Pages
48
MVP-5200i Modero® ViewPoint® Touch Panel with Intercom - Instruction Manual
Time & Date Settings Page
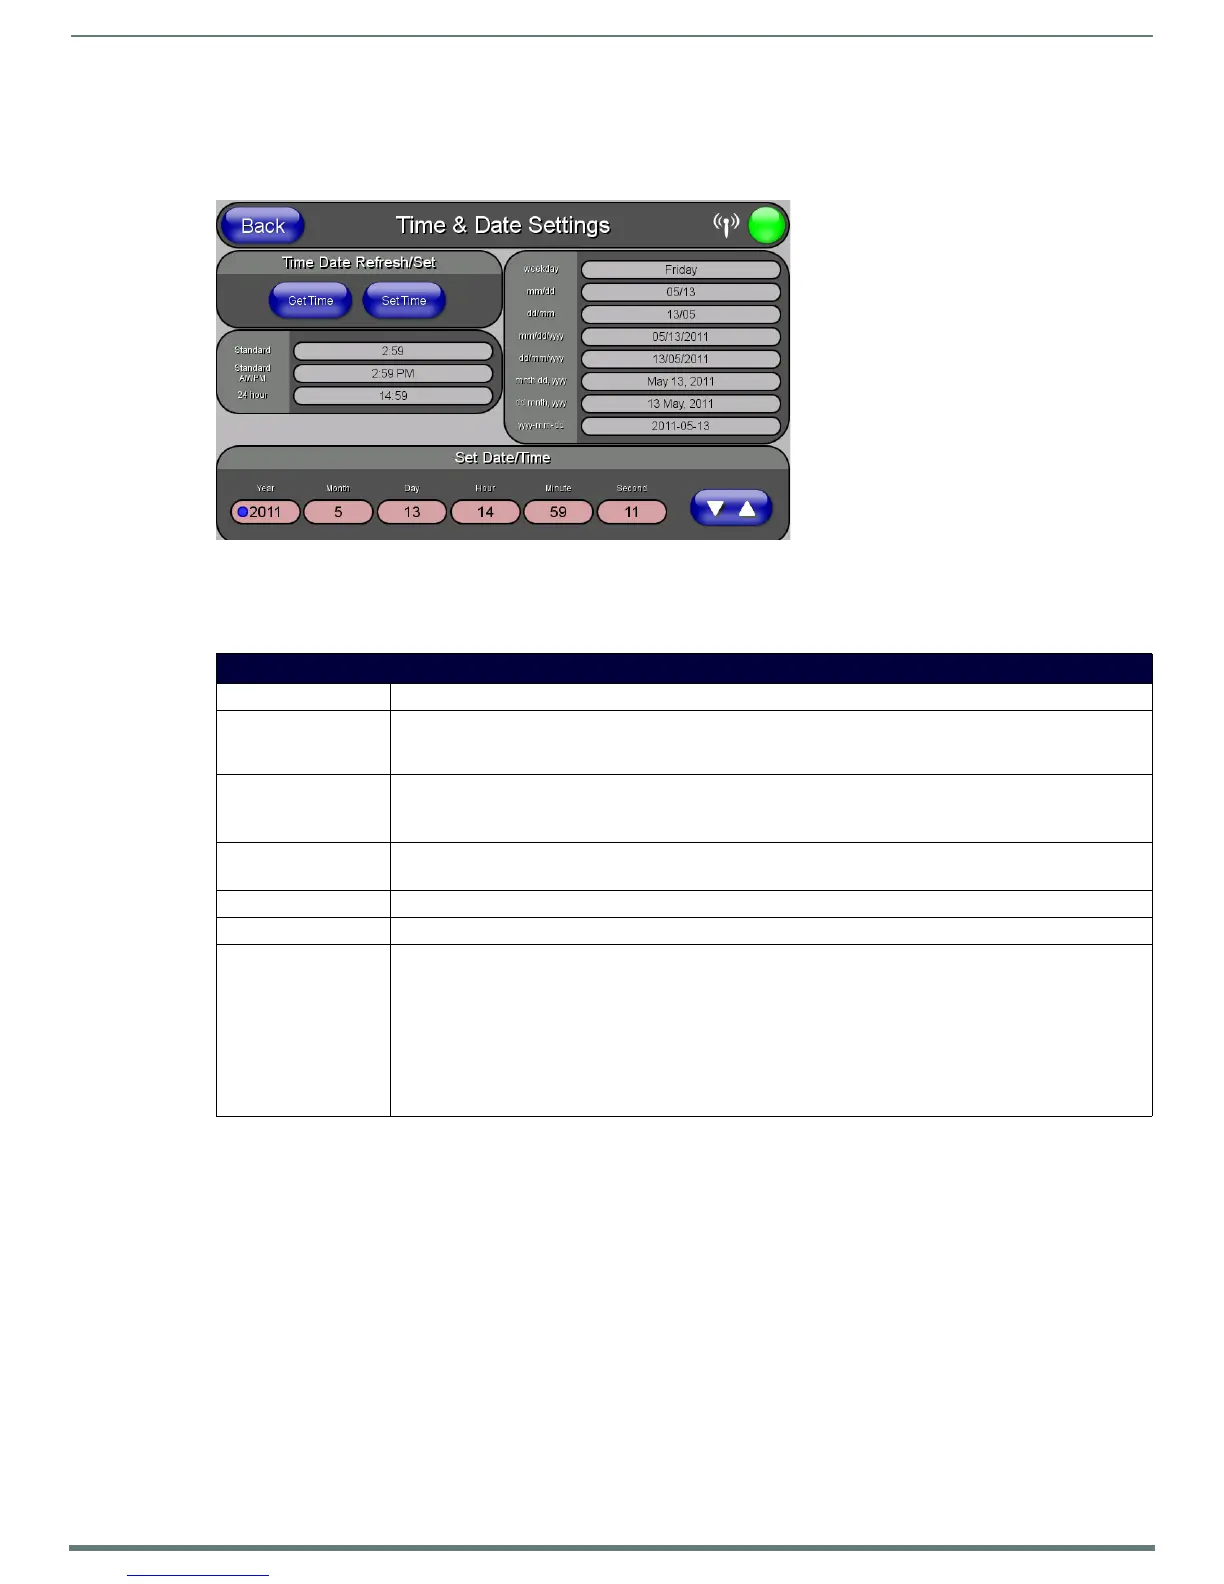
The options on the Time & Date Settings page (FIG. 52) allows setting and adjusting of time and date information on the NetLinx
Master. If the time and/or date on the Master is modified, all connected devices will be updated to reflect the new information.
NOTE: The MVP-5200i does not have an on-board clock, so the only way to modify a panel’s time without altering the Master is via
NetLinx Code.
Features on this page include:
FIG. 52
Time and Date Settings page
Time & Date Setup Page
Back: Saves all changes and returns to the previous page.
WiFi/Wired/USB Icon: The icon to the left of the Connection Status Icon displays whether the current connection to the Master is
Wireless (image of a radio antenna), Wired (image of three networked computers), or USB (USB connection
symbol).
Connection Status icon: The icon in the upper-right corner of each Setup page provides a constant visual indication of current
connection status.
Note: a Lock appears on the icon if the panel is connected to a secured NetLinx Master.
Time Date Refresh/Set: • The Ge t T i m e button retrieves Time and Date information from the Master.
•The Set Time button retains and saves any time/date modifications made on the panel.
Time Display fields: • These fields display the time in three formats: STANDARD, STANDARD AM/PM, and 24 HOUR.
Date Display fields: • These fields display the calendar date information in several different formats.
Set Date/Time: Use the Up/Down arrow buttons to adjust the Master’s calendar date and time. The blue icon indicates which
field is currently selected.
• Year range = 2000 - 2199
• Month range = 1 - 12
• Day range = 1 - 31
• Hour = 24-hour military
• Minute range = 0 - 59
• Second range = 0 - 59

 Loading...