MP-1xx SIP User’s Manual F. Accessory Programs and Tools
Version 4.4 227 March 2005
addition to those tones analyzed when in automatic mode.
To start recording in manual mode, take these 6 steps:
1. Press the Manual tab at the top of the recording screen, the manual recording screen is
displayed.
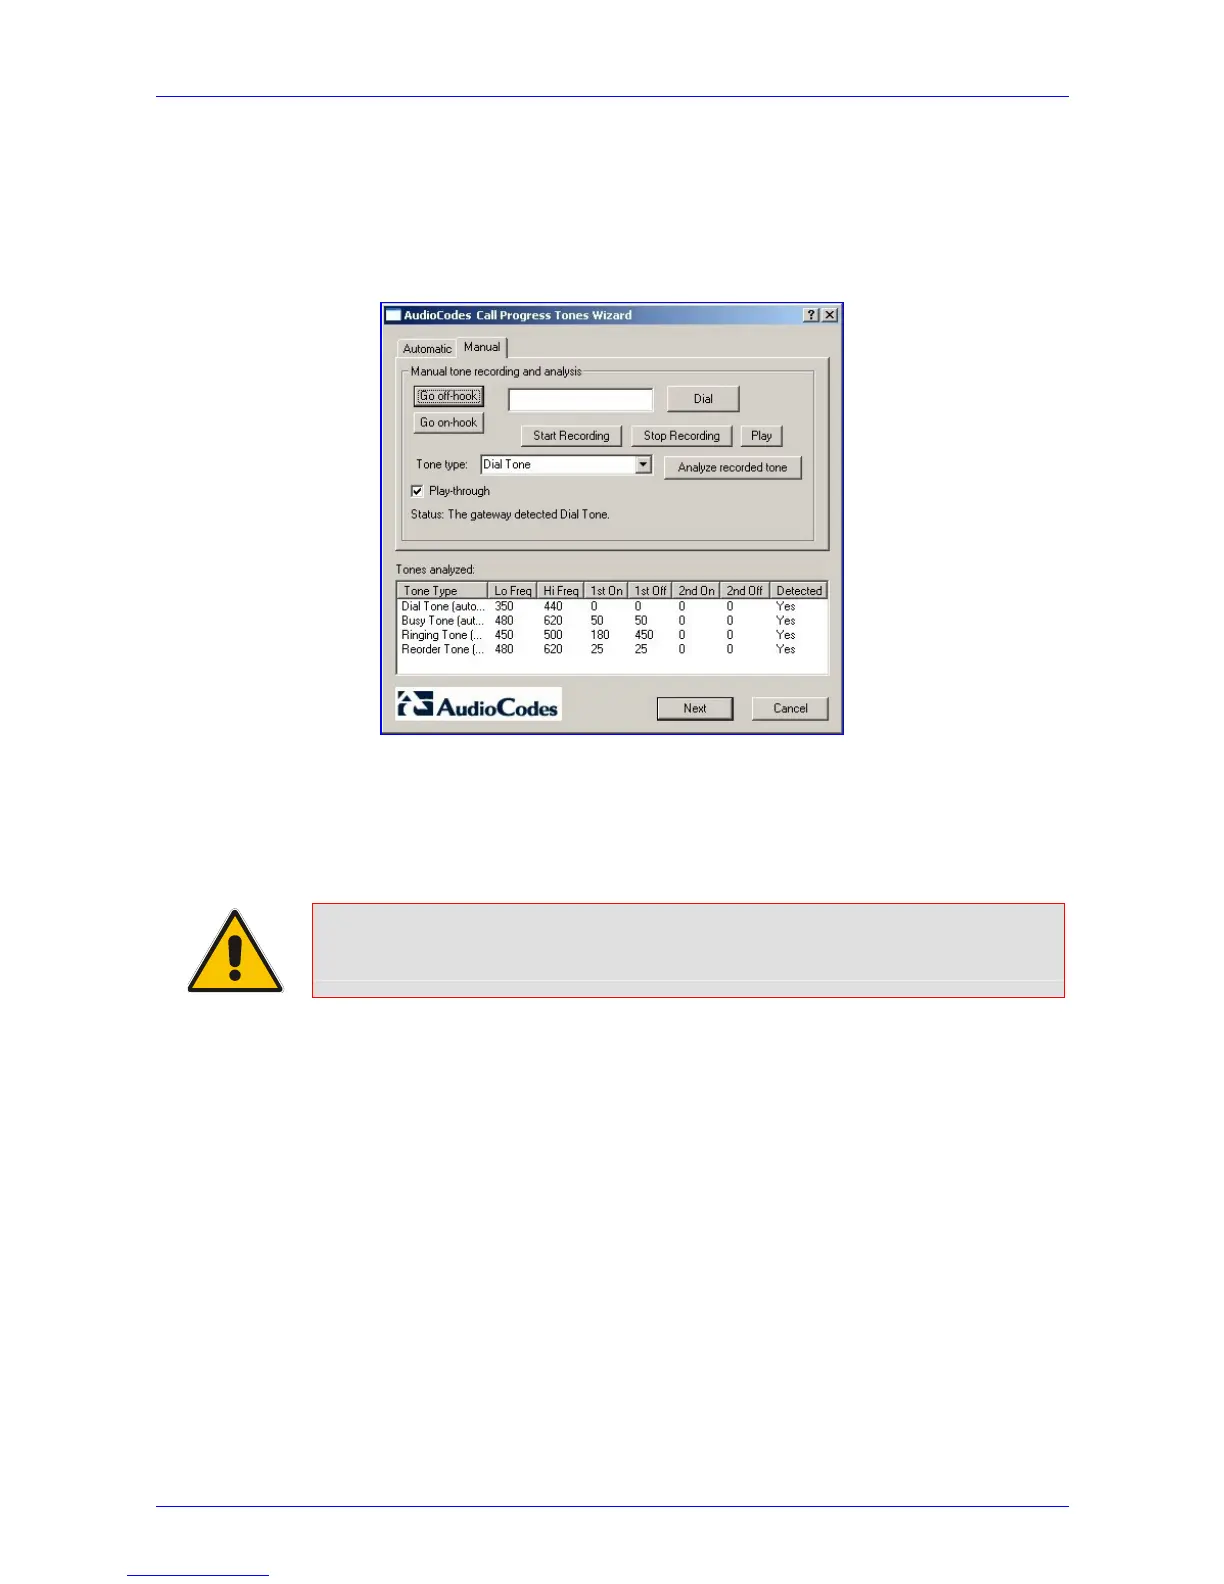
Figure F-9: Recording Screen - Manual Mode
2. Check the play-through check box to hear the tones through your PC speakers.
3. Press the Go offhook button, enter a number to dial in the Dial field, and press the Dial
button. When you’re ready to record, press the Start Recording button; when the desired
tone is complete, press Stop Recording. (The recorded tone is saved as
“cpt_manual_tone.pcm”.)
Note: Due to some PC audio hardware limitations, you may hear “clicks” in play-
through mode. It is safe to ignore these clicks.
4. Select the tone type from the drop-down list and press Analyze recorded tone; the
analyzed tone is added to the Tones analyzed list at the bottom of the screen. It is possible
to record and analyze several different tones for the same tone type (e.g., different types of
“busy” signal).
5. Repeat the process for more tones, as necessary.
6. When you’re finished adding tones to the list, press Next to generate a Call Progress Tones
ini file and terminate the wizard.
F.2.6 The Call Progress Tones ini File
After the Call Progress Tones detection is complete, a text file named call_progress_tones.ini is
created in the same directory as the directory in which the CPTWizard.exe is located. This file
contains:
• Information about each tone that was recorded and analyzed by the wizard. This information
includes frequencies and cadence (on/off) times, and is required for using this file with the
TrunkPack Downloadable Conversion utility.
 Loading...