MP-1xx SIP User’s Manual 4. Getting Started
Version 4.4 37 March 2005
2. Reconnect the power cable; the gateway is powered up. After approximately 45 seconds the
Ready LED turns to green and the Control LED blinks for about 3 seconds.
3. While the Control LED is blinking, press shortly on the reset button (located on the left side
of the front panel); the gateway resets a second time and is restored with factory default
parameters (username: “Admin”, password: “Admin”).
4. Reconnect the network cable.
5. Assigning the MP-1xx IP address (refer to Section
4.1 on page 35).
6. Load your previously backed-up ini file, or the default ini file (received with the software kit).
To load the ini file via the Embedded Web Server, refer to Section
5.9.2.1 on page 120.
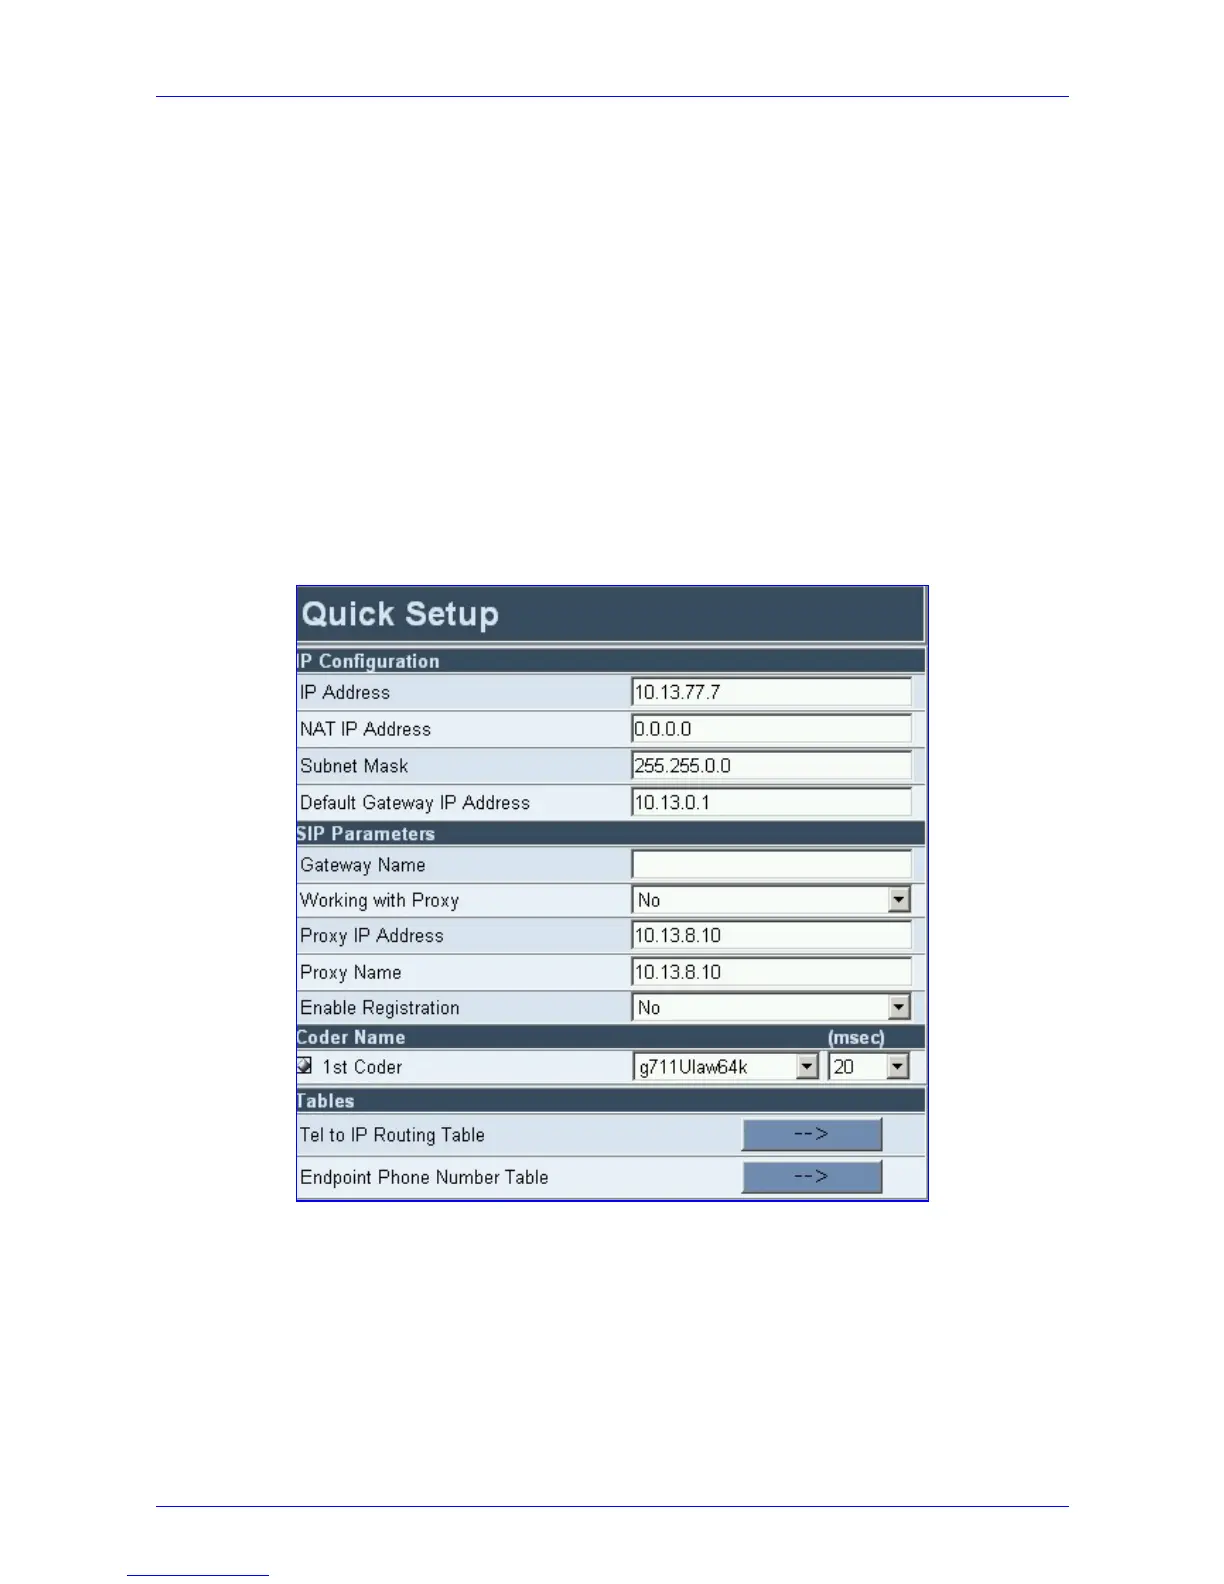
4.3 Configure the MP-1xx Basic Parameters
To configure the MP-1xx basic parameters use the Embedded Web Server’s ‘Quick Setup’
screen (shown in Figure
4-1 below). Refer to Section 5.5 on page 40 for information on accessing
the ‘Quick Setup’ screen.
Figure
4-1: Quick Setup Screen
To configure basic SIP parameters, take these 9 steps:
1. If the MP-1xx is behind a router with Network Address Translation (NAT) enabled, perform
the following procedure. If it isn’t, leave the ‘NAT IP Address’ field undefined.
Determine the “public” IP address assigned to the router (by using, for instance, router
Web management). Enter this public IP address in the ‘NAT IP Address’ field.
Enable the DMZ (Demilitarized Zone) configuration on the residential router for the LAN
port where the MP-1xx gateway is connected. This enables unknown packets to be
routed to the DMZ port.
 Loading...