7.
Tab.62 Distances and tolerances to be observed for the ignition electrode
and the burner
D
Distance POWER HT+ 1.50, POWER HT+ 1.70, POWER HT+ 1.90,
POWER HT+ 1.110
Ignition electrode and ground electrode 4 mm with a tolerance of +/- 0.5 mm
Check the distance between the ignition electrode and the ground
electrode.
Replace the ignition electrode if it is damaged.
8. Check whether the insulation on the inside surface of the burner is
damaged in any way. The surface must be clean and free of any
damage. Replace the insulation if it is damaged.
9. Remount the burner.
Remounting the burner, page 111
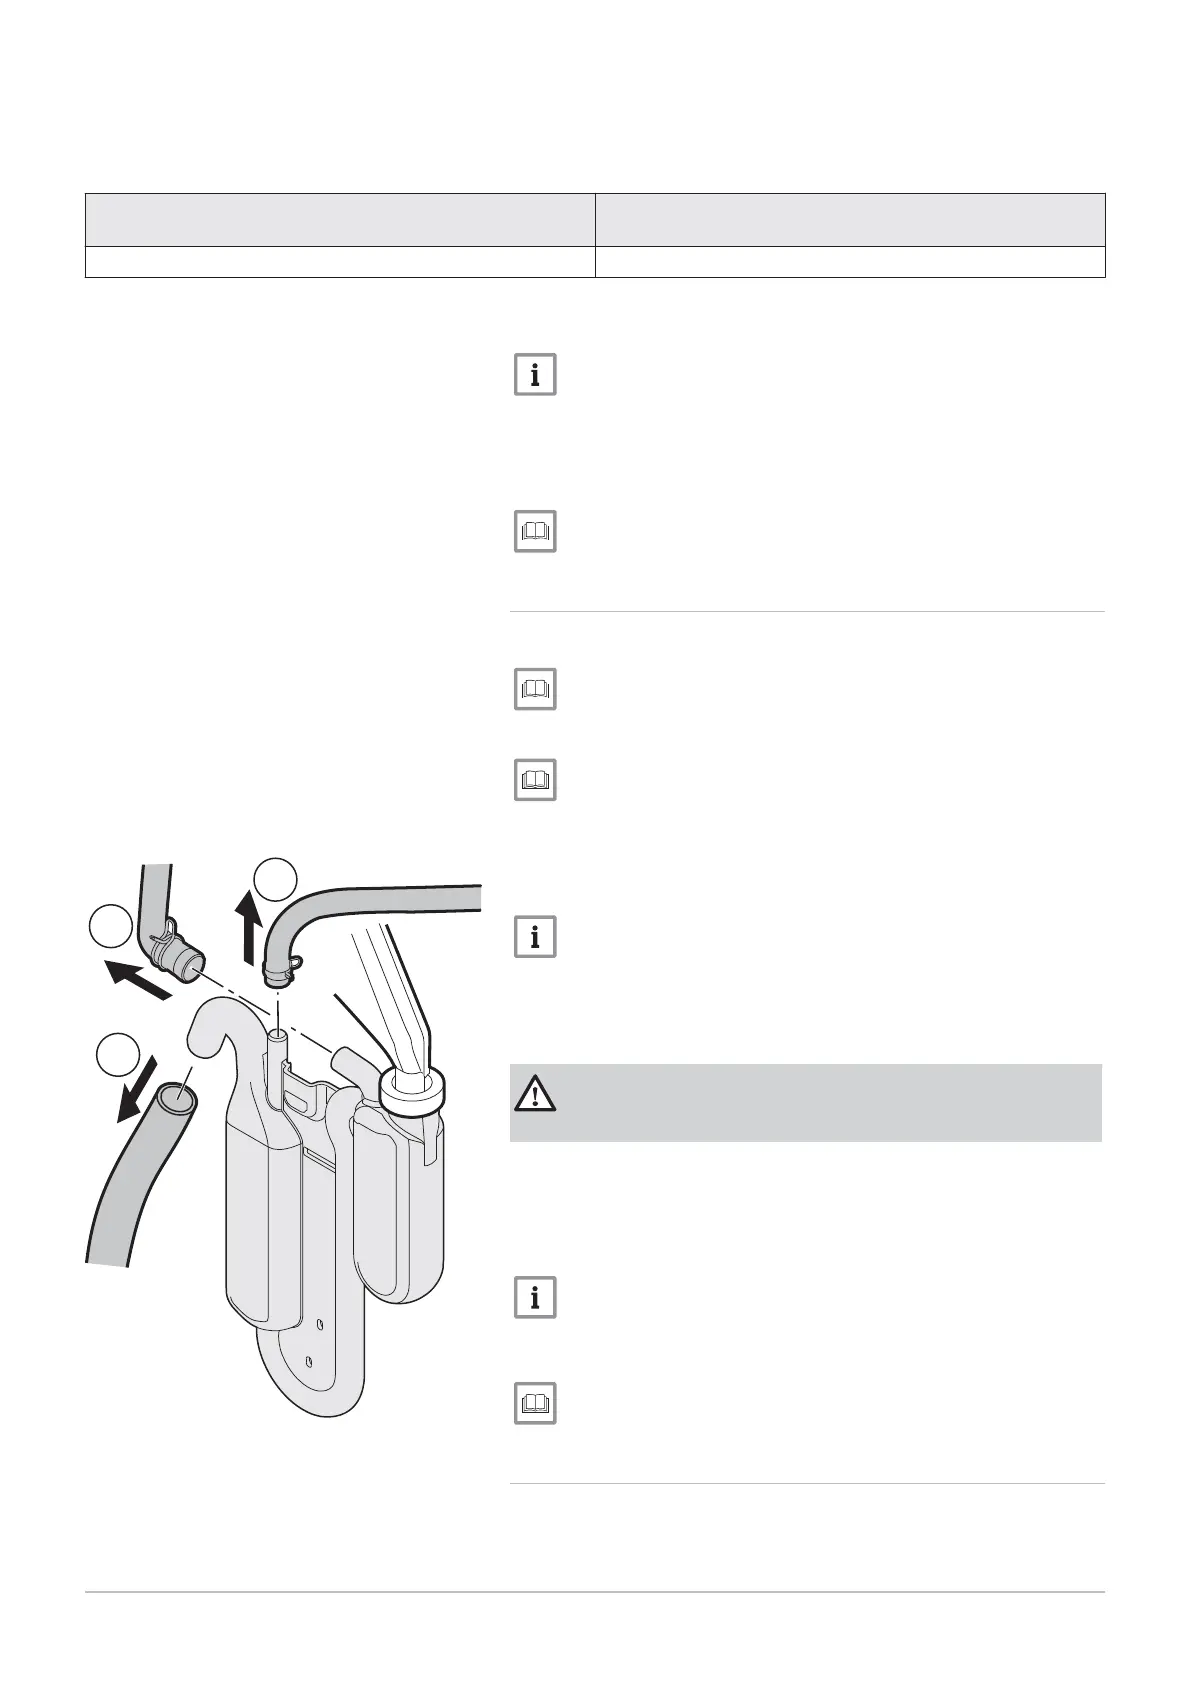
10.2.5 Cleaning the siphon
1. Remove the burner.
Removing the burner, page 107.
2. Access the siphon.
Accessing the internal boiler components, page 37
3. Disconnect the pipe from the combustion chamber (only on POWER
HT+ 1.50 and POWER HT+ 1.70).
4. Disconnect the pipe from the exchanger for the flue gases.
5. Disconnect the condensates discharge pipe.
Use a pair of pliers to remove the spring tightening clamps.
6. Remove the siphon from the heating body by taking out the retaining
screw with a cross-head screwdriver.
7. Clean the bottom of the siphon with water.
8. Completely fill the siphon.
Fill the siphon to the top. If the siphon is empty, there is a danger
of intoxication by exhaust gases.
9. Put the siphon back on the heating body and put the retaining screw
back in place with a cross-head screwdriver.
10. Reconnect the pipe from the combustion chamber, the pipe from the
exchanger for the flue gases and, finally, the condensates discharge
pipe.
Use a pair of pliers to put the spring tightening clamps back in
place.
11. Remount the burner.
Remounting the burner, page 111.
10.2.6 Remounting the burner
1. Remount the pipe connecting the gas valve to the Venturi unit.
2. Remount the burner, the Venturi and the fan.
Fig.
144
Distances and tolerances to be ob
served for the ignition electrode and
the ground electrode
Fig.
145
Removing the siphon
MW-3000104
5
4
3
10 Maintenance
7609474 - v02 - 04092014 111
 Loading...