– 250 –
14-6. Fan IPDU P.C. board (MCC-1610) replacement procedure
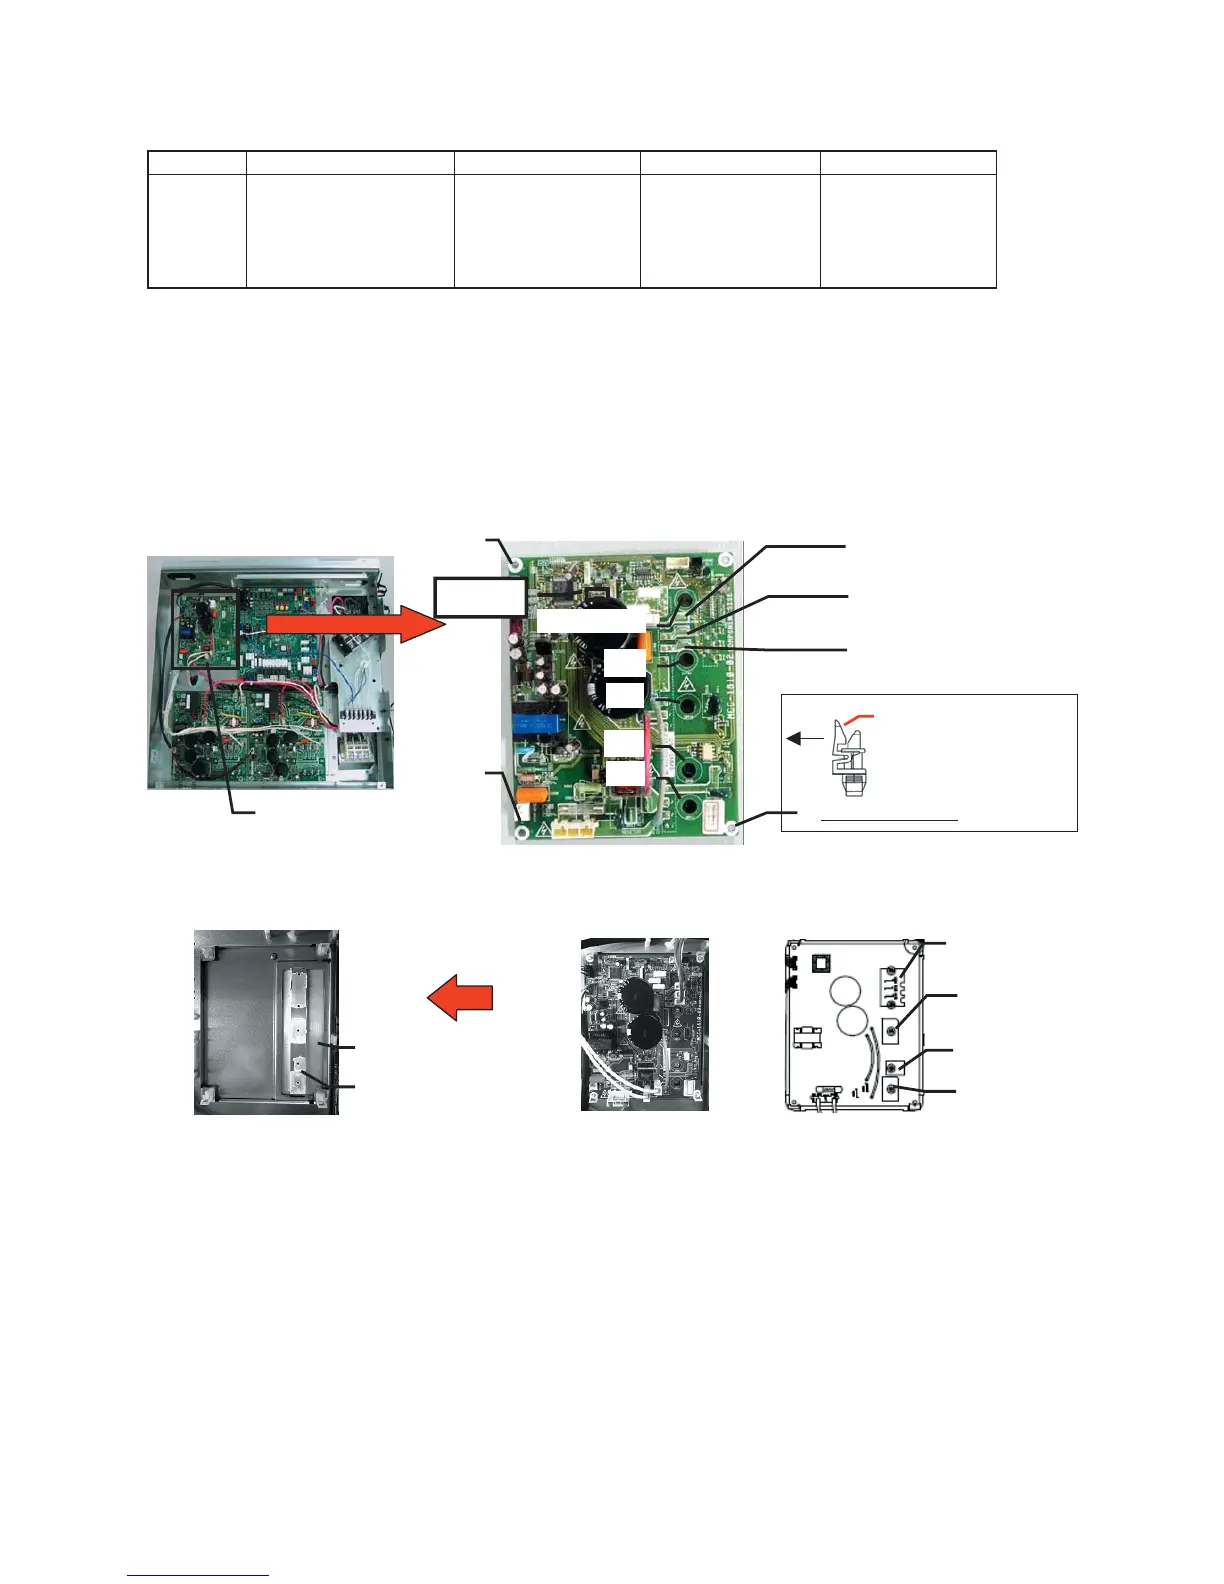
Parts code Description Applicable model P.C. board type code Product code
MMY-MAP0724FT9UL
MMY-MAP0964FT9UL
MMY-MAP1204FT9UL
MMY-MAP0724FT6UL
MMY-MAP0964FT6UL
MMY-MAP1204FT6UL
4316V520 Inverter P.C. Board for fan MCC-1610 ASM-PCB(FAN IPDU)
Fast-on terminal
1
BLACK lead wire
PCB Mounts
3
Screw
2
Fast-on terminal
1
RED lead wire
Fast-on terminal
1
WHITE lead wire
FAN IPDU
(MCC-1610)
3
2
2
2
2
3
LED
(D640)
Push this part to the
direction of the arrow.
And remove the PCB.
Remove the PCB
Sub Heat Sink
Heat Sink
IC701
DB510
Q590
DB509
Replacement steps:
(1) Turn off the power supply of the outdoor unit and allow at least one minute for the capacitor to discharge.
Confirm that the light of the LED (D640) fades away.
(2) Remove all the connectors and the fast-on terminals(1) connected to the FAN IPDU. (Remove the
connectors and fast-on terminals by pulling the connector body.
Do not pull the wire).
(3) Remove all the five screws(2) which secures the FAN IPDU to the Heat sink.
(These screws are to be re-used after procedure.)
(4) Remove the Fan IPDU from the three PCB Mounts (3).
(5) Confirm that no dirt or damage is on the sub heat sink. As it can reduce the heat transfer efficiency, and
cause a breakdown.
(6) Align the PCB mount holes on the PCB with the PCB mounts, and fix the FAN IPDU to the outdoor control
unit by clipping the PCB into the PCB mounts (3).
(7) Screw the FAN IPDU to the heat sink by the five screws that were removed in step (3).
If the screws are loose, the effected component will generate heat, and cause in to breakdown. Do not use
an electric driver or an air driver, as it can cause component damage.
The torque of 5 screws (IC701, DB509, DB510 and Q590) is “0.55N•m”.
(8) Re-connect the connectors and fast-on terminals(1). Be sure that all the connectors and the fast-on
terminals are connected correctly and securely inserted.
(9) If the components on the PCB were bent during this procedure, straighten them so they do not to touch
other parts.
(10) Install the cover, then turn on the supply. Check the operation.
 Loading...