– 87 –
8-4-3. Address Setup Procedure
Single refrigerant system: go to Address setting procedure 1
Multipul refrigerant system with cetral control: go to Address setting procedure 2
Address setting procedure 1
1 Turn on indoor units first, and then turn on outdoor units.
2 About one minute after turning the power on, confirm that the 7-segment display on the
interface P.C. board of the header outdoor unit indicates U. 1. L08 (U. 1. flash) .
3 Push SW 15 to start the automatic address setting.
(It may take up to 10 minutes (normally about 5 minutes) to complete one line’s setting.)
4 The 7-segment display indicates Auto 1
→→
→→
→ Auto 2
→→
→→
→ Auto 3 .
After the indication, U. 1. - - - (U. 1. flash) starts flashing on the display.
When the flashing stops and U. 1. - - - (U. 1. light) emain lit on the display, the setting is
complete.
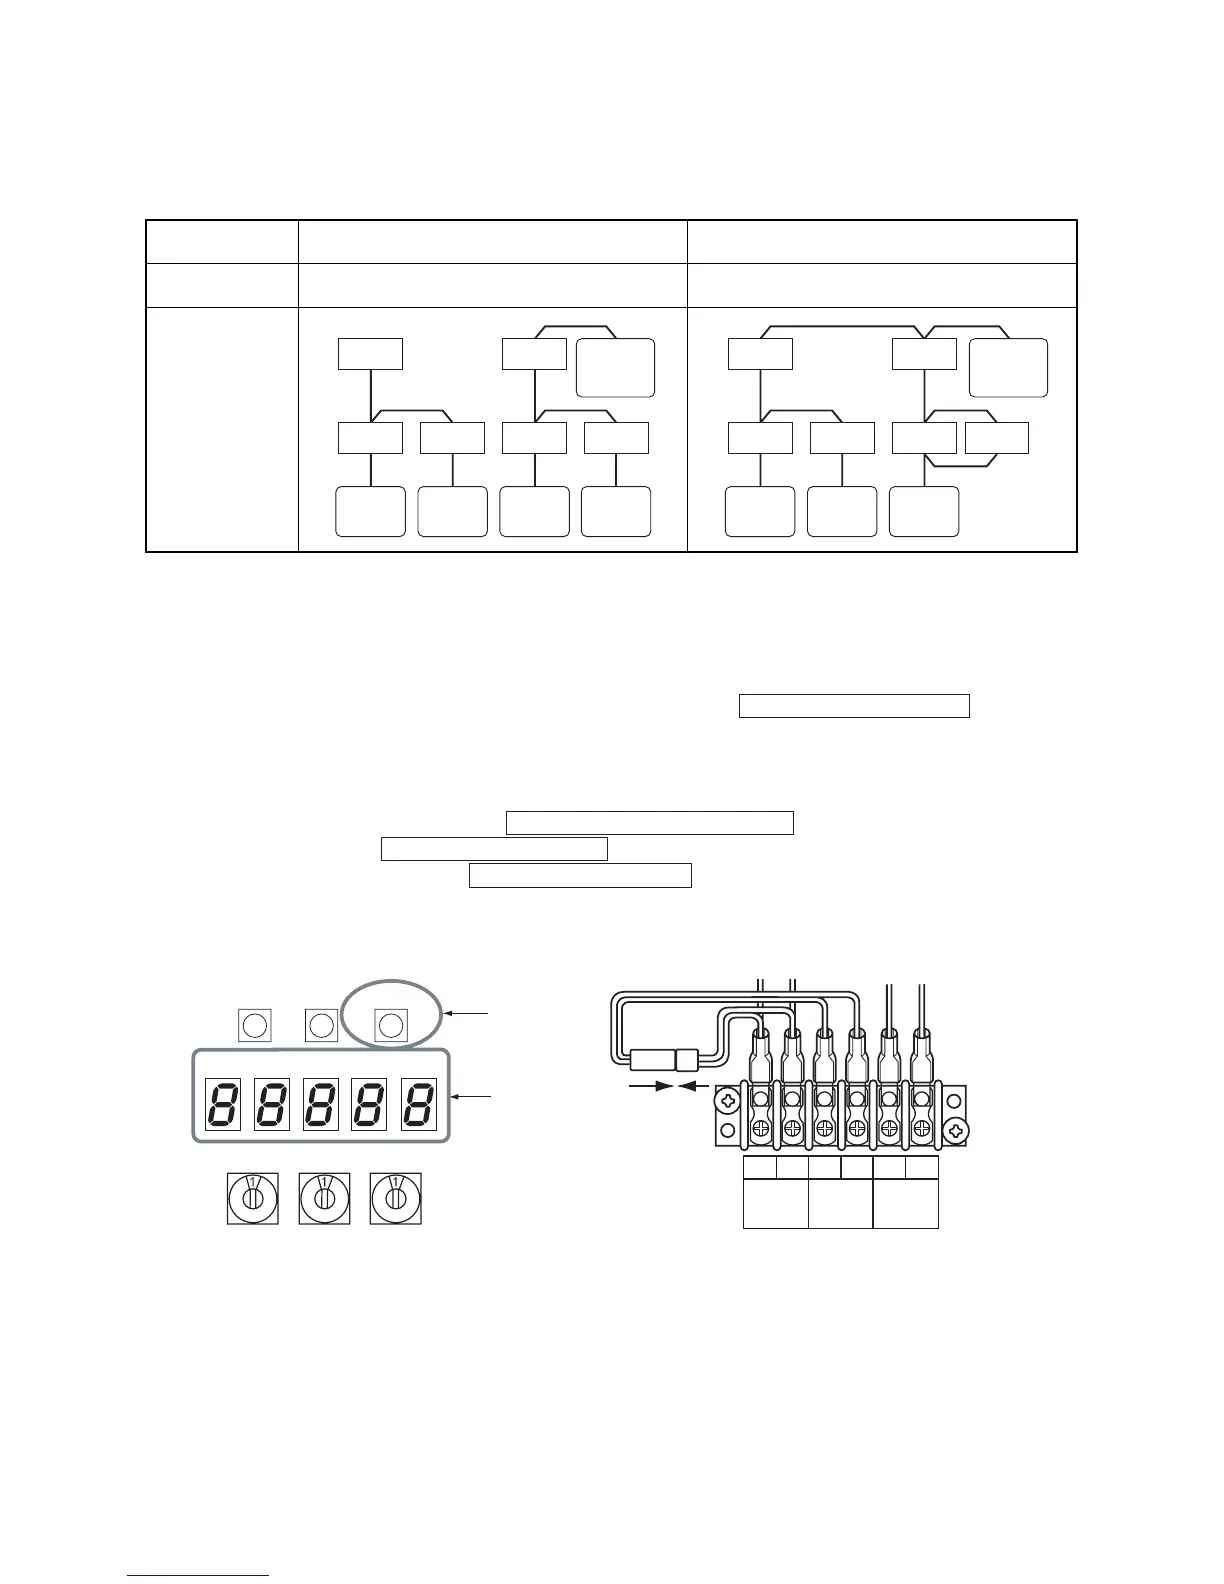
Interface P.C. board on the header outdoor unit
(Example)
Without central control
single refrigerant system with central control
when controling 2 or more
refrigerant lines centrally
Address setting
procedure
To procedure 1 To procedure 2
System wiring
diagram
Outdoor
Indoor
Indoor
Indoor
Indoor
Outdoor
Central
remote
controller
Remote
controller
Remote
controller
Remote
controller
Remote
controller
Outdoor
Indoor
Indoor
Indoor
Indoor
Outdoor
Central
remote
controller
Remote
controller
Remote
controller
Remote
controller
SW04
SW05 SW15
SW01
SW02 SW03
D600 D601 D602 D603
D604
3
5
2,4
U1 U2 U3 U4 U5 U6
TO
Relay
connector
INDOOR
UNIT
TO
CENTRAL
CONTROL
LER
TO
OUTDOOR
UNIT
5 When using a central control, connect a relay connector between [U1, U2] and [U3, U4]
terminals.
 Loading...