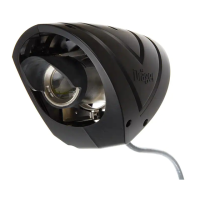
Installing and Commissioning the Dräger Polytron Pulsar 2
21
Installing and Commissioning the Dräger Polytron Pulsar 2
To install the Dräger Polytron Pulsar 2 you require:
— Dräger Polytron Pulsar 2 Transmitter and Receiver.
— Hand Held Terminal (Part of alignment kit).
— 4mm Allen key (Part of alignment kit)
— Suitable spanner for fixing. (Not supplied)
— Set of plastic Test Sheets. (Part of alignment kit)
— U bolts if fixing to a pipe. (Supplied if ordered as an accessory)
— Nominal 24V dc power.
— Where junction boxes are used Three M20 Ex e certified cable glands if unit is to be powered via Transmitter or via Receiver.
Two M20 cable glands if unit is to be linked in marshalling/control cabinet. (Not Supplied).
— Attenuator plate if the operating distance is below 16m
— A portable detector to check that the beam path is free of hydrocarbon gas before zeroing.
● Carefully unpack the equipment and check the contents of the boxes against the packing note. In case of shortages or damage contact
the carrier, Draeger Safety UK Ltd. or the distributor immediately.
● Mount the Dräger Polytron Pulsar 2 on a suitable structure, ensuring that the beam path meets the criteria laid down in section “Install-
ing The Dräger Polytron Pulsar 2”.
● Connect the field cables (see Electrical installation section) and apply power.
● If the beam path is less than 16m the AP800 attenuator (see figure 11) must be fitted to the TRANSMITTER. The attenuator has push
out sections depending on the distance over which the Dräger Polytron Pulsar 2 is to be used, the inner sections should be removed
for beam paths between 8 and 16m. To fit the attenuator press the three serrated tabs firmly into recesses in the transmitter lens retain-
ing ring.
— During the alignment and zeroing procedure the output from the Dräger Polytron Pulsar 2 will vary between 0 and 20mA. It is
therefore important that all control functions are inhibited.
— The following sections explain how to commission the Dräger Polytron Pulsar 2, see “The Handheld Terminal” section for using
the Draeger PLMS Handheld Terminal. Essentially the same steps can be carried out using the MTL611B Handheld terminal
(based on a Psion Organiser) that was formerly supplied, or with a laptop computer, running software supplied by Draeger
PLMS. Please refer to the appropriate documentation.
NOTE
Only apply the power if you intend to fully commission the detector at this stage.

 Loading...