7 Managing Users
28
7.1.2 Enrolling and Deleting Proximity Tags
When enrolling or deleting proximity tags for a user, the system provides a choice of option depending on
if tag is already enrolled or not. For more information on see 6.2 "Using Proximity Tags".
7.1.3 Naming a User
Adding or editing labels are accomplished by using the keypad to input the desired letters or numbers.
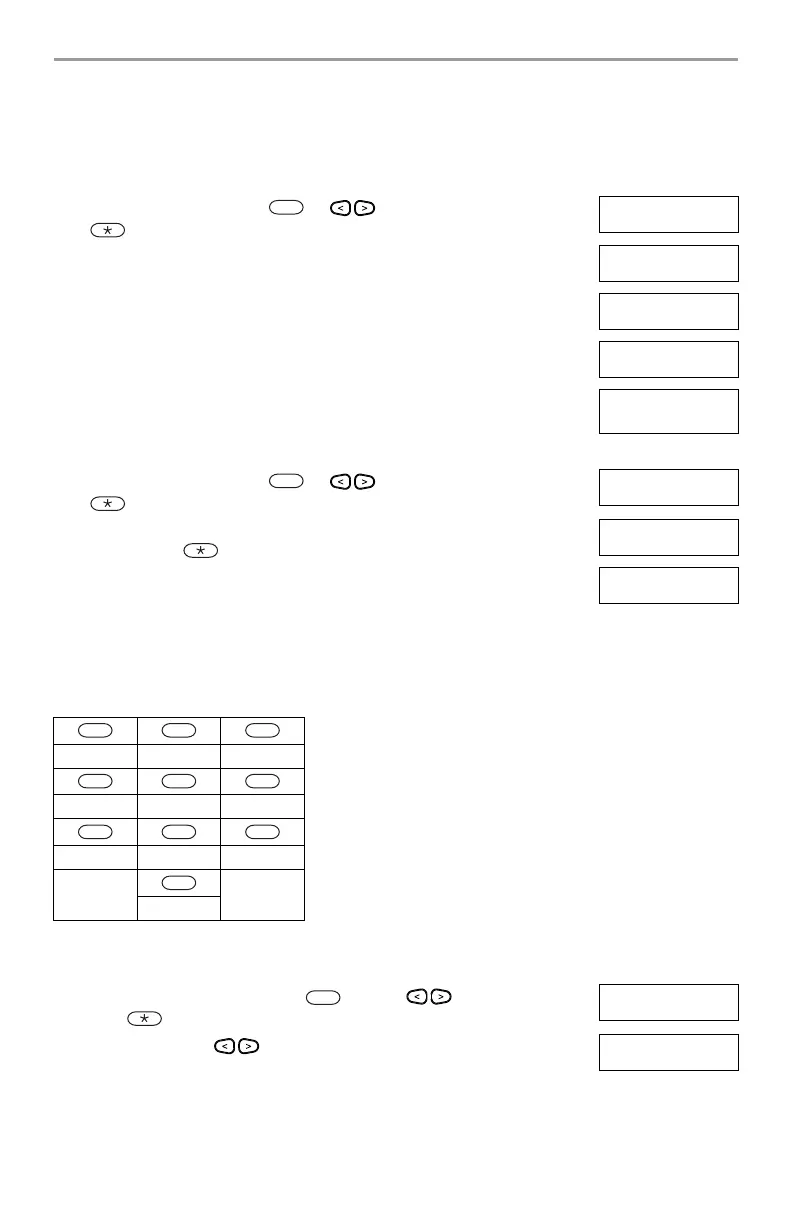
Figure 7-1 depicts the three letters and one number that corresponds to each keypad button.The first press
of the number key displays the first letter. The second press displays the second letter, etc.
Figure 7-1 Entering letters using the keypad
To Enroll a Proximity Tag LCD Display
1. From the desired user press or scroll to Prox Tag and press
.
Press (*) for <>
Prox Tag
2. If no tag is enrolled for this user you will be asked to present the tag to the
reader.
Present Tag or
Press # to Exit
• If the card successfully enrolls the blue LED bar flashes.
Tag Enrolled
Successfully
• If the tag is invalid the following message is displayed.
Invalid Tag
Not Enrolled
• If the tag already is enrolled with another user the following message is dis-
played.
Duplicate Tag
Not Enrolled
To Delete a Proximity Tag LCD Display
1. From the desired user press or scroll to Prox Tag and press
.
Press (*) for <>
Prox Tag
2. If a tag is enrolled for this user you will be asked if you would like to delete
the Tag. Press to delete the tag.
* To Delete Tag
Press # to Exit
Tag Deleted
Successfully
A, B, C, 1 D, E, F, 2 G, H, I, 3
J, K, L, 4 M, N, O, 5 P, Q, R, 6
S, T, U, 7 V, W, X, 8 Y, Z, 9,0
Space
To Edit a User Label LCD Display
1. From the User Codes menu press or scroll to User Labels and
press .
Press (*) for <>
User Labels
2. Use the arrow keys to move the cursor to a blank space or existing
character.
Program Name
{User 1 Label}
3. Press the number key corresponding to the appropriate letter as shown in Fig-
ure 7-1.
2
2
2
3
5 6
8 9
0
 Loading...