2-12
DAE2P/DAE3P Hardware Reference
Installing a DAE2P/DAE3P
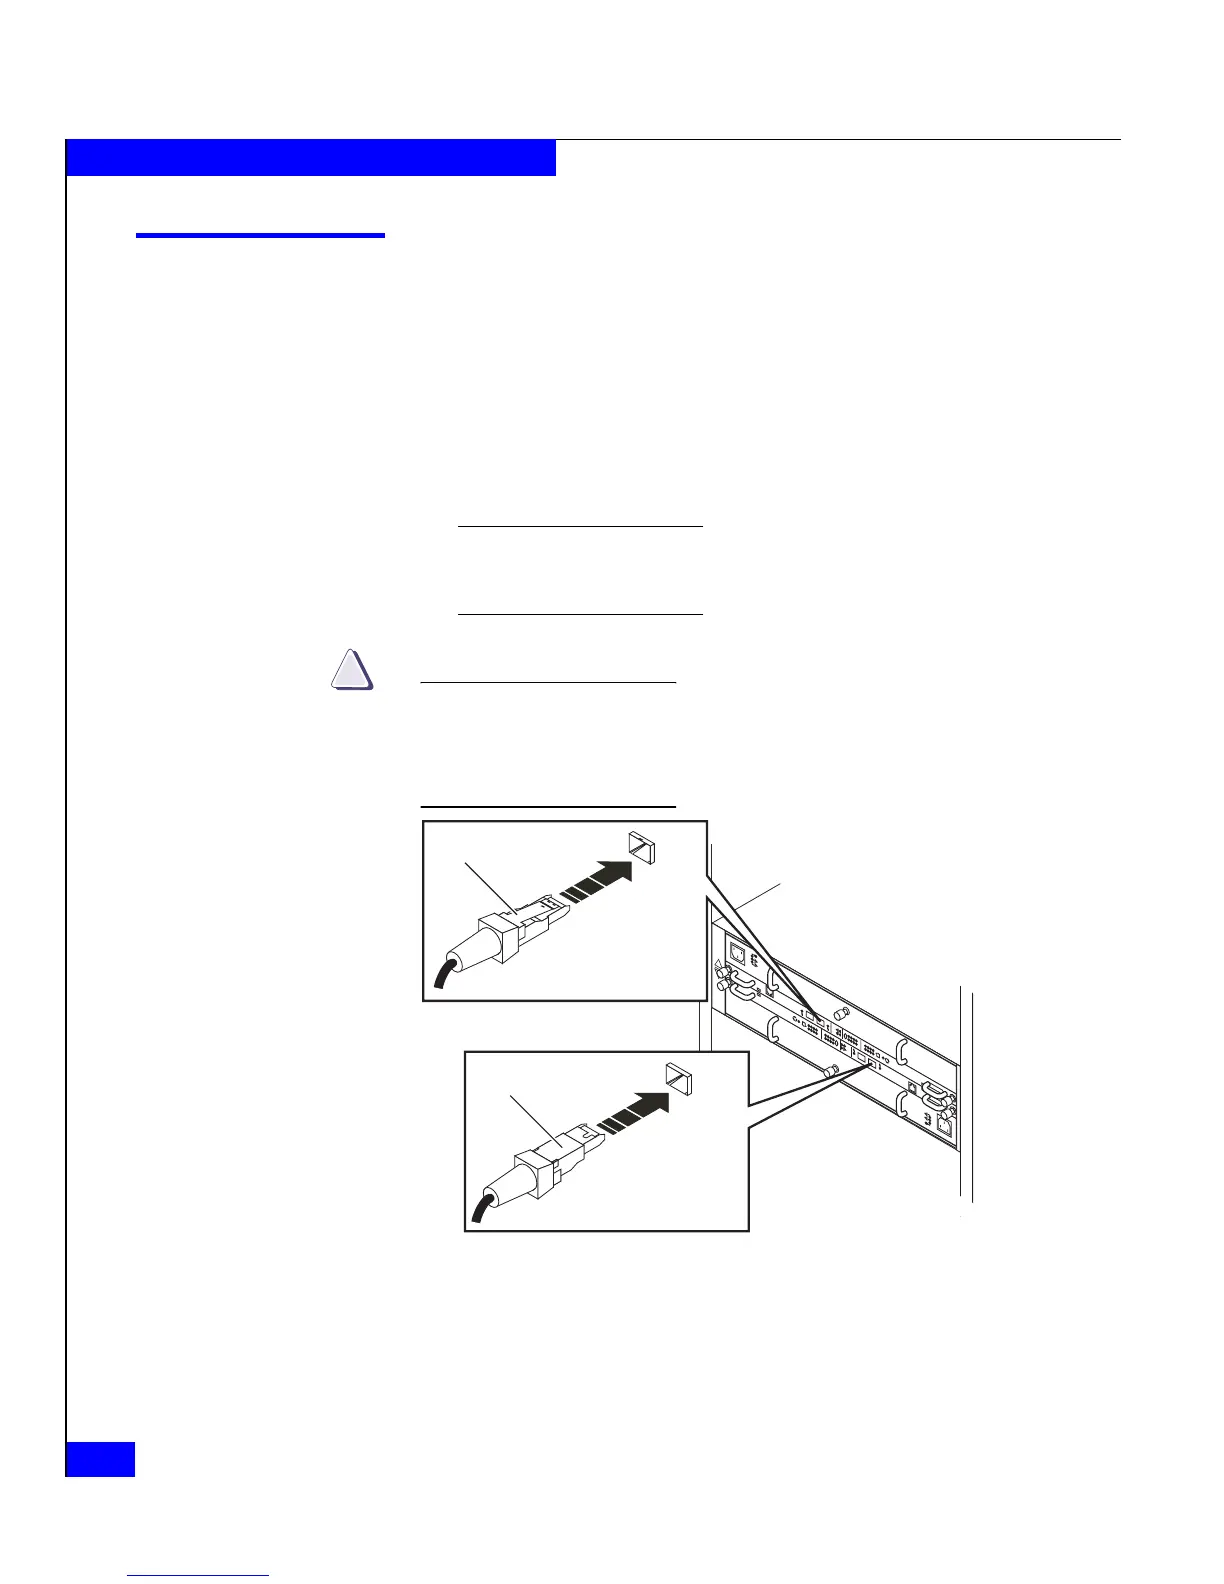
Connecting the DAE2P/DAE3P to the back end bus
Attach your DAE2P/DAE3P to a back end bus after you have set the
enclosure address.
1. Attach the copper cable from the external device (storage
processor, DAE2, or another DAE2P/DAE3P) to the PRI
connector as shown in Figure 2-5. If you are continuing the bus to
another DAE2P/DAE3P, attach a cable from the EXP connector to
the PRI connector in the next DAE2P/DAE3P.
Use HSSDC-HSSDC2 cables to connect a CX-series DPE2 , DAE2, or SPE;
use HSSDC2-HSSDC2 cables to connect DAE2Ps and DAE3Ps, and use
SFP-HSSDC2 cables to connect to a CX3-series SPE.
CAUTION
!
Make sure to orient the HSSDC2 connectors as shown in Figure 2-5.
The connector thumb clip faces up when connecting to LCC B, and
down when connecting to LCC A. An audible/tangible click
indicates that the cable is completely seated in the LCC connector.
Figure 2-5 Connecting a disk enclosure to another FC device
2. If you are installing multiple disk enclosures, cable them as
shown in Figures 2-6 and
Figure 2-7.
!!
!!
!
EXP PRI
EXPPRI
#
!
EXP
PRI
EXPPRI
#
A
B
EMC3244
To Previous Enclosure
PRI
Connector
PRI
PRI
Thumb Clip Up
To Previous Enclosure
PRI
Connector
PRI
PRI
Thumb Clip Down
 Loading...