Replacing or adding a disk module
3-15
Servicing a DAE2P/DAE3P
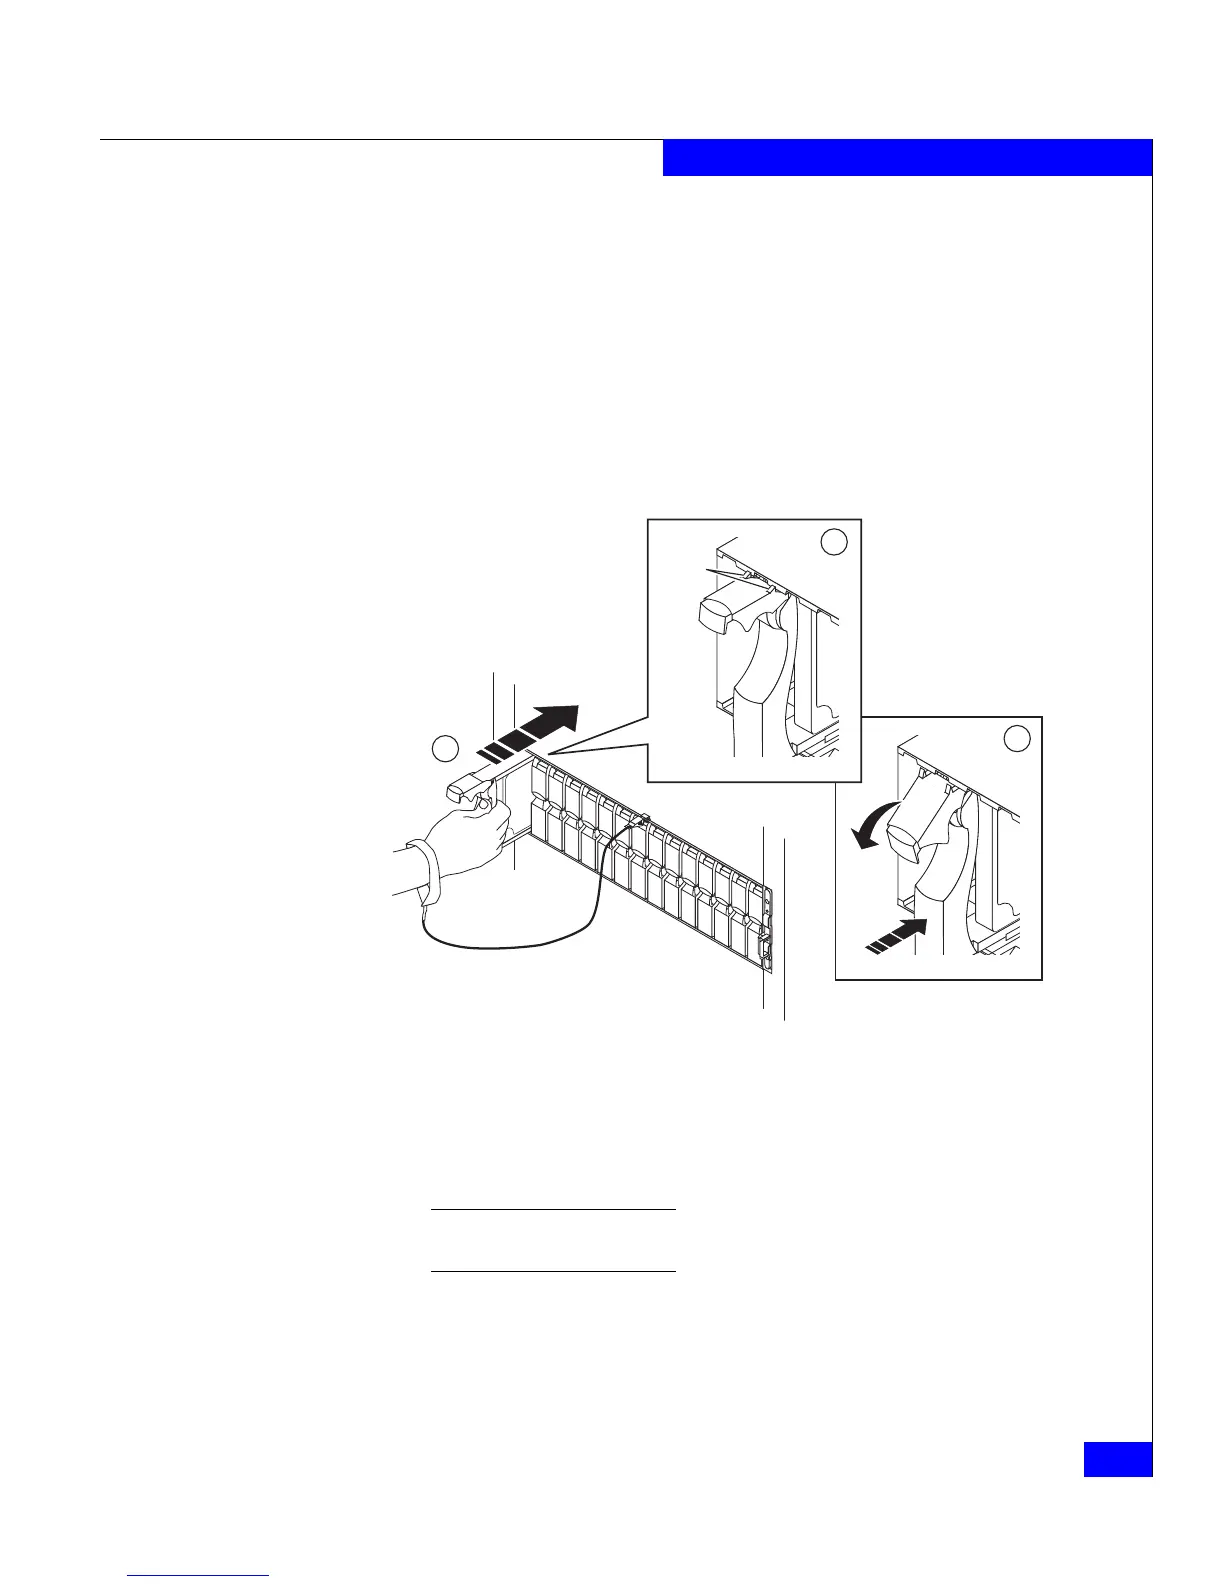
3. Refer to Figure 3-9 as you insert the new disk module.
a. With the disk module latch fully open, gently push the module
into the slot.
b. The disk module latch will begin to rotate downward when its
tabs meet the enclosure chassis.
c. Push the handle down to engage the latch. After the latch is
engaged, push firmly on the bottom of the module to verify
that the disk is properly seated.
Figure 3-9 Installing a disk or filler module
The disk module’s Active light flashes to reflect the disk’s spin-up
sequence.
If you are installing multiple disk modules in a system that is powered
up, wait at least 6 seconds before sliding the next module into position.
4. Remove and store the ESD wristband and continue to the next
section to install the front bezel.
EMC3140
Tabs
A
B
C
 Loading...