3-18
DAE2P/DAE3P Hardware Reference
Servicing a DAE2P/DAE3P
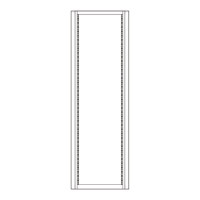
Figure 3-12 Removing an LCC
Continue to the next section to install the replacement LCC.
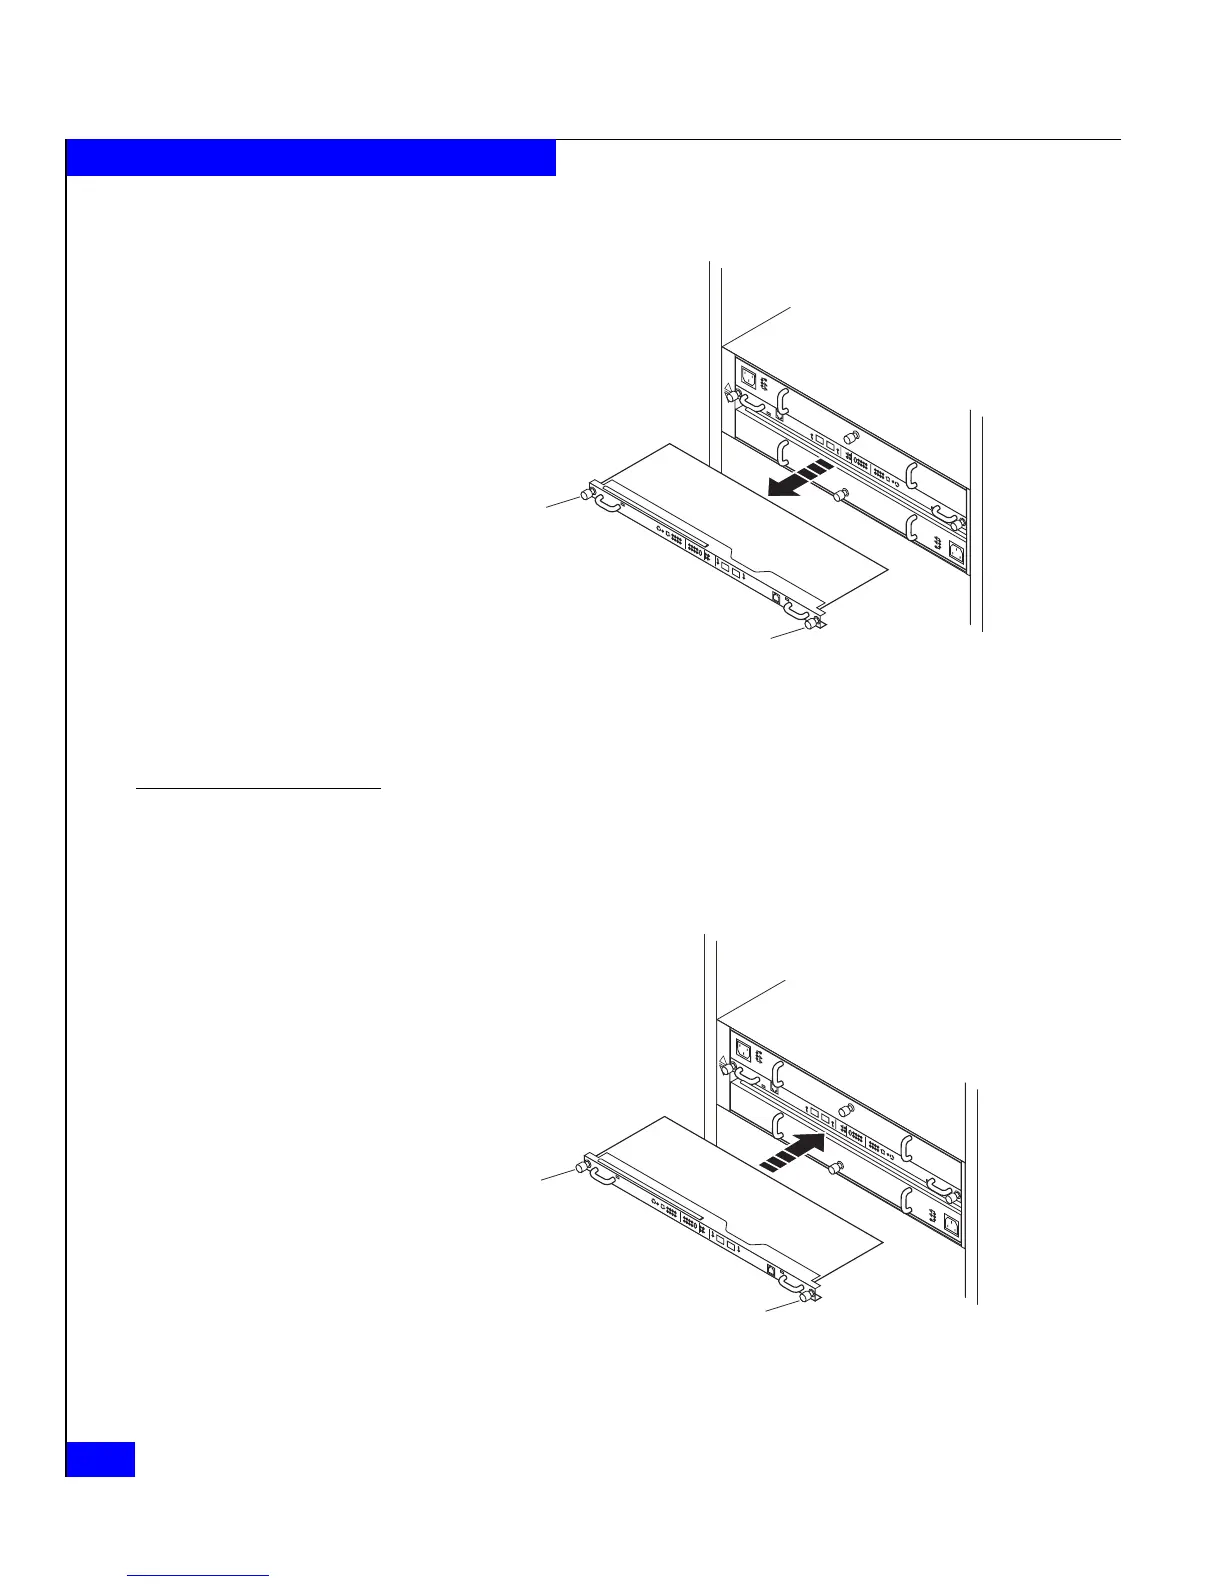
Installing an LCC
1. Gently insert the LCC as shown in Figure 3-13. Be sure the module
is completely seated in the enclosure midplane.
Figure 3-13 Installing an LCC
!!
!!
!
EXP PRI
EXPPRI
#
A
B
EMC3227
Captive Screw
Captive Screw
!
EXP PRI
EXPPRI
#
!!
!!
!
EXP
PRI
EXPPRI
#
A
B
EMC3181
Captive Screw
Captive Screw
!
EXP PRI
EXPPRI
#
 Loading...