Handle an LCC gently and use an ESD wristband. Do not remove a
faulty LCC until you have a replacement module available.
LCC modules for DAE2P and DAE3P enclosures are not interchangeable.
Make sure you have the correct replacement part before removing the LCC.
A DAE2P or DAE3P must have at least one LCC installed while it is powered
up. Do not remove both LCCs while the disk enclosure is powered up.
Removing an LCC
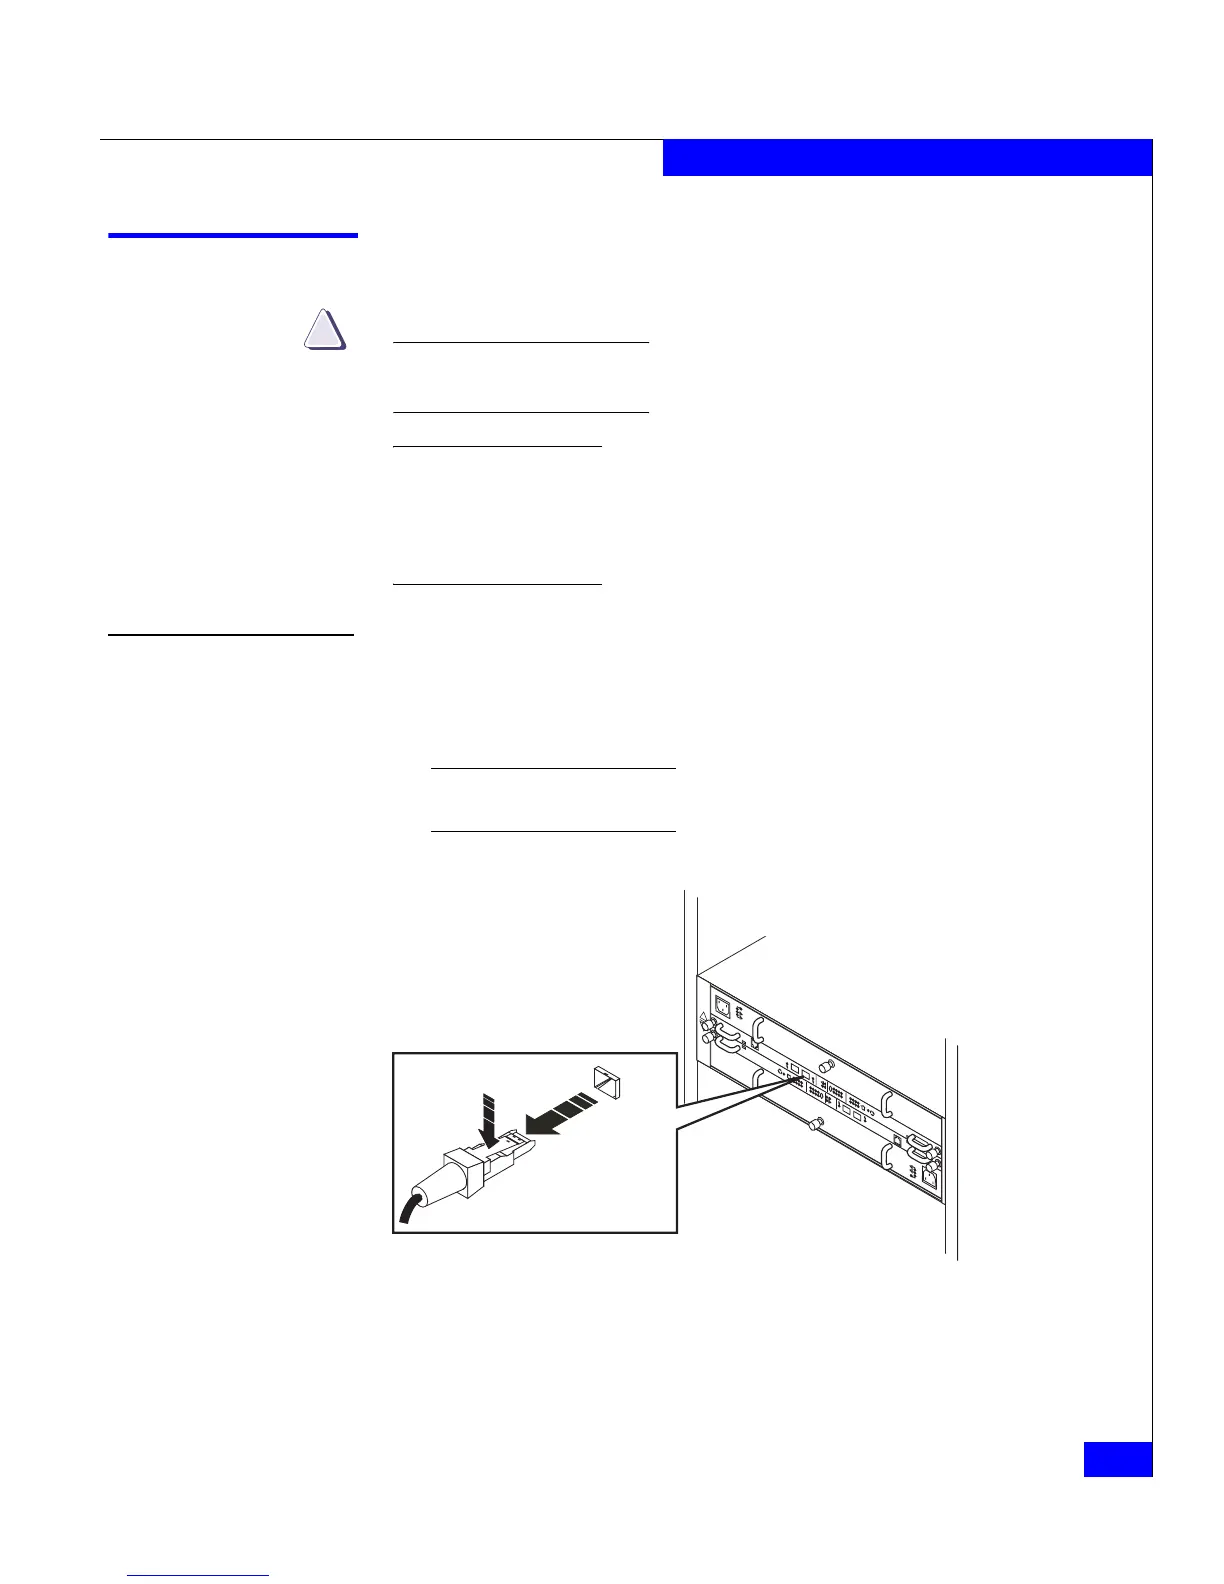
1. Gently press the connector latches to release them as you remove
the copper cables connected to the LCC, as shown in Figure 3-11.
Note where the cable(s) connect to the LCC; you will need to reconnect
them to the replacement LCC.
Figure 3-11 Removing a copper cable from an LCC
2. Turn the captive screws counterclockwise to release the module,
and then remove the LCC from its slot, as shown in Figure 3-12.
!!
!!
!
EXP
PRI
EXPPRI
#
!
EXP PRI
EXPPRI
#
A
B
EMC3212
PRI
Connector
PRI
PRI
 Loading...