c
Important:
Do not hang hanger platens on the hooks. They
could fall on the floor and be damaged.
Depending on the type of frame, only hang one as shown
in the illustration.
❏ Frames for L/M size hanger platens and
medium grooved platens
❏ Frames for S size hanger platens
❏ Frames for XS size platens as well as sleeve
platens
Loading on Sleeve Platens
A
Press the P button to turn on the printer.
B
Check that the platen is ejected forward.
If it is not ejected, press the } button to move the
platen forward.
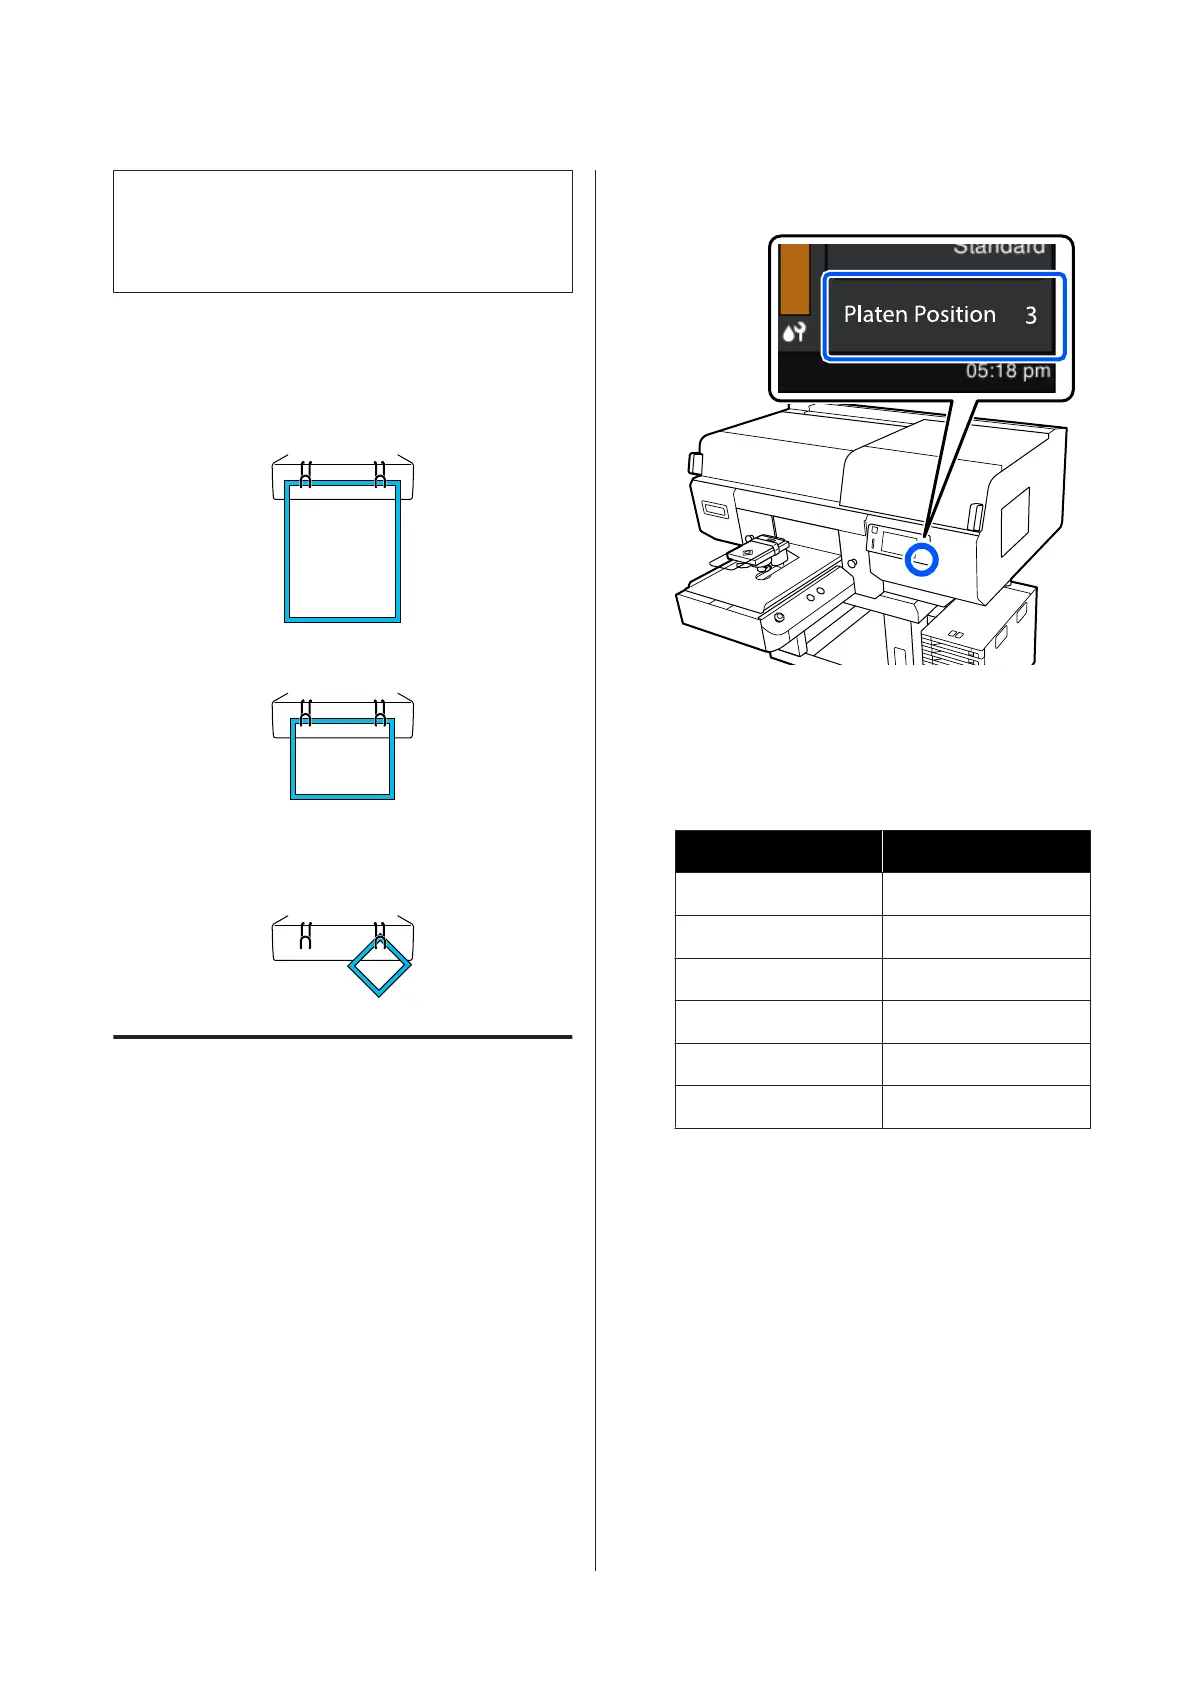
C
On the printer's screen, confirm that the platen
position is as shown below.
When Platen Gap is set to Auto:
The optimum platen position varies depending
on the thickness of the media. Use the following
guideline to change the platen position.
Media thickness Platen position
0 mm to 4 mm 3
4 mm to 7 mm 4
7 mm to 10 mm 5
10 mm to 13 mm 6
13 mm to 16 mm 7
16 mm to 19.5 mm 8
When Platen Gap is set to Manual:
The optimum platen position varies depending
on the thickness of the media being loaded and
the type of platen being used. See the following
for more details.
U “Table for Platen Gap setting values for
media thicknesses” on page 142
See the following for how to change the platen
position.
U “How to change the platen position” on
page 58
SC-F3000 Series User's Guide
Basic Printing
65
 Loading...