Connecting the Scanner to the Computer via the USB Cable
This section explains about the setup procedure for connecting the scanner to the computer by using the USB cable.
For the procedure to unpack the scanner, refer to Getting Started.
ATTENTION
If an old version of the software is installed, uninstall it first.
For the procedure to uninstall the software, refer to Uninstalling the Software (page 145).
1 Turn on the computer and log onto Windows as a user with administrator privileges.
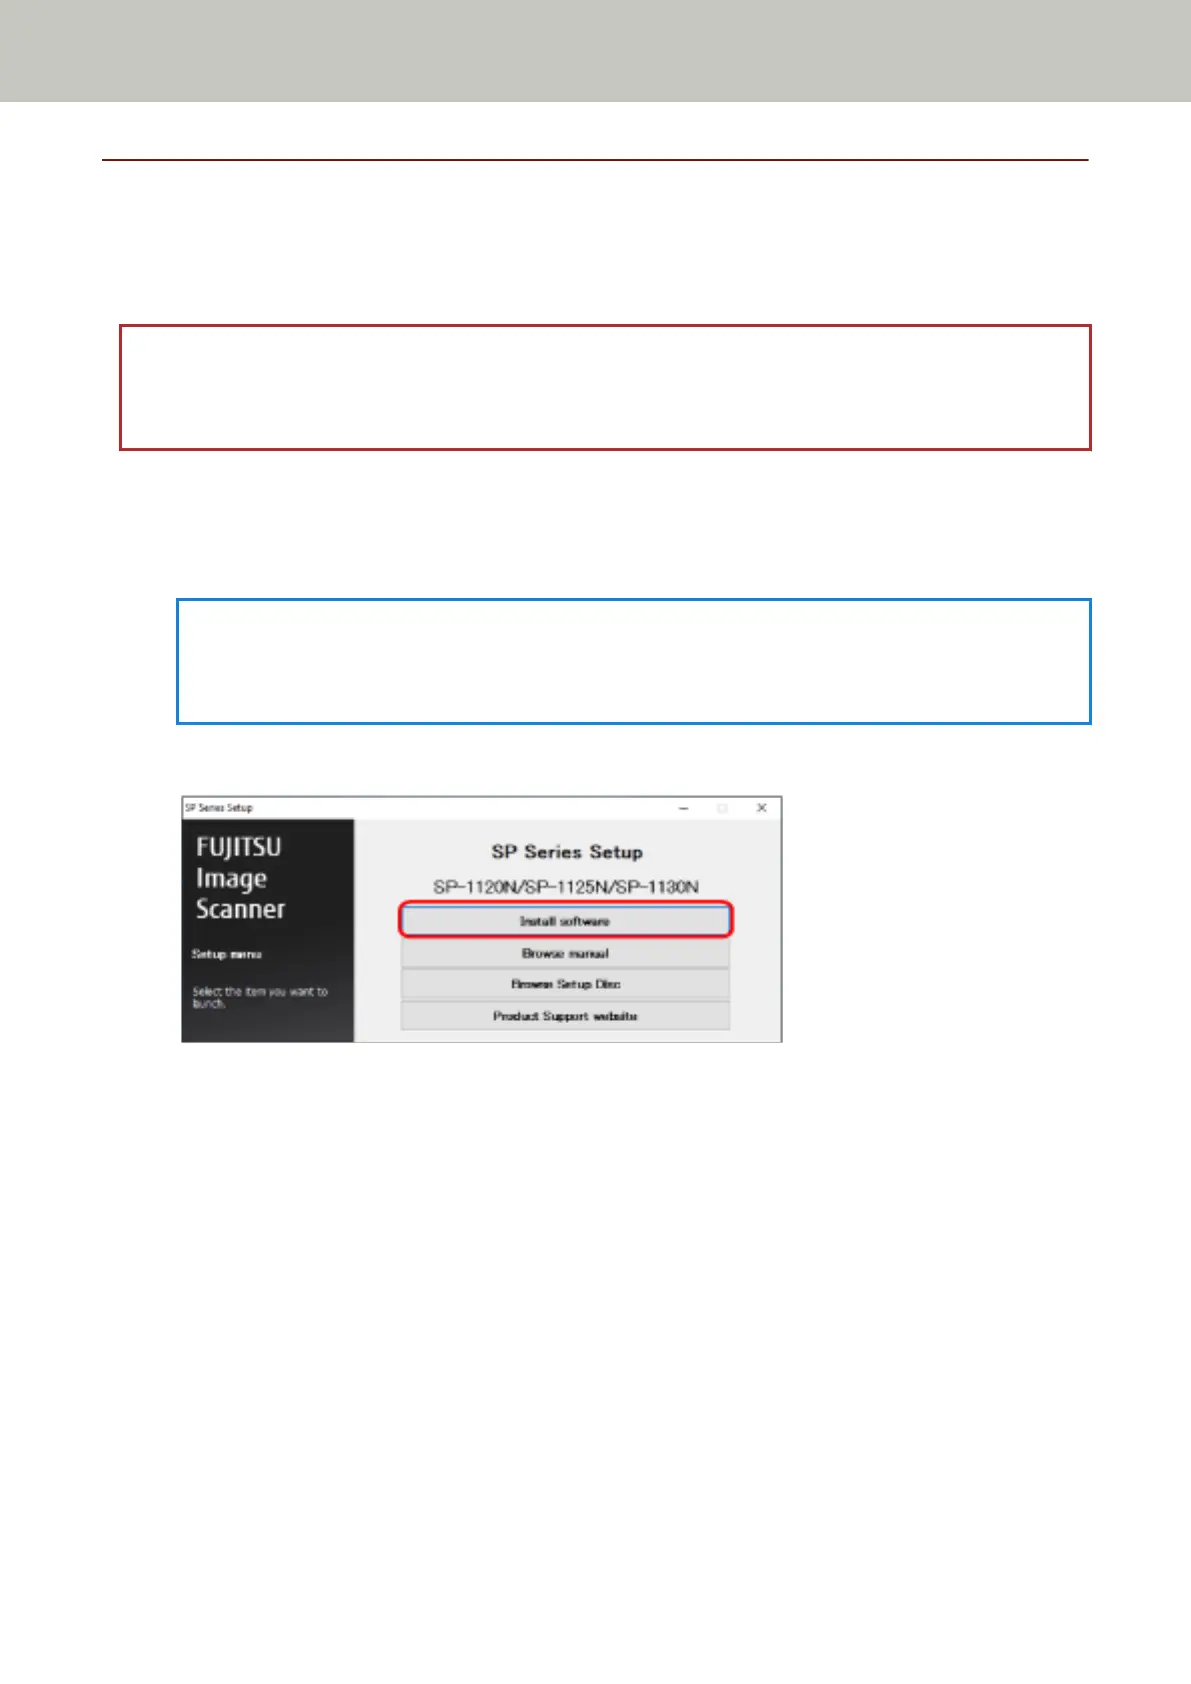
2 Insert the Setup DVD-ROM into the DVD drive.
The [SP Series Setup] window appears.
HINT
If the [SP Series Setup] window does not appear, double-click "Setup.exe" in the Setup DVD-ROM via [File
Explorer] or [Computer].
3 Click the [Install software] button.
The software information window appears.
4 Check the information and click the [Next] button.
5 Click the [Scanner software] button.
6 Install the software by following the instructions displayed in the window.
The [How to Connect the Scanner] window appears when the installation of the software is complete.
Scanner Setup
29
 Loading...