6 - Maintenance
73
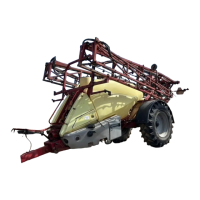
Drain valve seal replacement
If the main tank drain valve leaks, the seal and seat can be changed the
following way.
€
DANGER! Do not enter the inside of the tank - the parts can be
changed from the outside of the tank!
±
WARNING! Use eye / face protection mask when dismantling the
tank drain valve!
1. Make sure the tank is empty and clean.
2. The valve must be closed and the string loose.
3. Pull out the clip (A) and pull down connecting piece (B). The entire
valve assembly can now be pulled out.
4. Check cord and valve flap assembly (C) for wear, replace seal (D)
and assemble again.
5. Assemble the valve assembly again using a new valve seat (E). Lubricate O-rings (F) before assembly.
6. Fit clip (A) again.
ATTENTION! Check function of valve with clean water before filling chemicals into the tank.
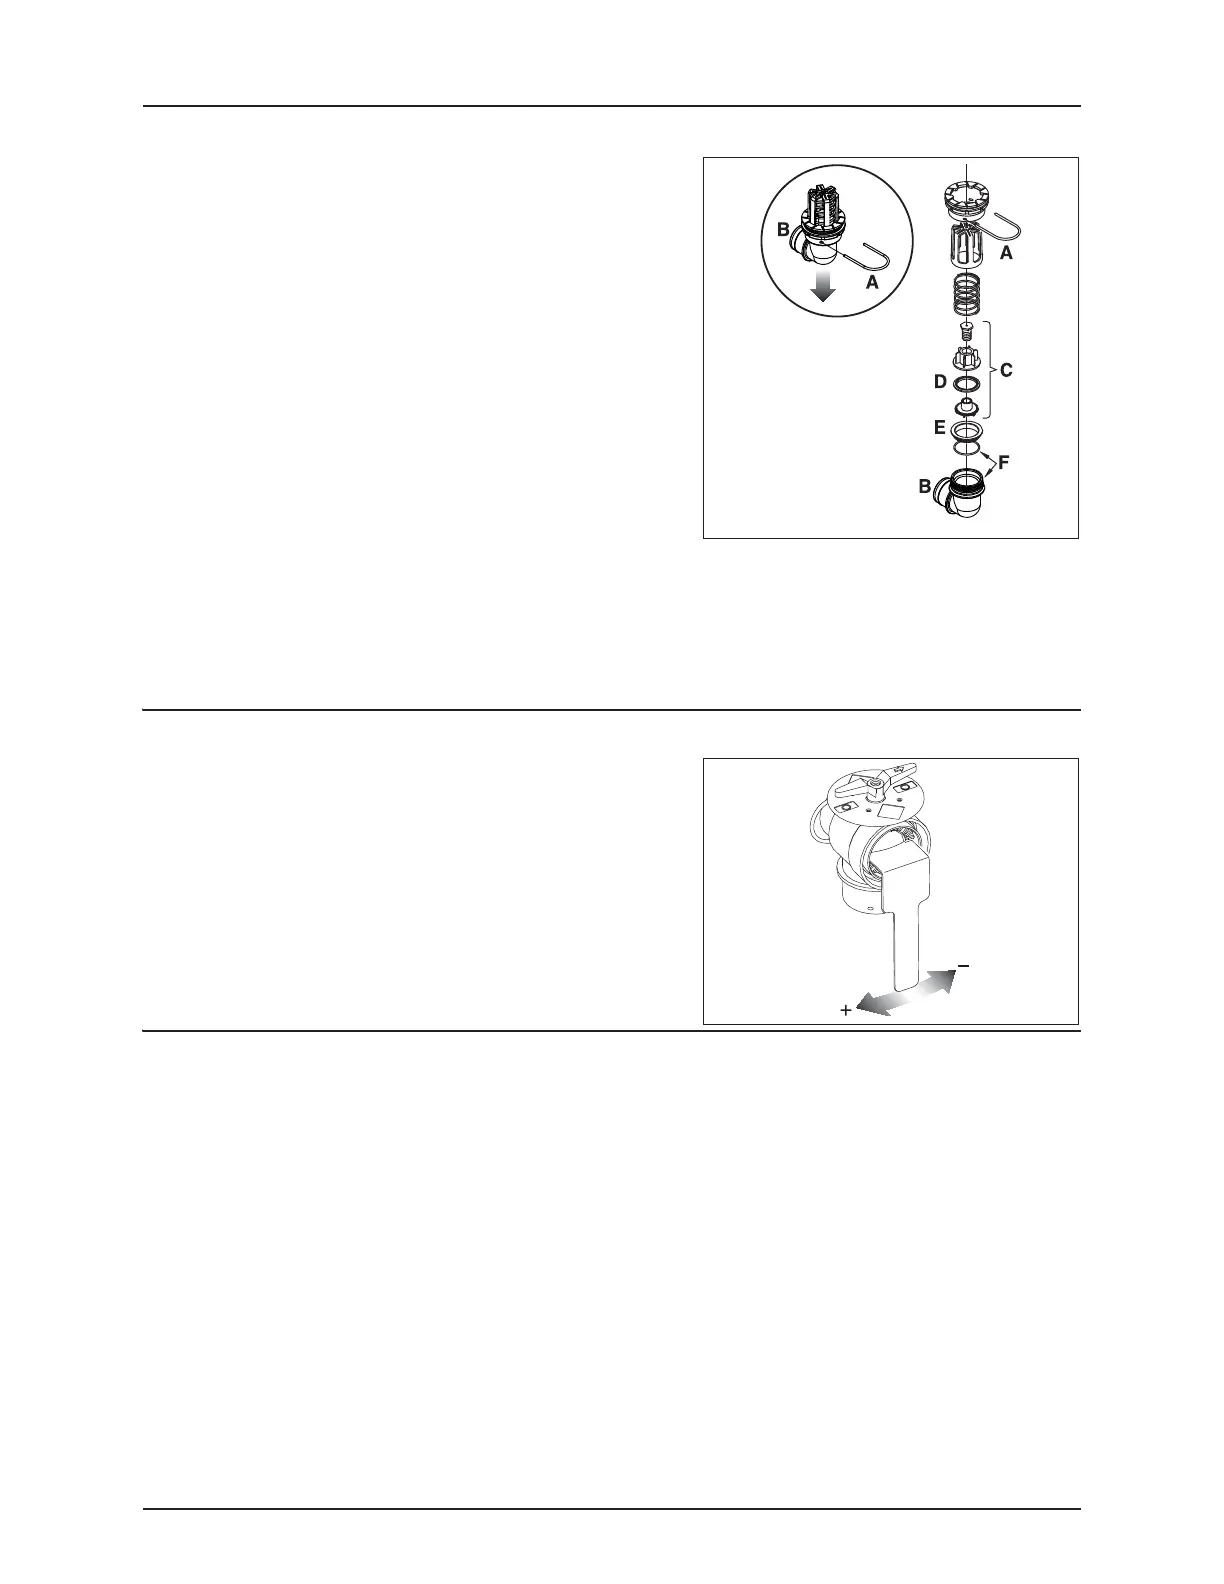
Adjustment of 3-way valve
The large ball valve (S93) used for SmartValves and valves for filling
equipment can be adjusted if it is too tight to operate - or if it is too loose
(=liquid leakage).
• Correct setting is when the valve can be operated smoothly by one
hand.
Use a suitable tool and adjust the toothed ring inside the valve as shown
on the drawing.
ATTENTION! The small ball valves (S67) cannot be adjusted.
Safety valve activation
To make the fluid system work perfectly over time, it is good practice to regularly provoke opening of the safety valve.
This avoids clogging and ensures proper function of the safety valve. This is done by turning the pressure SmartValve to an
unused function or (“TurboFiller” without activating it) when pump is running. This is good practice for all but particularly
for sprayers without optional equipment.
 Loading...