6 - Maintenance
80
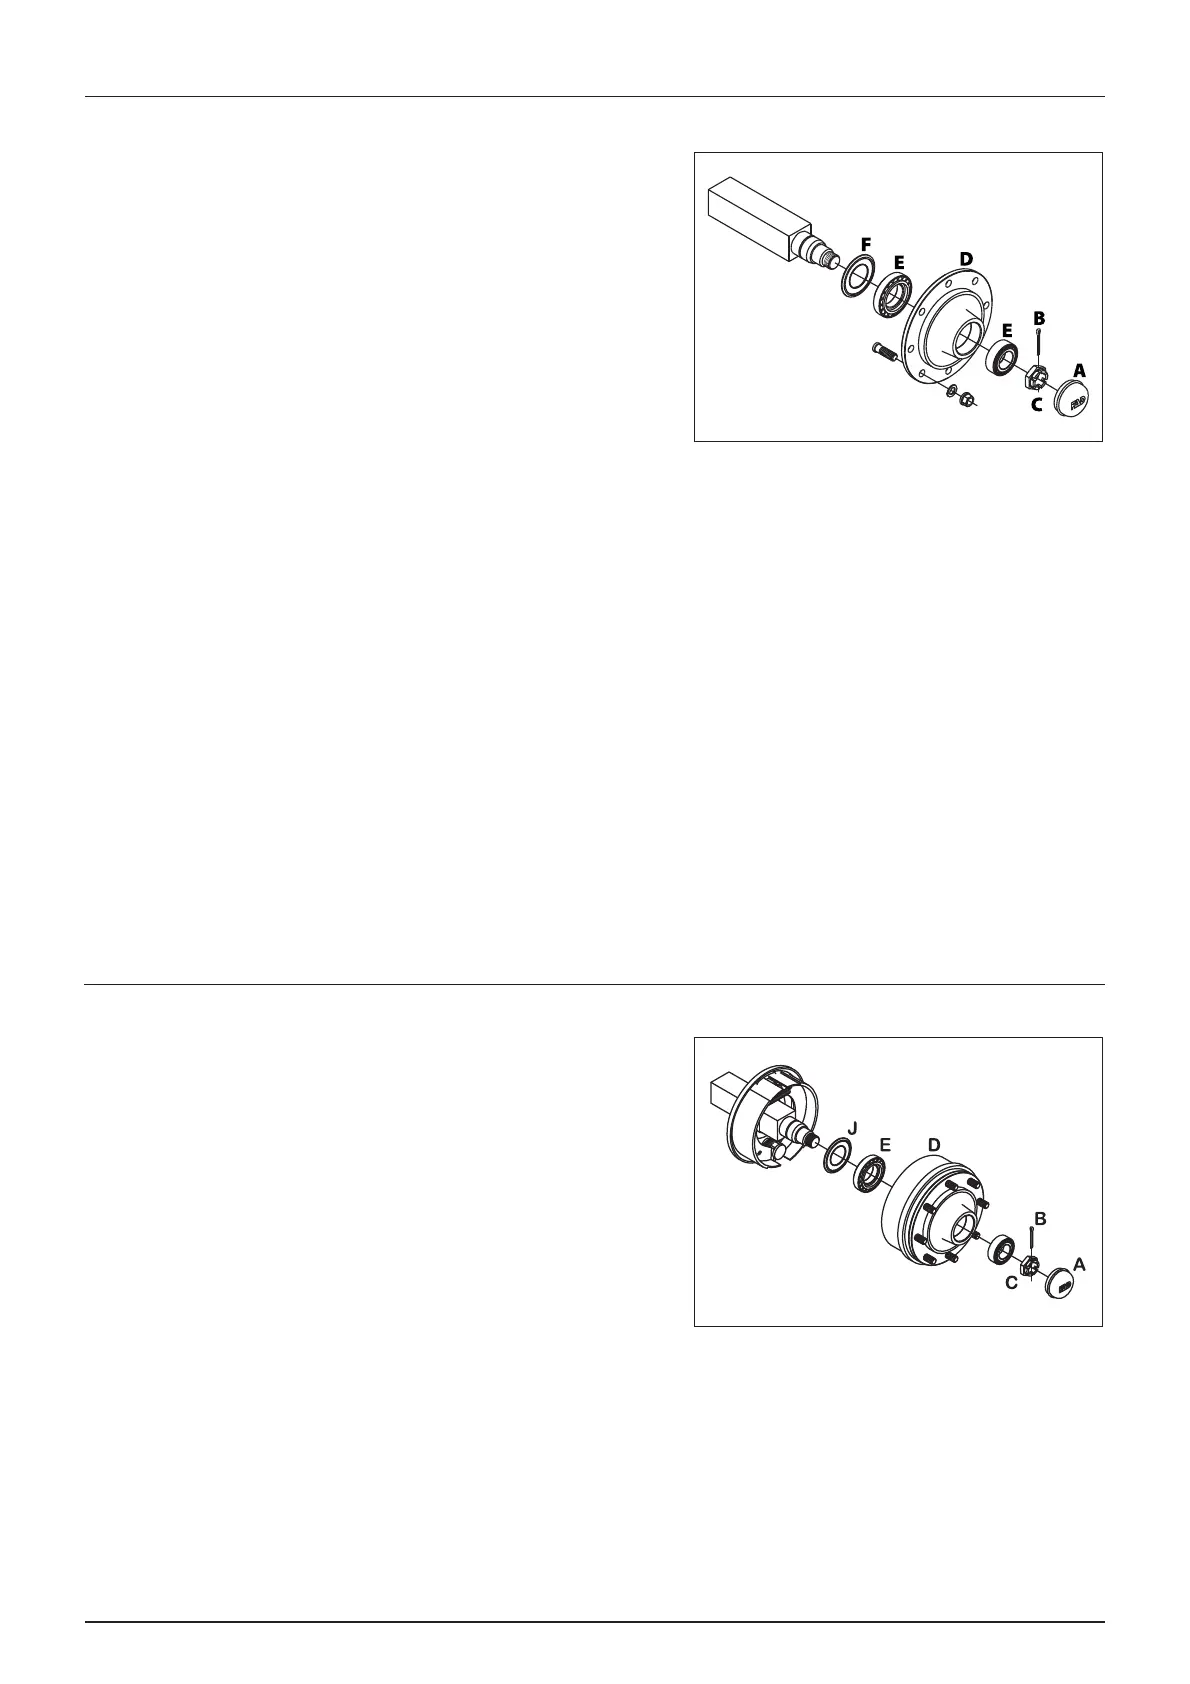
1000 hours service - Wheel bearings (No brakes)
Check the condition of the bearings in the following way:
1. Place stop wedges in front of and behind LH wheel and jack up RH
wheel.
2. Support the trailer with axle stands.
3. Remove the wheel.
4. Unscrew the 6 Allen bolts and remove the hub cap (A), cotter pin
(B) and castle nut (C).
5. Pull off the wheel hub (D). Use a wheel puller if necessary.
6. Remove roller bearings (E), clean all parts in degreasing detergent
and dry them.
7. Check roller bearings (E) for discoloration and wear - renew if worn or damaged.
8. Assemble the hub (D) and bearings (E) using a new sealing ring (F).
9. Fill the hub (D) and bearings (E) with fresh grease before fitting it to the shaft.
10. Fit the castellated nut (C). Rotate the hub (D) and tighten the castellated nut (C) until a slight rotation resistance is felt.
11. Loosen the castellated nut (C) again until the first notch is aligned with the cotter pin hole in the shaft.
12. Fit a new cotter pin (B) and bend it.
13. Fit the hub cap (A) to the hub (D). Slightly tighten the 6 Allen bolts.
14. Fit the wheel again and tighten the wheel nuts. See section “50 hours service” regarding torque wrench setting.
Tighten all bolts to half the specified torque first, then to the full specified torque.
15. Tighten again after 10 hours of work. Check the torque every day until it is stabilised.
μ
ATTENTION! The shaft has a vertical and an horizontal cotter pin hole. Use the one first aligned with the notch when
loosening the castellated nut.
±
WARNING! If you do not feel totally confident changing wheel bearings then contact your HARDI dealers workshop.
1000 hours service - Wheel bearings and brakes
Check the condition of the bearings and brake wear parts in the
following way:
1. Place stop wedges in front of and behind LH wheel and jack up RH
wheel.
2. Support the trailer with axle stands.
3. Remove the wheel.
4. Unscrew the 6 Allen bolts and remove the hub cap (A), cotter pin
(B) and castle nut (C).
5. Pull off the wheel hub and brake drum assembly. Use a wheel
puller if necessary.
6. Vacuum clean the brake drum (D) for brake dust or rinse with water.
7. Rinse the remaining parts on the brake carrier plate with water and dry them.
8. Remove roller bearings (E), clean all parts in degreasing detergent and dry them.
9. Check the brake drum diameter and lining thickness - renew if worn.
Max. wear rates on brake components:
Max. drum diameter: 302 mm (11.8897 in)
Min. lining thickness: 2.0 mm (0.07874 in)
 Loading...