Version 1.1, 09/2020. Copyright 2012 Hitron Technologies
72
Version 1.1, 09/2020. Copyright 2020 Hitron Technologies
72
Hitron CODA-551x User’s Guide
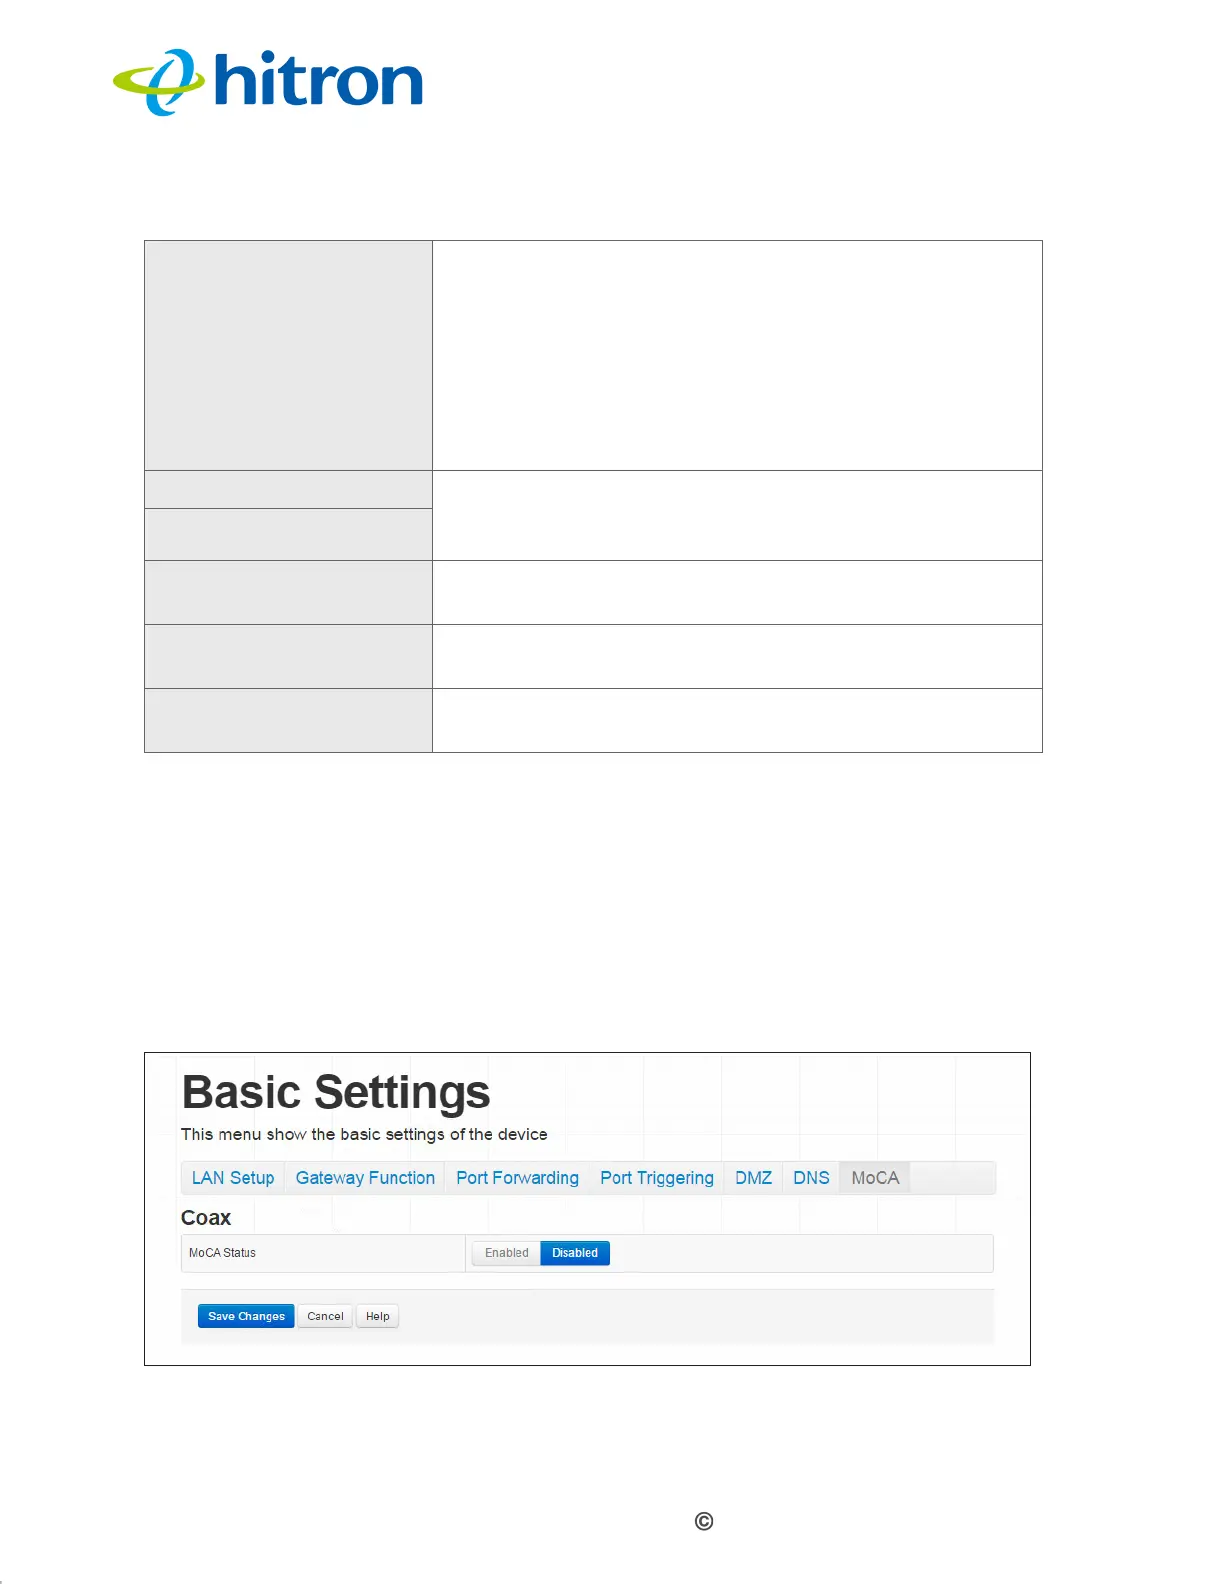
4.8 The Basic: MoCA Screen
Use this screen to turn the CODA-551x’s Multimedia over Cable Alliance (MoCA)
features on or off.
Click Basic > MoCA. The following screen displays.
Figure 29: The Basic: MoCA Screen
Domain Suffix Use this field to define the domain that you can enter
into a Web browser (instead of an IP address) to reach
the CODA-551x on the LAN.
NOTE: It is suggested that you make a note of your
device’s Domain Suffix in case you ever need
to access the CODA-551x’s GUI without
knowledge of its IP address.
Proxy Hostname 1 When LAN DNS Obtain is set to Manual, enter the IP
addresses of up to two computers for which you want to
manually add to the DNS.
Proxy Hostname 2
Save Changes Click this to save your changes to the fields in this
screen.
Cancel Click this to return the fields in this screen to their last-
saved values without saving your changes.
Help Click this to see information about the fields in this
screen.
Table 20: The Basic: DNS Screen (continued)
 Loading...