Upgrading and Servicing 189
Replacing and Adding Drives
You can replace the drives that are located in the
removable drive cage: hard disk drive; 7-In-1
memory card reader (select models); and diskette
(floppy) drive. On PCs with no 7-In-1 memory card
reader, you can add a second hard drive by
installing it into the drive cage.
Removing the drive cage
1 Remove the fan duct. See “Removing the Fan
Duct” on page 184.
2 Remove the cables from the back of the drives
that are in the removable drive cage. Make
note of each connection and the plug
orientation before disconnecting the cables.
3 If you do not have a 7-In-1 memory card
reader, skip to step 5. If you have a 7-In-1
memory card reader, continue with step 4.
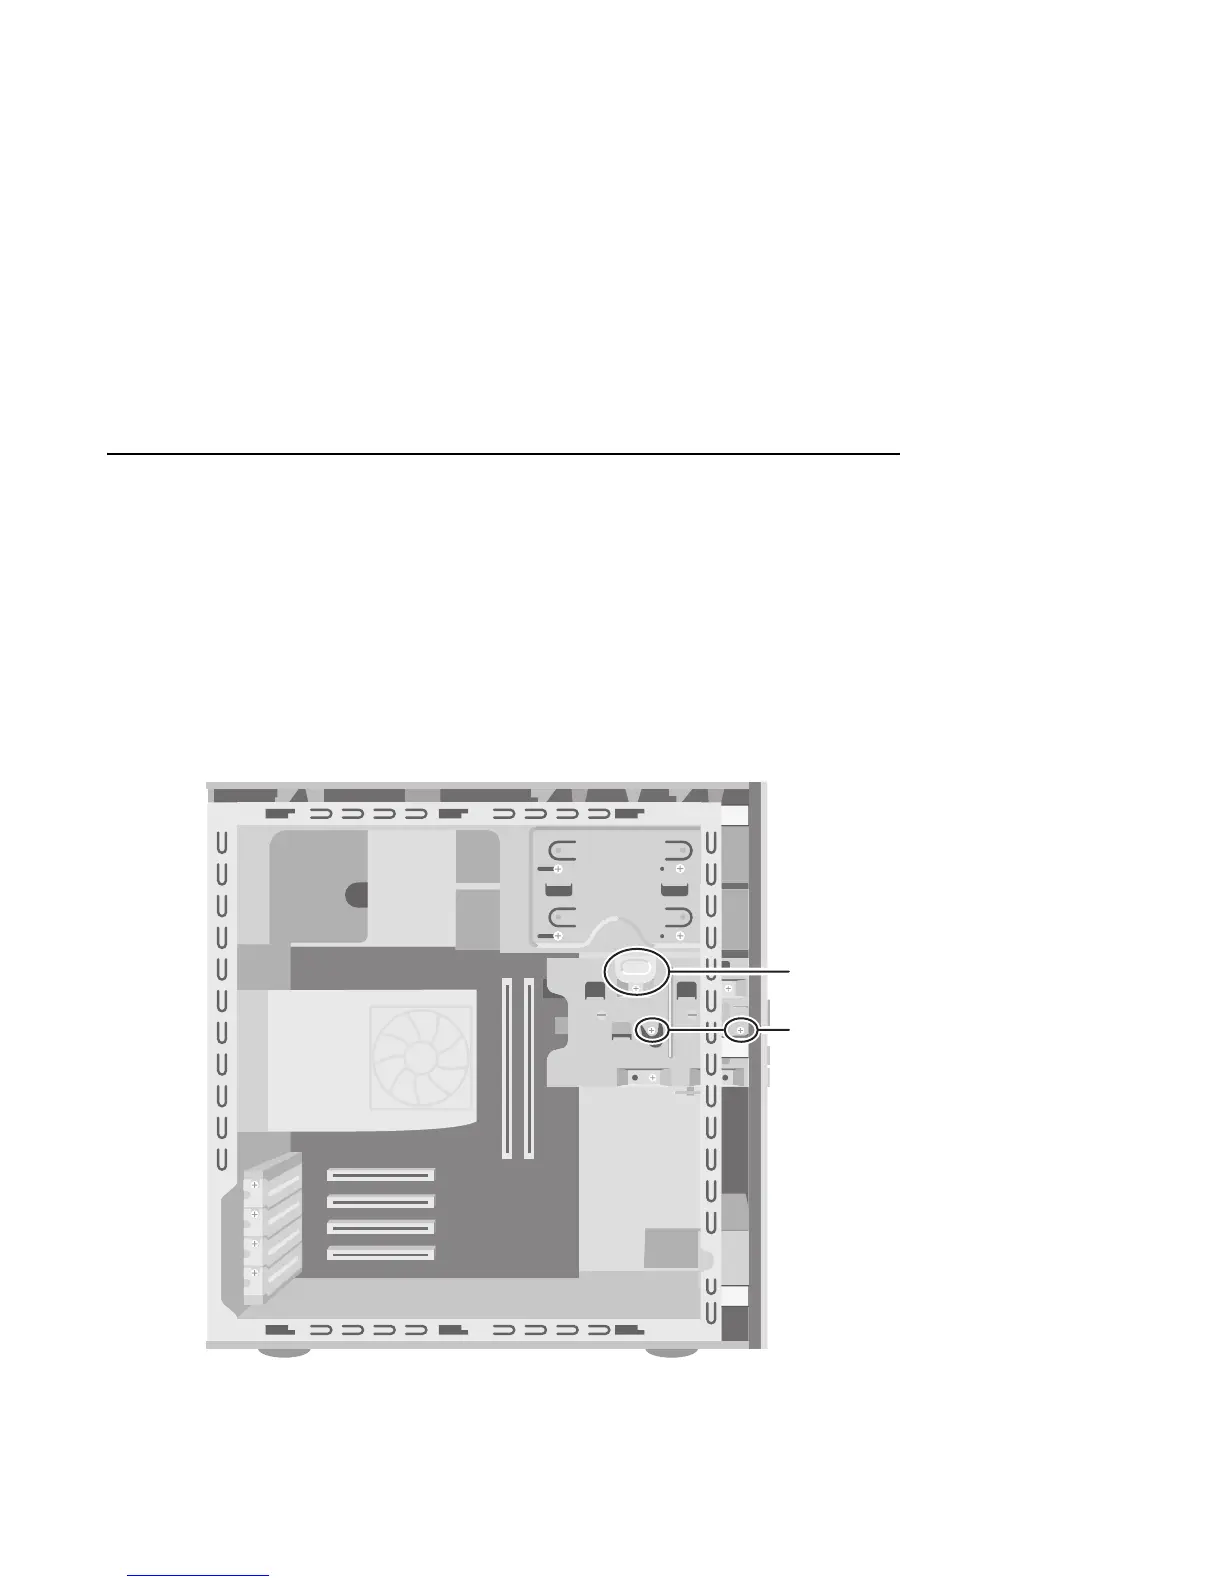
4 Remove the two screws (F) that secure the
7-In-1 memory card reader in the drive cage.
From the front of the chassis, push the reader
into the drive cage.
5 Push down on the drive cage release tab (E),
and hold it down as you rotate the cage up
and lift it out of the chassis. Cover the front of
the cage as you lift it out so that the 7-In-1
memory card reader does not slide out.
.
E
F
 Loading...